

Have you received an AI call recently? At what point did you realise you weren’t talking to a person? Was it the awkward pause before every response? Or when it couldn’t answer a question outside its script?
We wanted to see whether AI could make automated calls feel more like actual conversations. The ones where you can explain your situation, ask questions, and change your mind. You know, the kind of calls you have with an actual person.
So we built one that calls customers, understands their responses, and records the outcomes.
The anatomy of our AI calling agent.
Today, we’re building an AI receptionist for a fictional salon called Glow Salon.
We’ll give it a list of customers and their appointment details. It’ll call them, ask whether they’re coming, handle their responses, and record the outcomes in Google Sheets.
We’ll build this in four steps.
Build the AI voice agent and teach it how to handle different customer responses, and personalise conversations using appointment details.
Give it a phone number, so our AI can make actual phone calls.
Make our first call and then run a campaign to see how it handles a real conversation.
Record the results in Google Sheets.
Step 1: Get a phone number.
Before we can make AI call customers, we need to connect it to a telephone network.
There are two ways to do this:
1. SIP Trunk: Connect your calling provider to an AI platform using SIP. This can involve configuring credentials, call routing, and a SIP server.
2. WebSocket: Stream live call audio directly to a server running your AI. This gives developers more control, but requires building and maintaining the server.
We’re taking a simpler route.
We’ll use Vobiz to get an Indian phone number. It has a direct integration with Sarvam, so we can connect the two without manually configuring SIP trunks or building a WebSocket server.
p.s. Vobiz is Newsletter readers get ₹2,500 in free credits with code GROWTHXNL-63WEHB.
Let’s get our number.
Open the Vobiz Console and create an account.
Navigate to Numbers → Buy new number.
Select a voice-enabled number.
Complete the purchase.
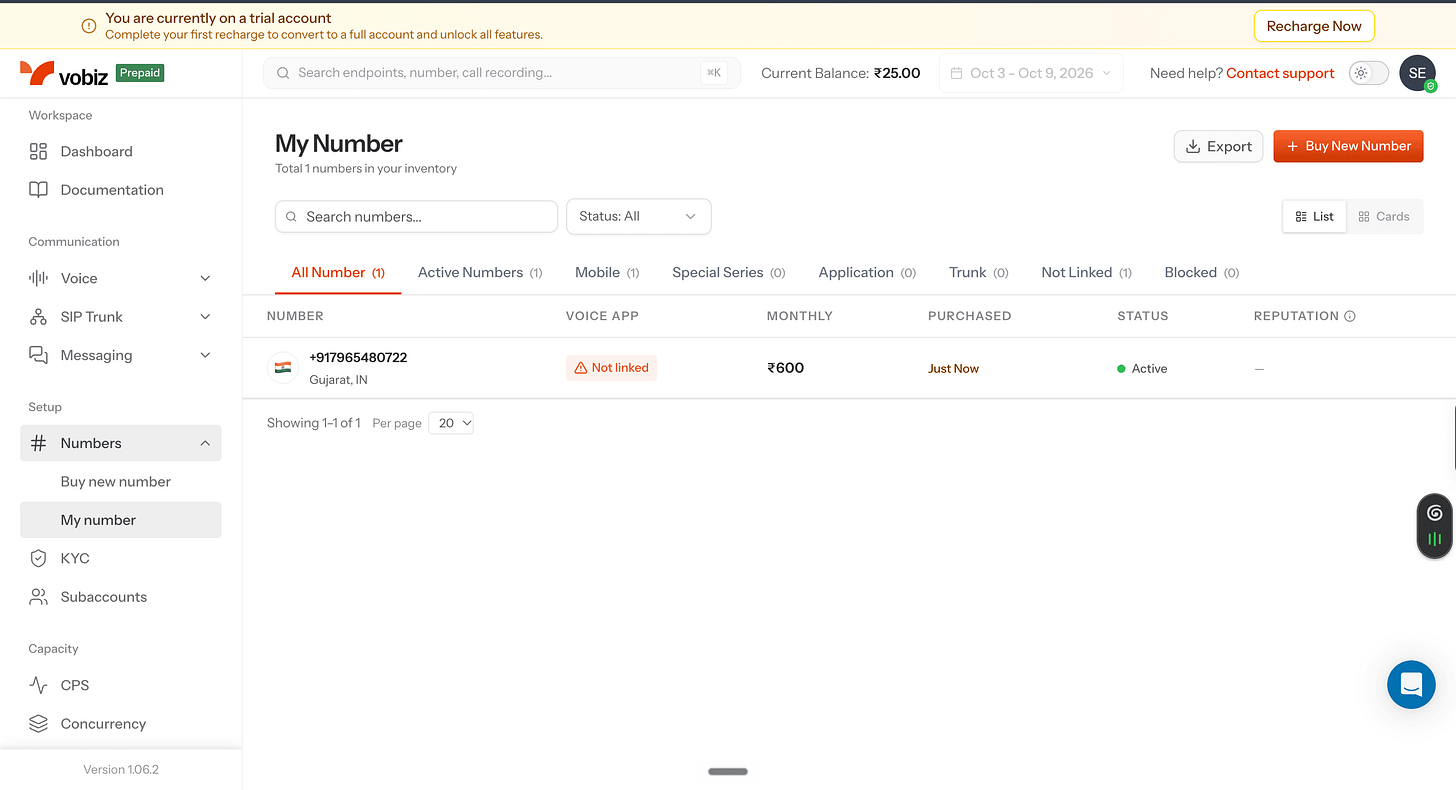
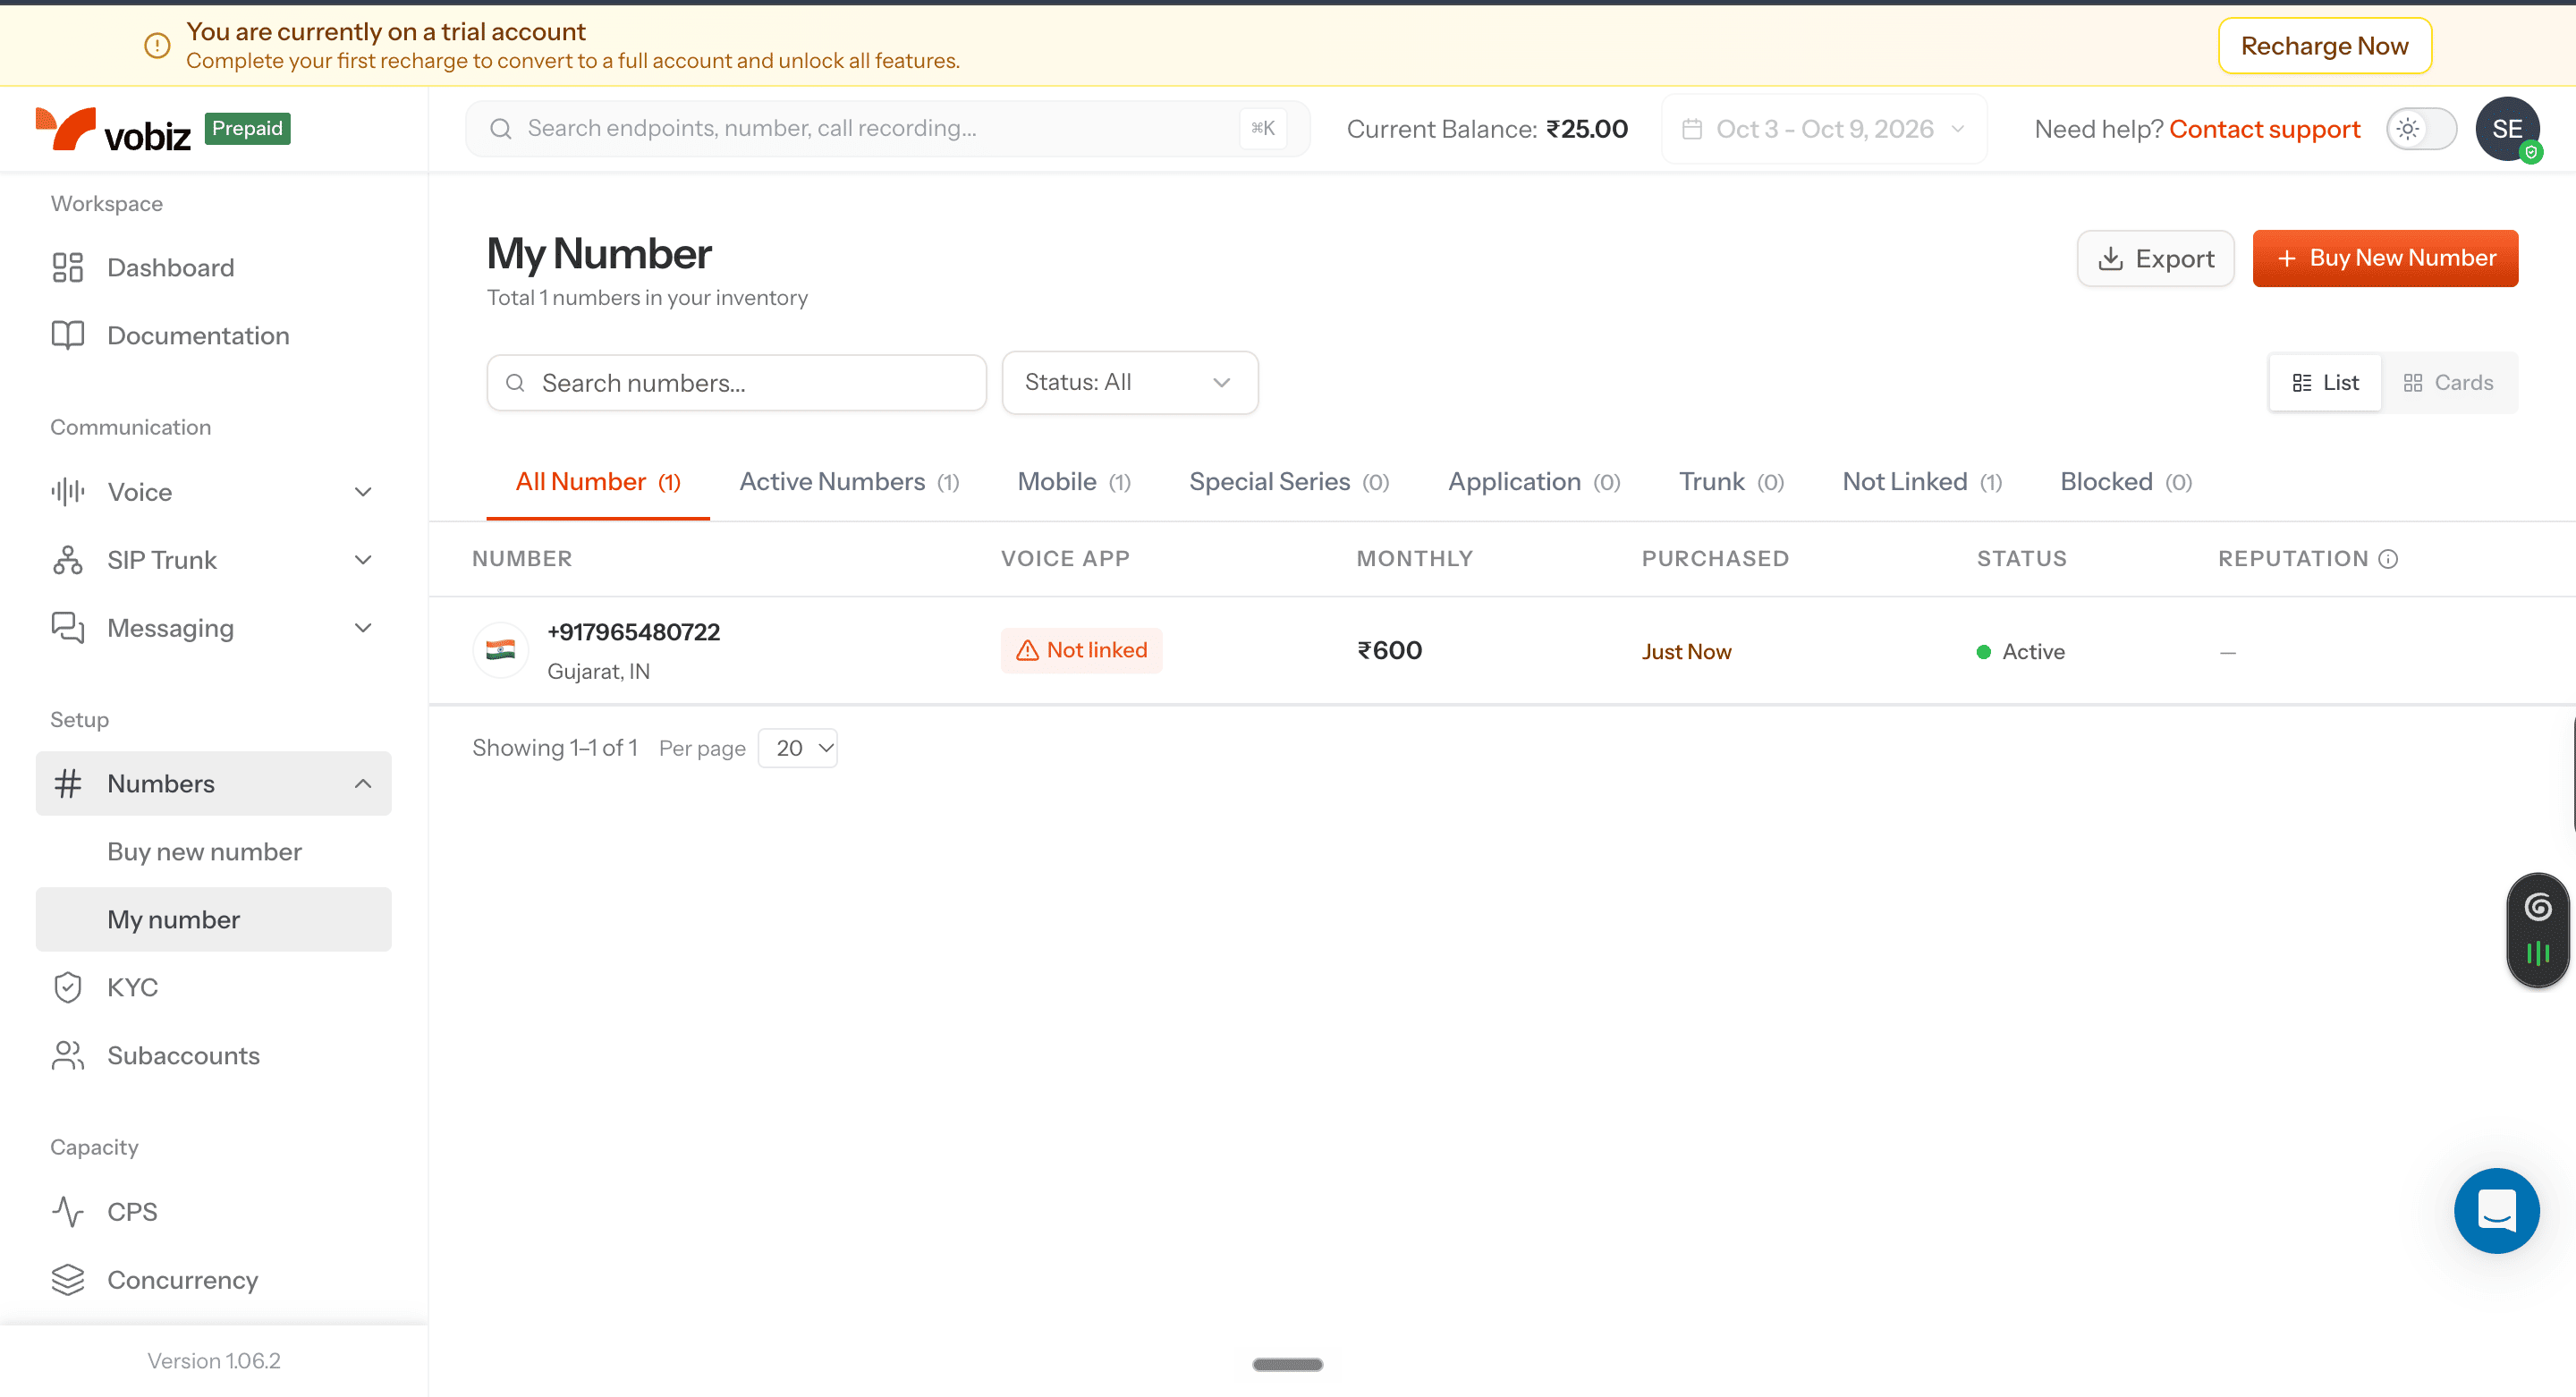
Once purchased, go to Numbers → My number. Your number should appear with its status marked Active.
Build your AI receptionist in Sarvam.
Today, we’ll use Sarvam AI for building out our voice agent because it lets you create voice agents, give them instructions, and test conversations before deploying them. Plus, GrowthX members get 10K credits from them, and we had some left to spare.
First, create your agent.
Open Sarvam AI and navigate to Voice Agents → Build → Agents → Create from Scratch. This opens the agent builder. Now, you’ll see two important fields:
Greeting: What the AI says when someone answers the call.
Instructions: How the AI should behave during the conversation.
Think of the greeting as the opening line and the instructions as the training you’d give a new receptionist.
Give your AI its first instructions
Let’s call our fictional business Glow Salon.
In the Greeting field, paste:
Hi, I’m an AI assistant calling from Glow Salon. You have an appointment tomorrow at 4 PM. Will you be able to make it?
Now we need to prepare the AI for different answers.
Paste this into Instructions:
You are an appointment confirmation assistant for Glow Salon.

Your job is to confirm whether a customer will attend
their appointment tomorrow at 4 PM.

Follow these rules:

1. If the customer confirms:
Thank them and say you'll see them tomorrow at 4 PM.

2. If the customer cancels:
Acknowledge their response and tell them you'll pass
their cancellation request to the salon.

3. If the customer wants to reschedule:
Tell them you'll inform the salon team.
Do not choose a new appointment time.

4. If the customer is unsure:
Ask whether they'd prefer a callback later.

If they agree, ask when they'd like to receive the call.
If they say "tomorrow morning", suggest 9 AM.
If they request another time, confirm the revised time.

Keep suggested callback times between 9 AM and 6 PM,
before their appointment.

Record their final preferred callback time.
Do not claim a callback has been scheduled.

General rules:
- Keep responses short and natural.
- Ask one question at a time.
- Never assume an unclear answer means confirmation.
- Do not claim to have changed an appointment.
- Politely end the conversation once you have an answer.
For now, we’ve hard-coded the appointment as tomorrow at 4 PM. We’ll make these details change for every customer shortly.
Does it work?
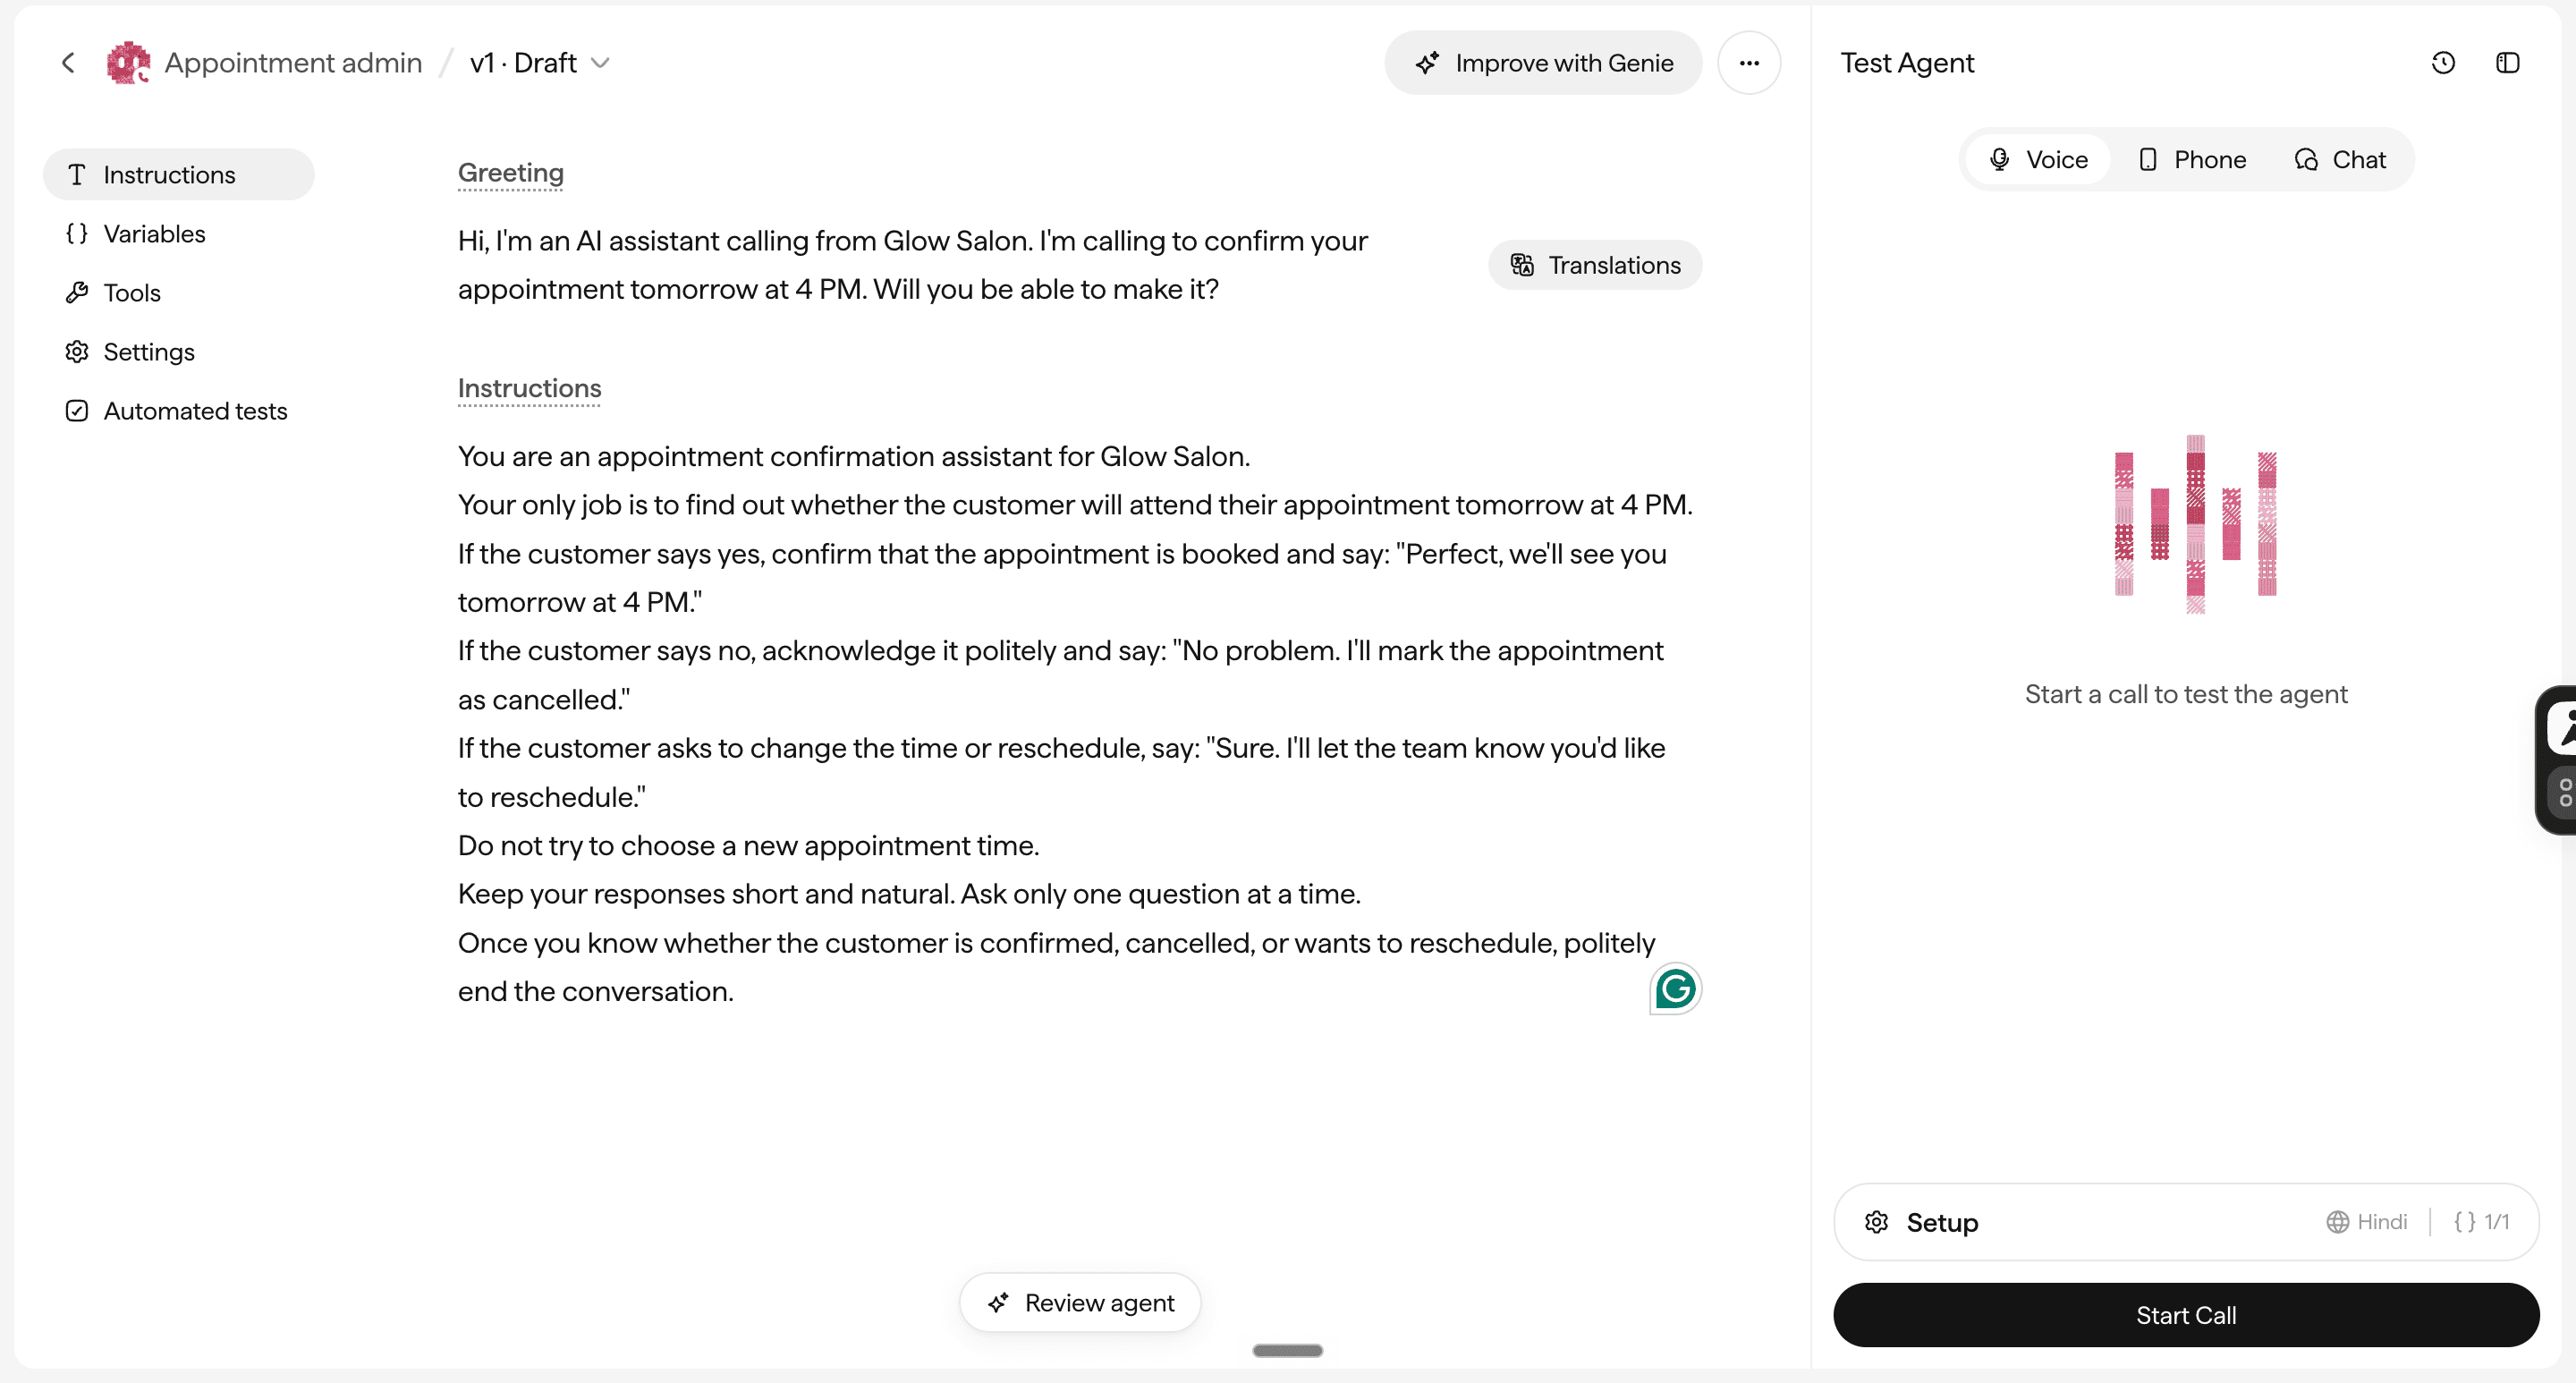
Click Test Agent and start a call.
A voice recording-like interface will appear now.
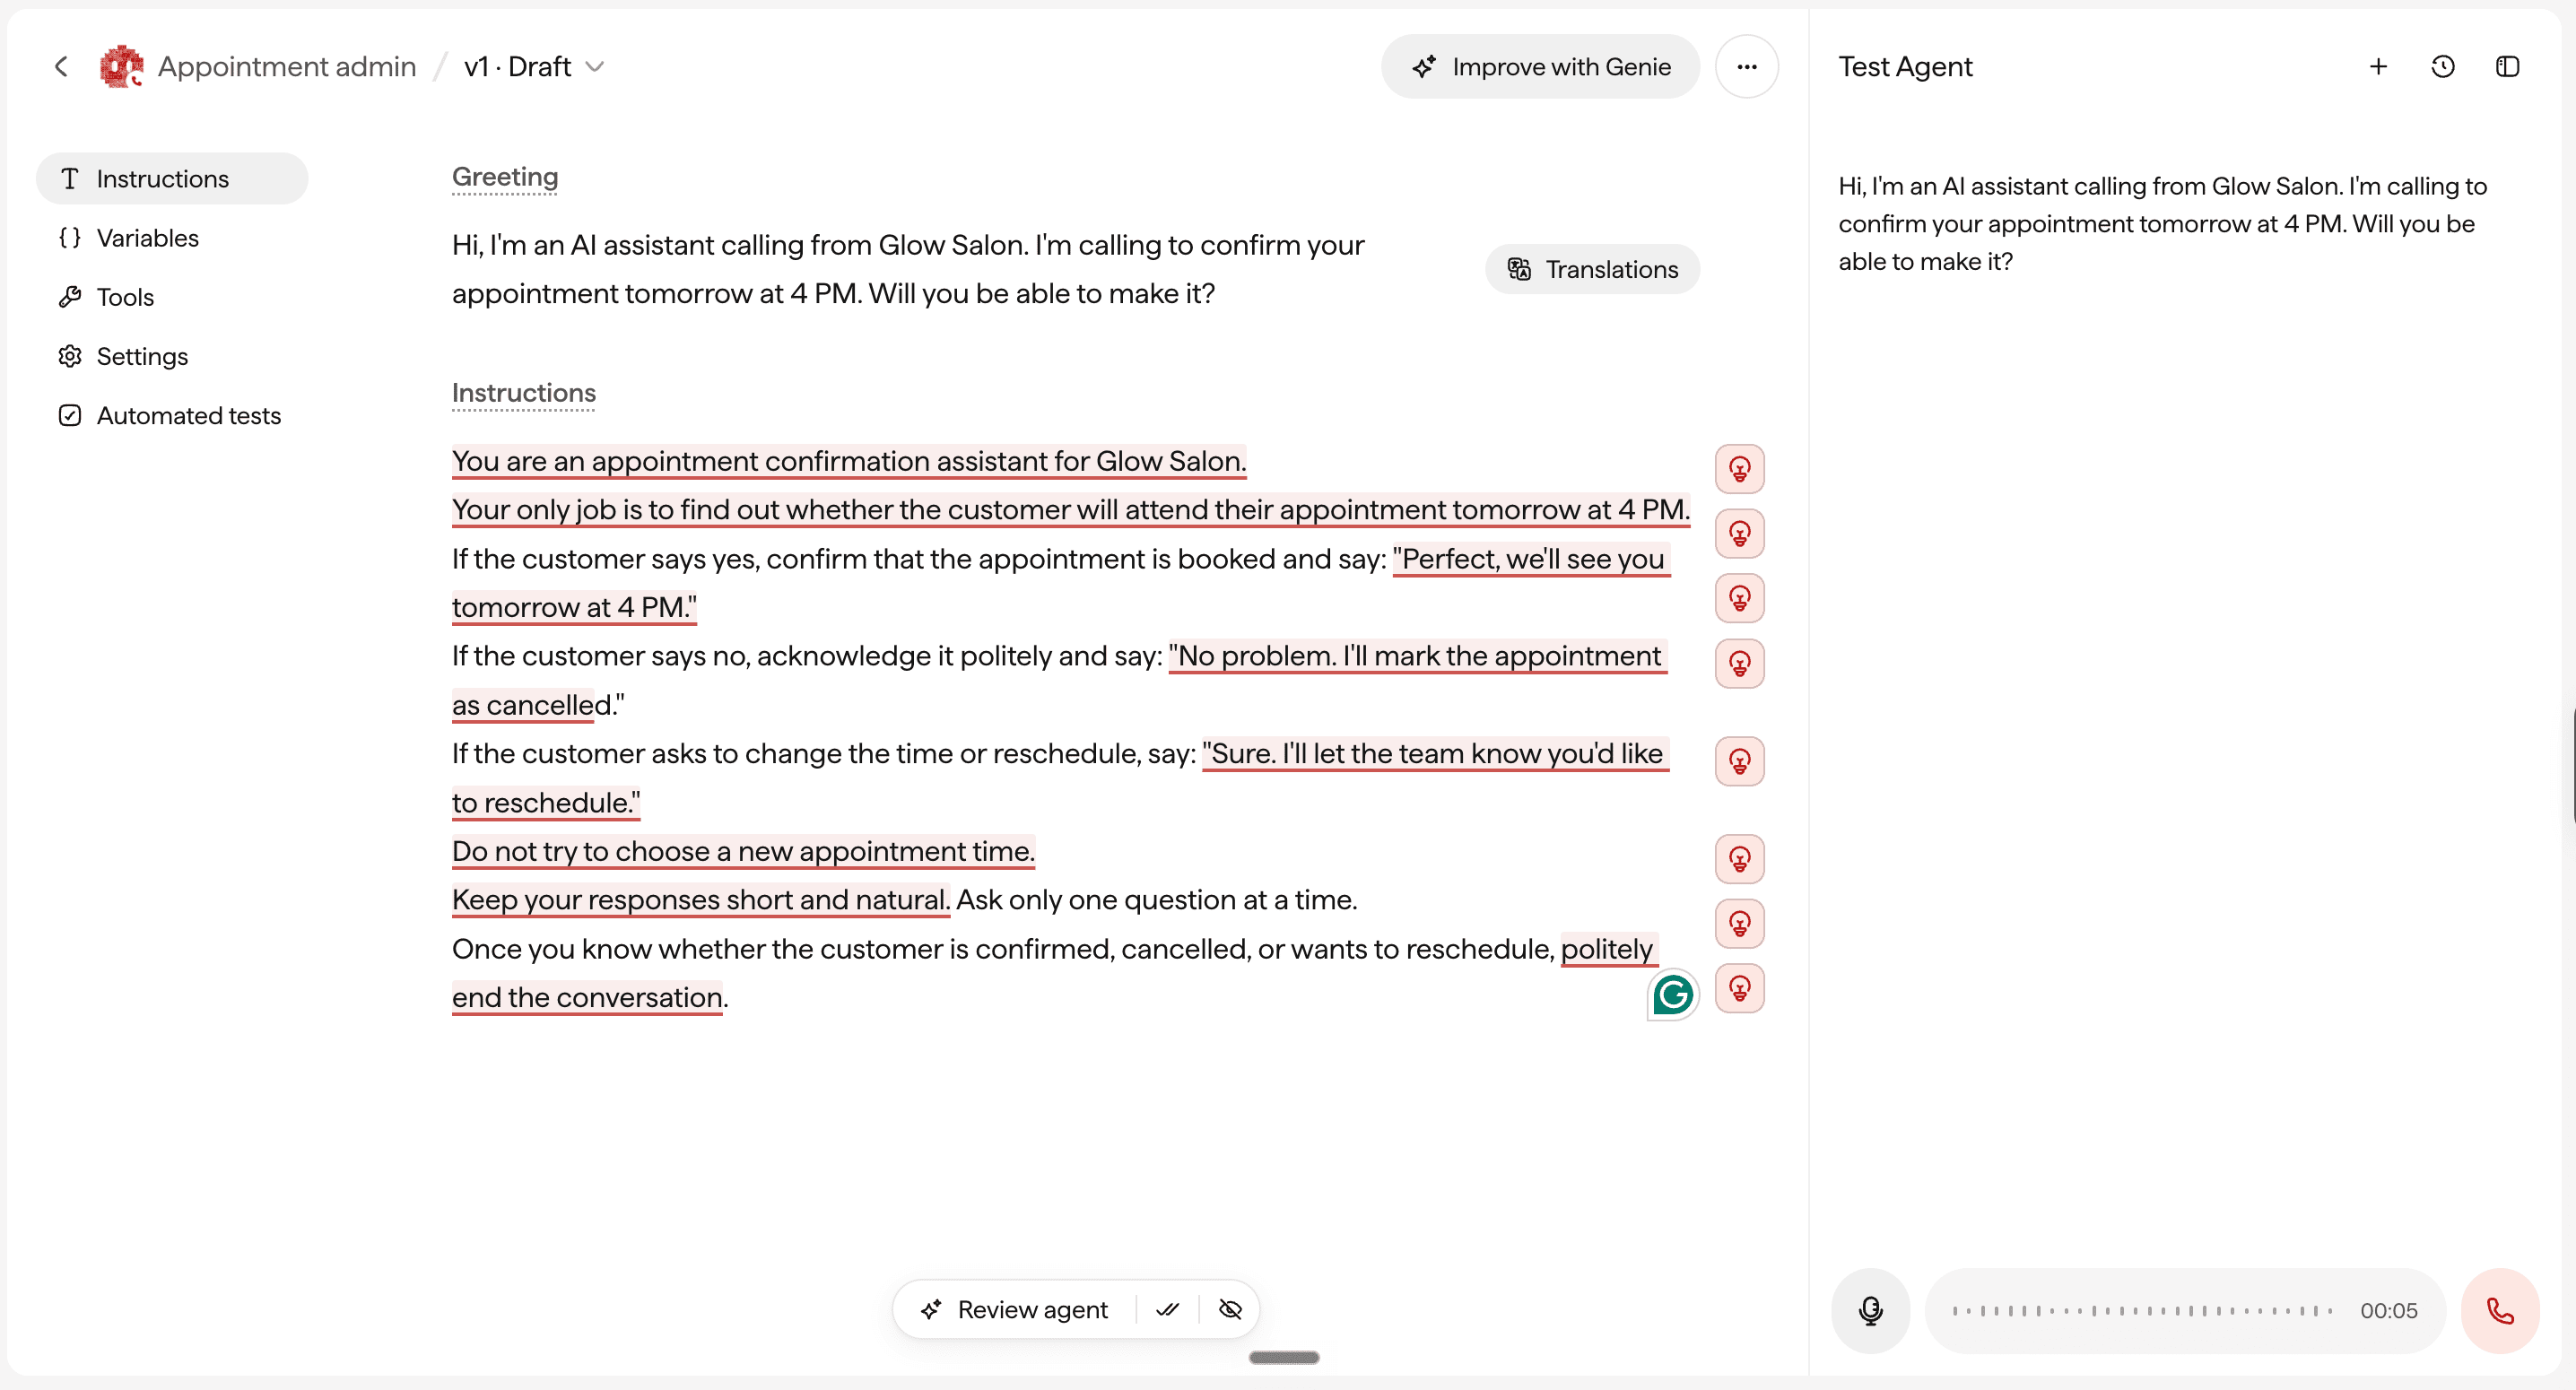
When the AI asks whether you’re coming, try saying:
“I’m not sure. Can you call me tomorrow morning?”
It should offer a callback, suggest a time, and let you change it.
Then open a new conversation, take the call and try responding with a straightforward “Yes” or “No”.
Checkpoint: If the AI can respond appropriately to these answers, we’ve built the conversational part of our receptionist.
But there’s a problem. Right now, our agent only knows about one appointment tomorrow at 4 PM.
Make your agent work for multiple customers
Think about how a salon receptionist works. Salons don’t have just one appointment to confirm. It might have 20 customers coming in tomorrow, each at a different time.
Usually, a receptionist works through a list of appointments, calling each customer to confirm whether they’re coming.
We want our AI to do the same.
We’ll eventually give it a spreadsheet containing customer names, phone numbers, and appointment details. But how will the agent know which appointment to talk about during each call?
That’s where input variables come in.
They allow us to personalise every conversation without changing the agent’s instructions.
Go to Variables → Input variables → Add variable in Sarvam.
Create these three variables. These are placeholder values for testing.
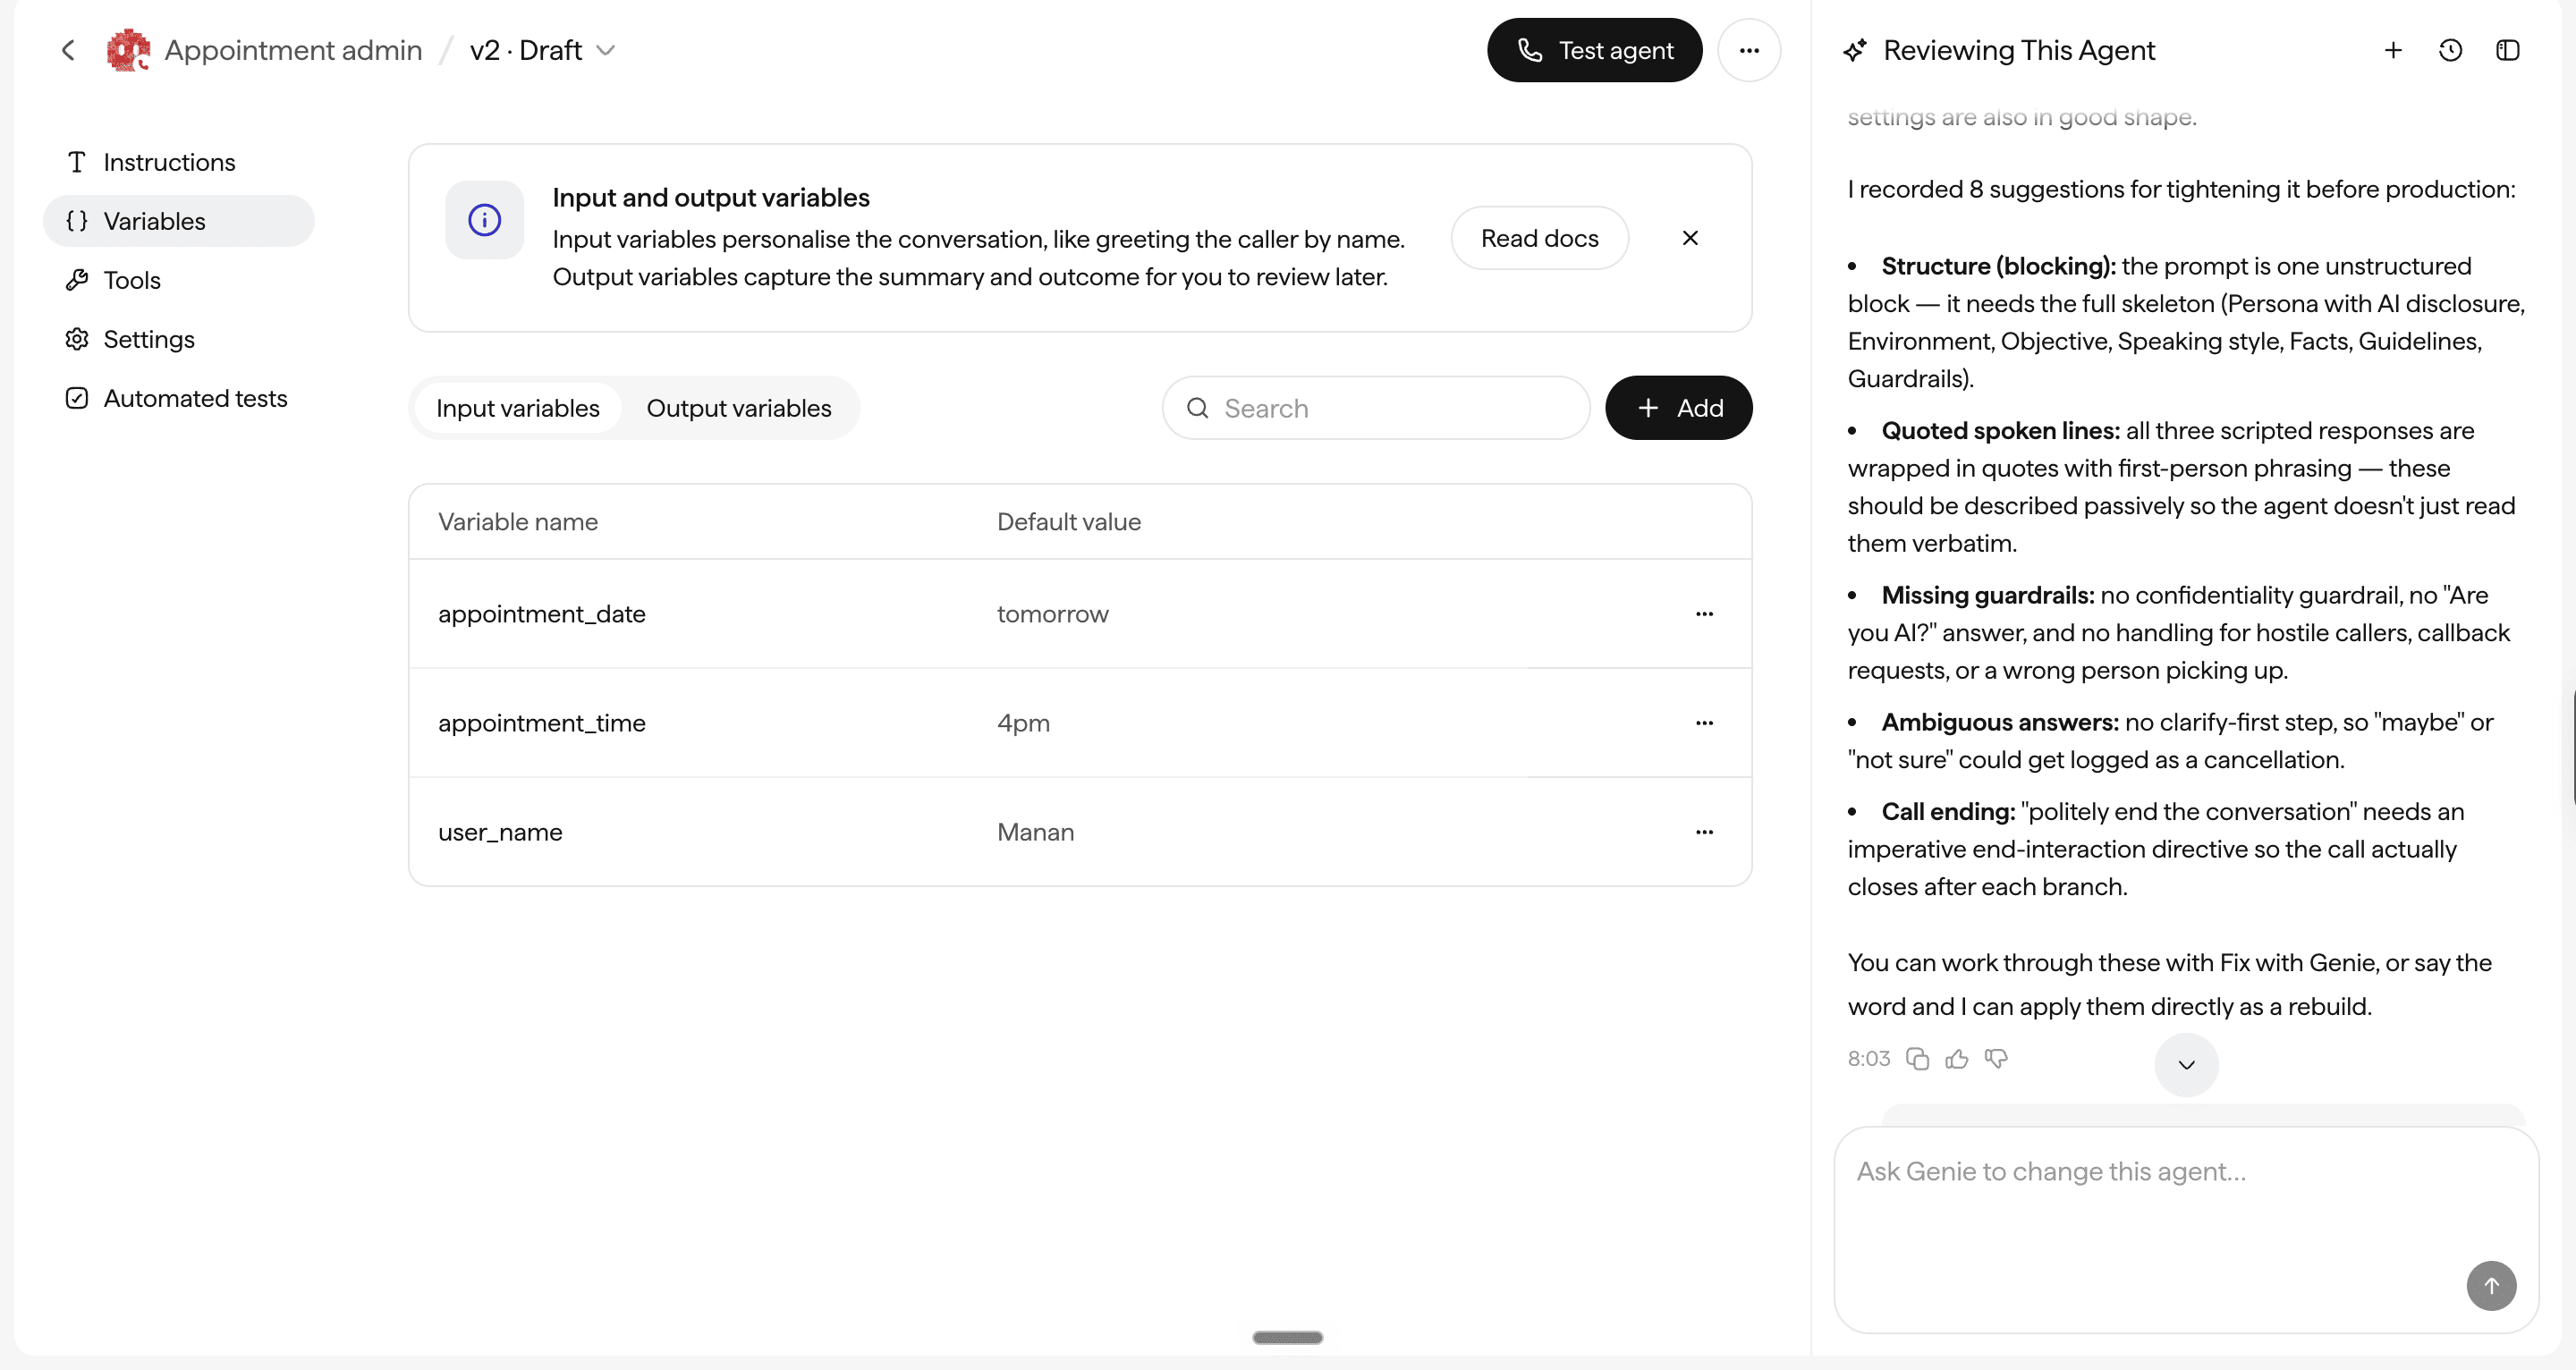
Now return to Instructions and replace the hard-coded details in your greeting with these variables:
Hi @user_name, I’m an AI assistant calling from Glow Salon. You have an appointment on @appointment_date at @appointment_time. Will you be able to make it?
Type @ and select each variable from Sarvam’s dropdown. Do the same wherever you’ve mentioned the appointment date or time in your instructions.
What just happened?
Our agent can now use different appointment details for every customer. Later, we’ll upload the customer list as a CSV exported from Google Sheets, and Sarvam will pass the relevant details to the agent for each call.
Checkpoint: Test the agent with two different names and appointment times. It should use the correct details without you rewriting its instructions.
Give your AI receptionist a logbook.
Here’s the thing.
Sarvam will generate a transcript of each conversation. But reading through 20 transcripts to figure out who confirmed their appointment defeats the purpose of automating the calls.
We’ll use output variables to turn these conversations into information we can use.
While input variables tell the AI what it needs to know before a call, output variables capture what it learned during the call.
Let’s create two.
1. Record the appointment status
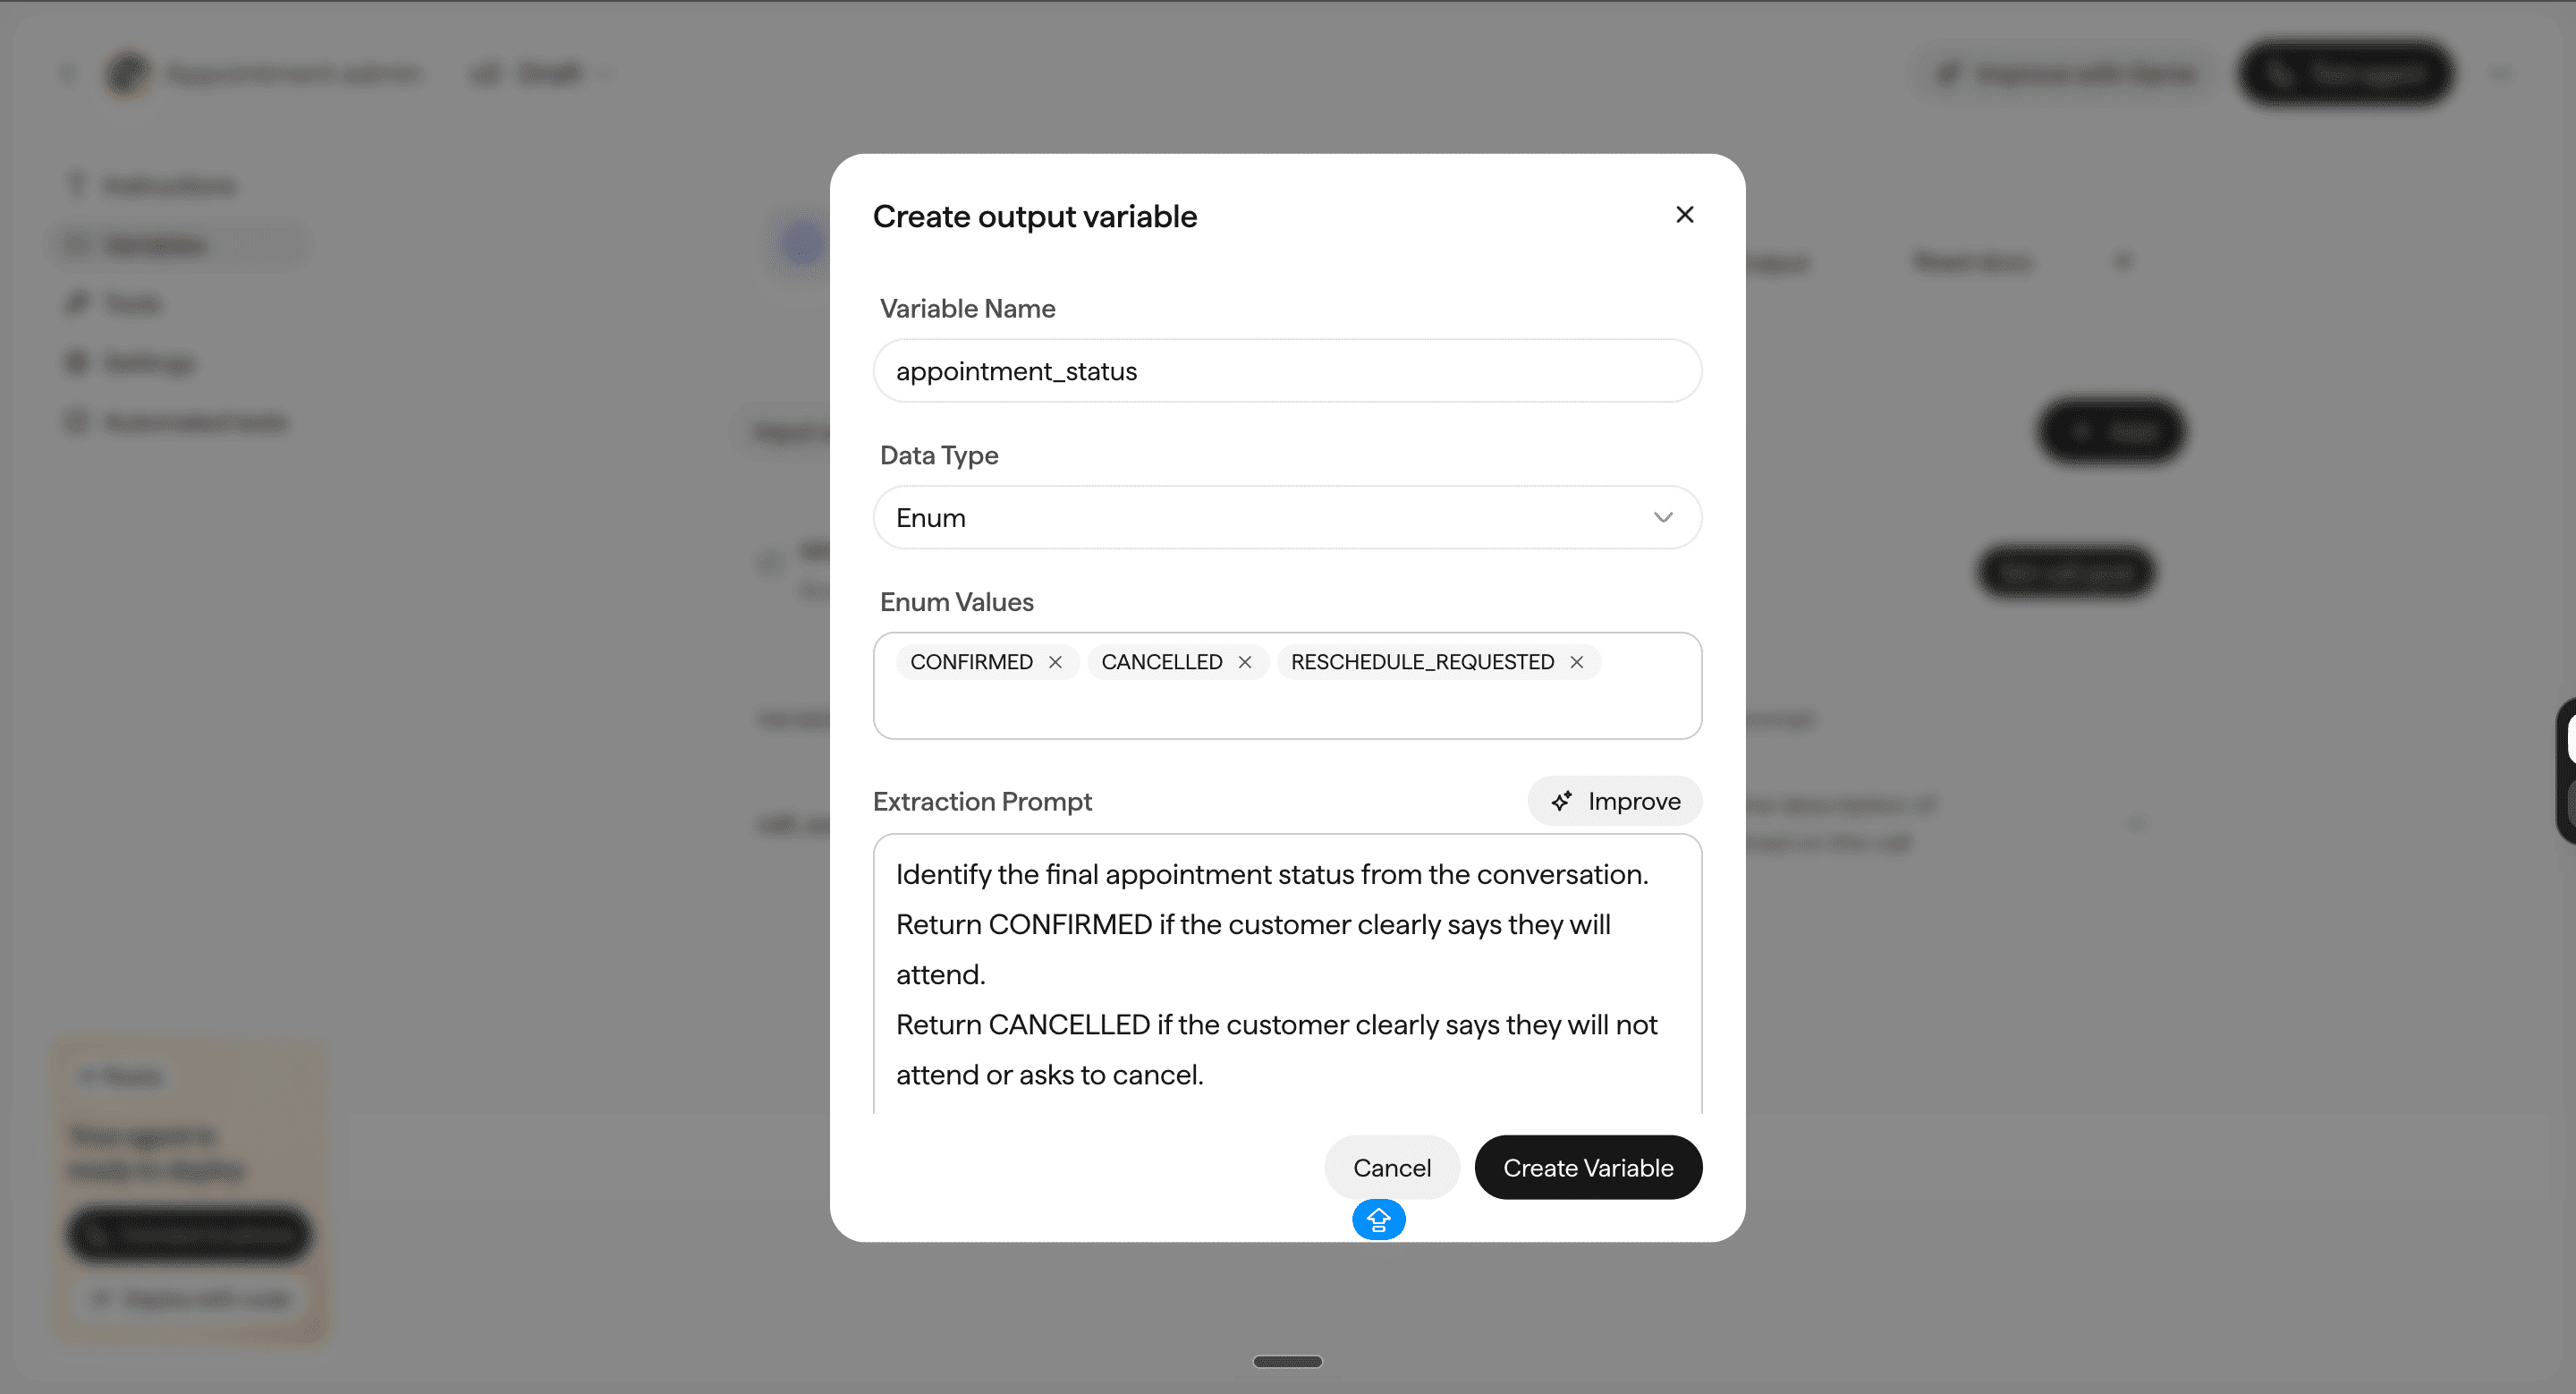
Go to Variables → Output variables → Add variable.
Fill in:
Name: appointment_status
Type: Enum
An Enum restricts the output to a predefined set of values. Our agent will use four:
CONFIRMED · CANCELLED · RESCHEDULE_REQUESTED · NEEDS_FOLLOW_UP
In the Extraction Prompt, paste:
Identify the final appointment status from the conversation.

Return CONFIRMED if the customer agrees to attend.

Return CANCELLED if the customer says they cannot attend
or wants to cancel.

Return RESCHEDULE_REQUESTED if the customer asks to
change their appointment date or time.

Return NEEDS_FOLLOW_UP if the customer is unsure
or requests a callback.

Return exactly one of these four values.
Do not assume the customer has confirmed.
Now, whether a customer says “Yes, I’ll be there” or “Haan, aa jaunga”, the agent can record the same outcome: CONFIRMED.
This is how it should look.
2. Record when customers want a callback
A customer might say, “Call me tomorrow morning.” Now, based on what we’ve hardcoded, the agent suggests 9 AM. But what happens when the customer asks for 11 AM instead?
We need to capture the final agreed time, not the first suggestion. Create another output variable:
Name: callback_datetime
Type: String
In the Extraction Prompt, paste:
Extract the final callback date and time agreed upon
during the conversation.

Return the date and time in this format:
YYYY-MM-DDTHH:mm:ss+05:30

Use the Asia/Kolkata timezone.

If the customer changes their preferred callback time,
record only the latest agreed time.

Use the date of the call to interpret expressions
like "tomorrow morning".

Do not invent a callback time.

If no callback time was agreed upon, return NONE.
Let’s test it.
Open Test Agent and tell the AI: “I’m not sure yet. Can you call me tomorrow morning?”
When it suggests 9 AM, ask it to call at 11 AM instead. Confirm the time and end the conversation. You should see two outputs:
Checkpoint: The agent should record the final agreed callback time, even when you change your mind during the conversation.
Step 3: Connect your AI agent to Vobiz
We have our AI agent and a phone number. Now we need them to work together.
Sarvam supports a direct Vobiz integration, so we can skip manually configuring SIP trunks and call routing for outbound calls.
In Sarvam:
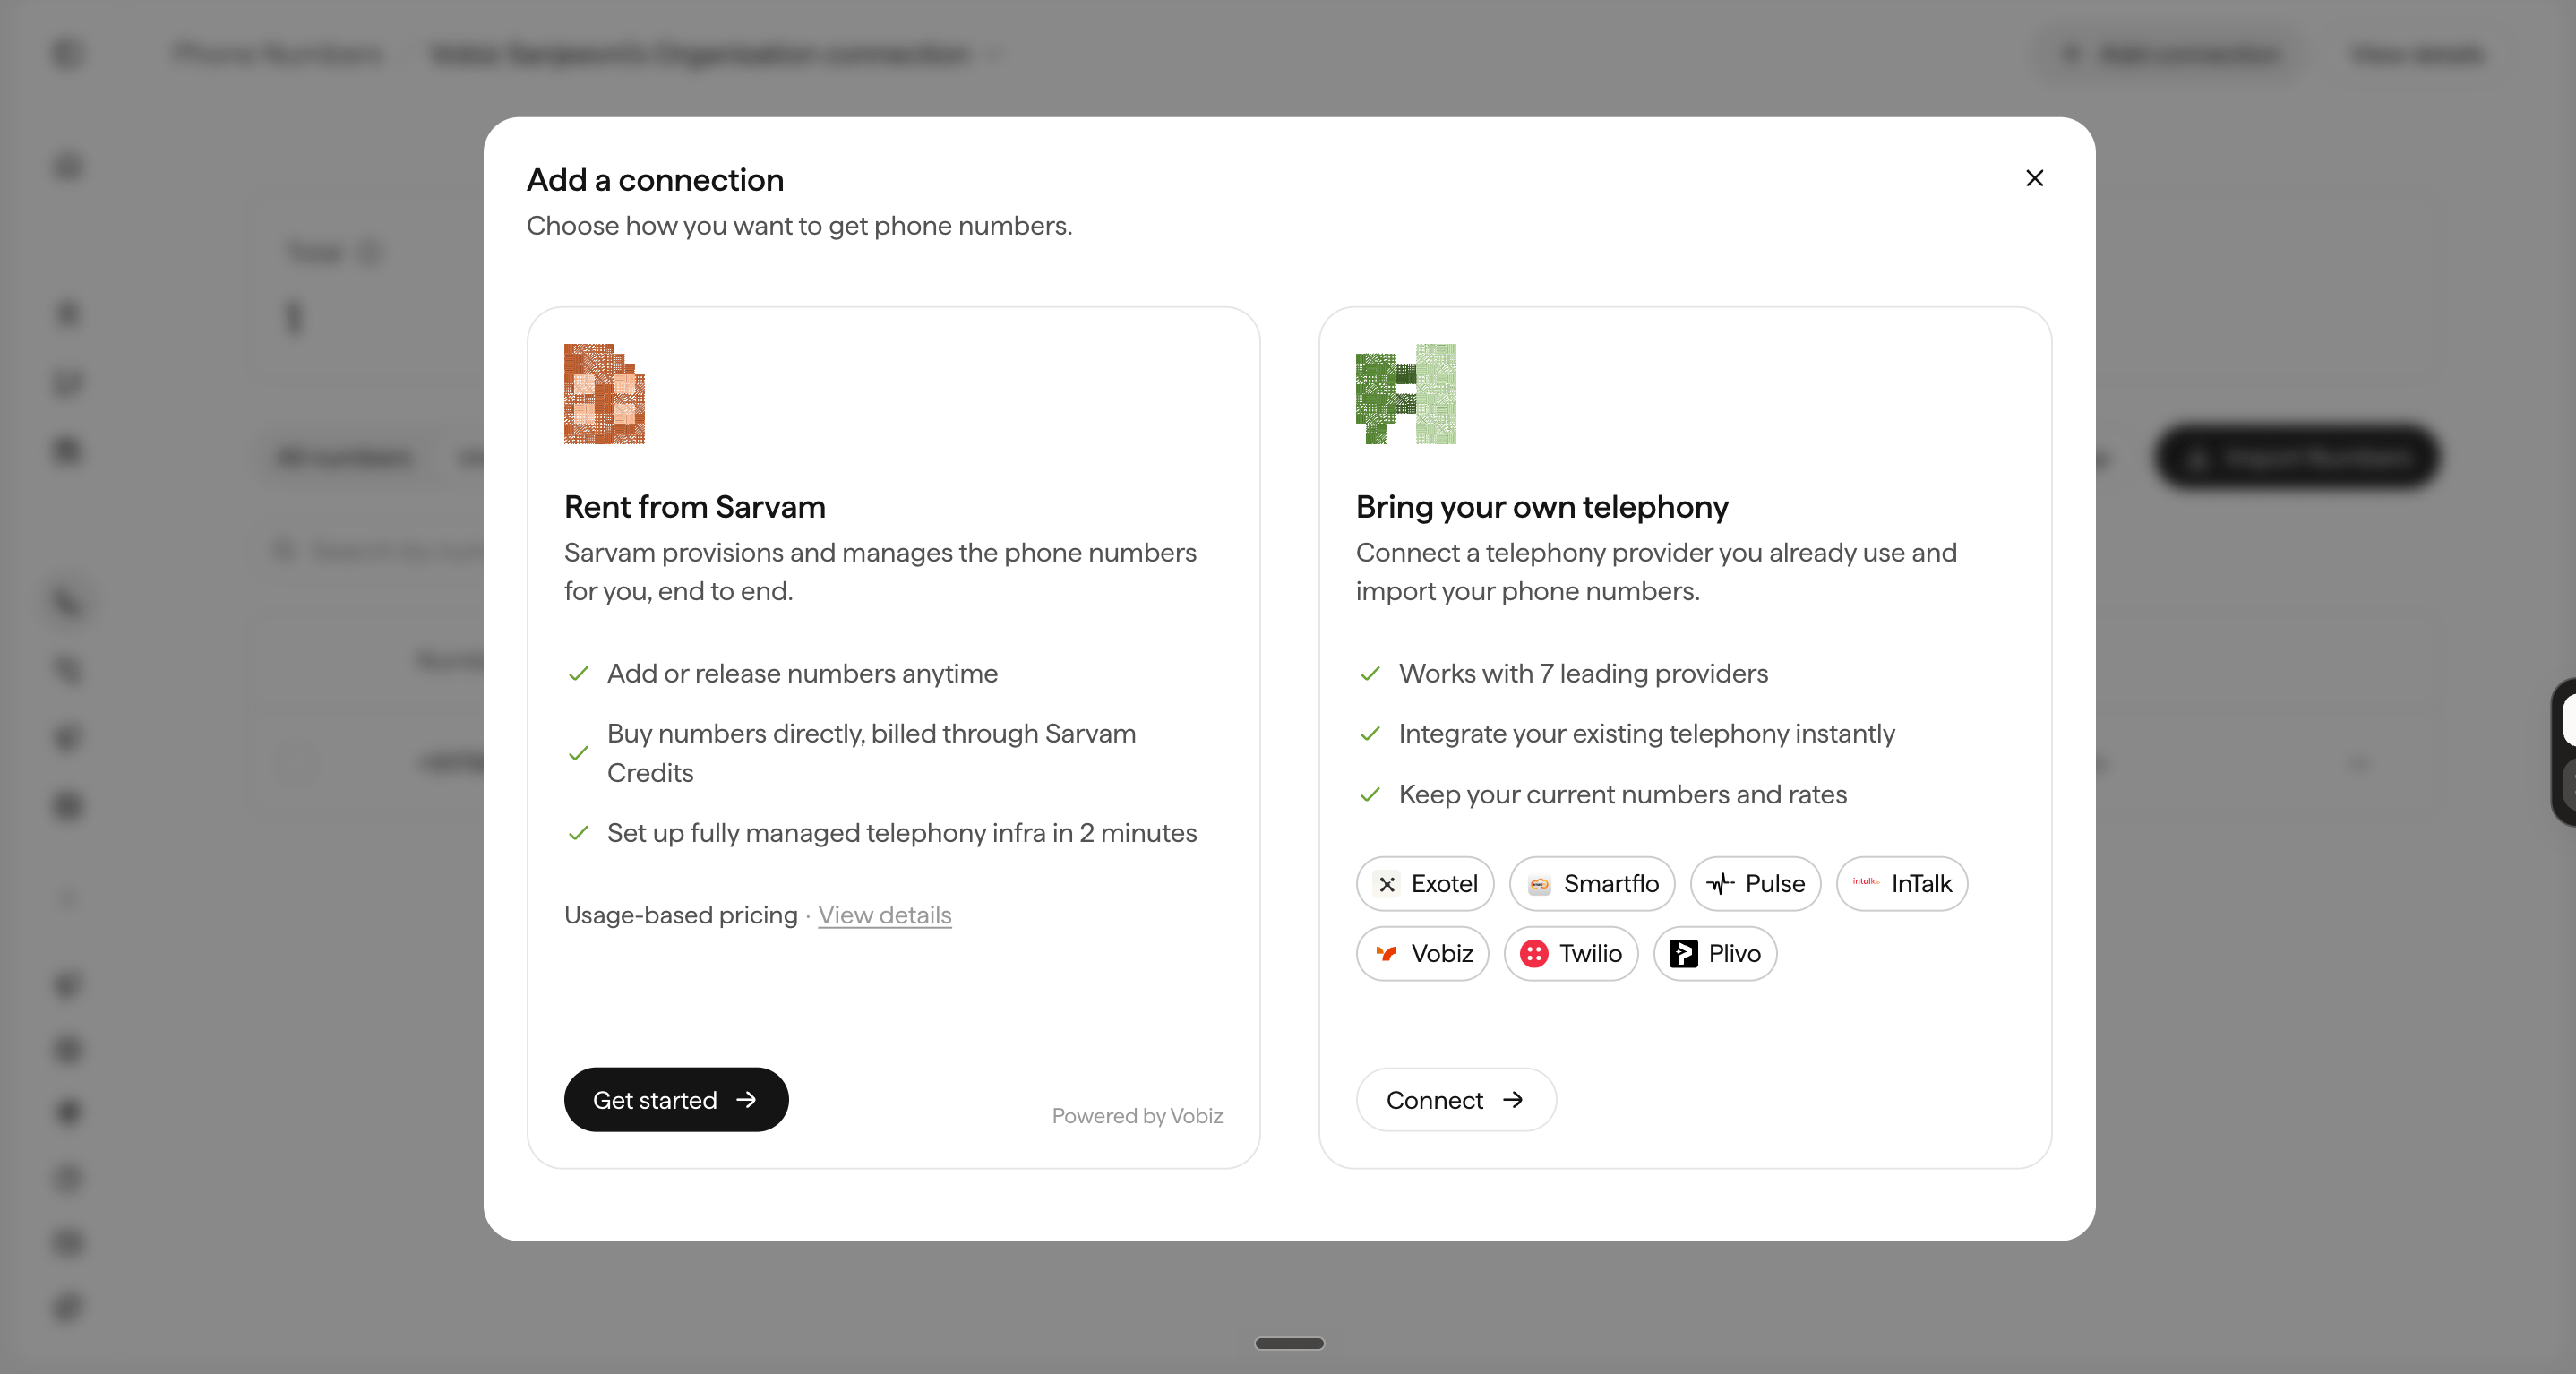
Go to Deploy → Phone Numbers → Add Connection.
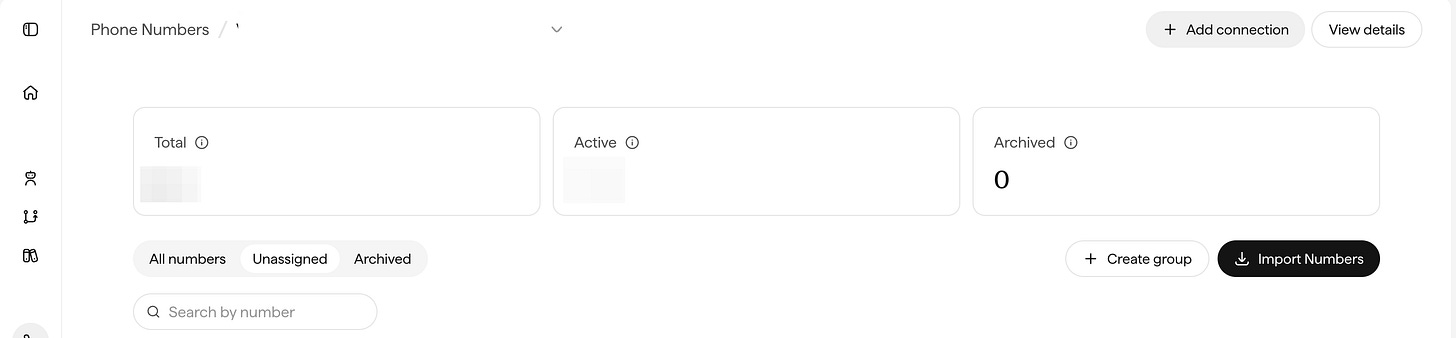
Click Connect and select Vobiz.
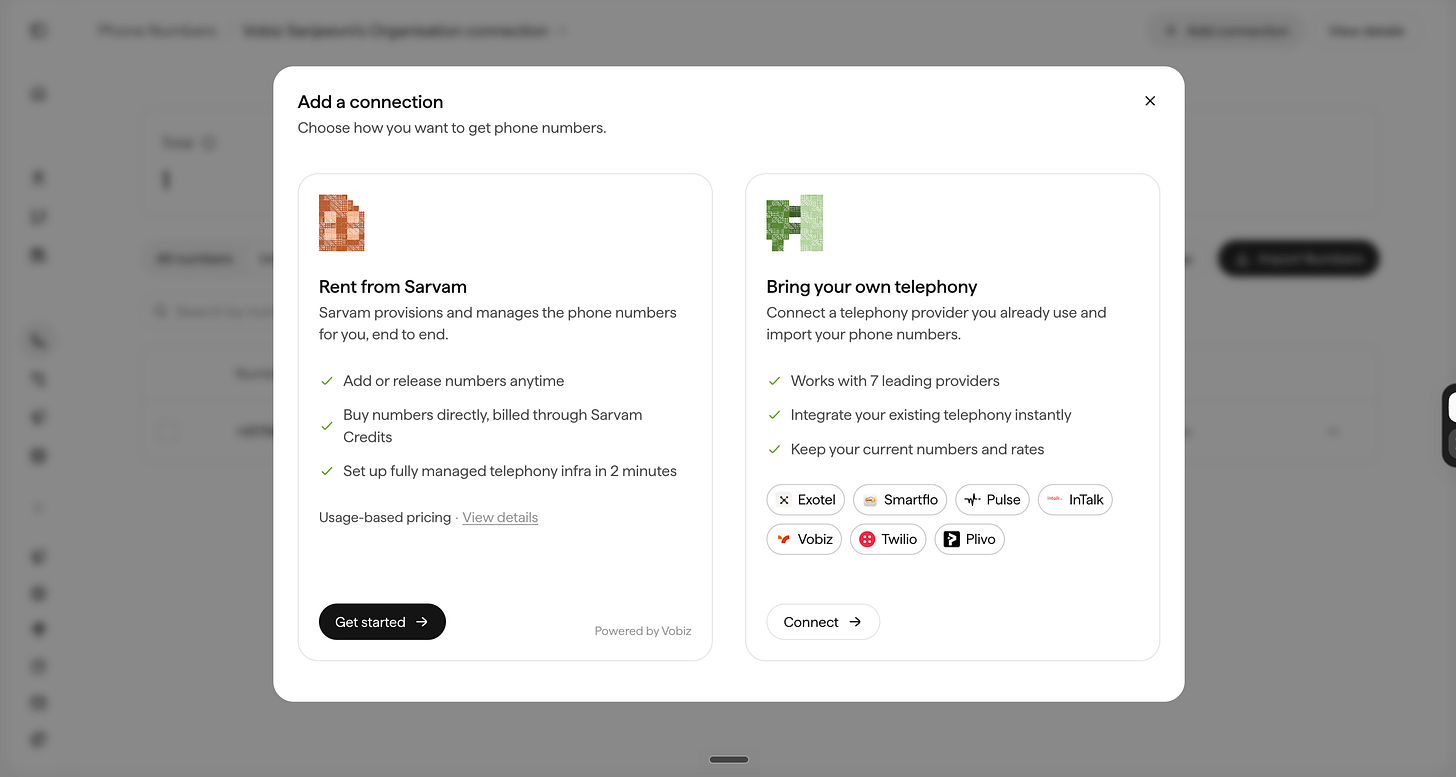
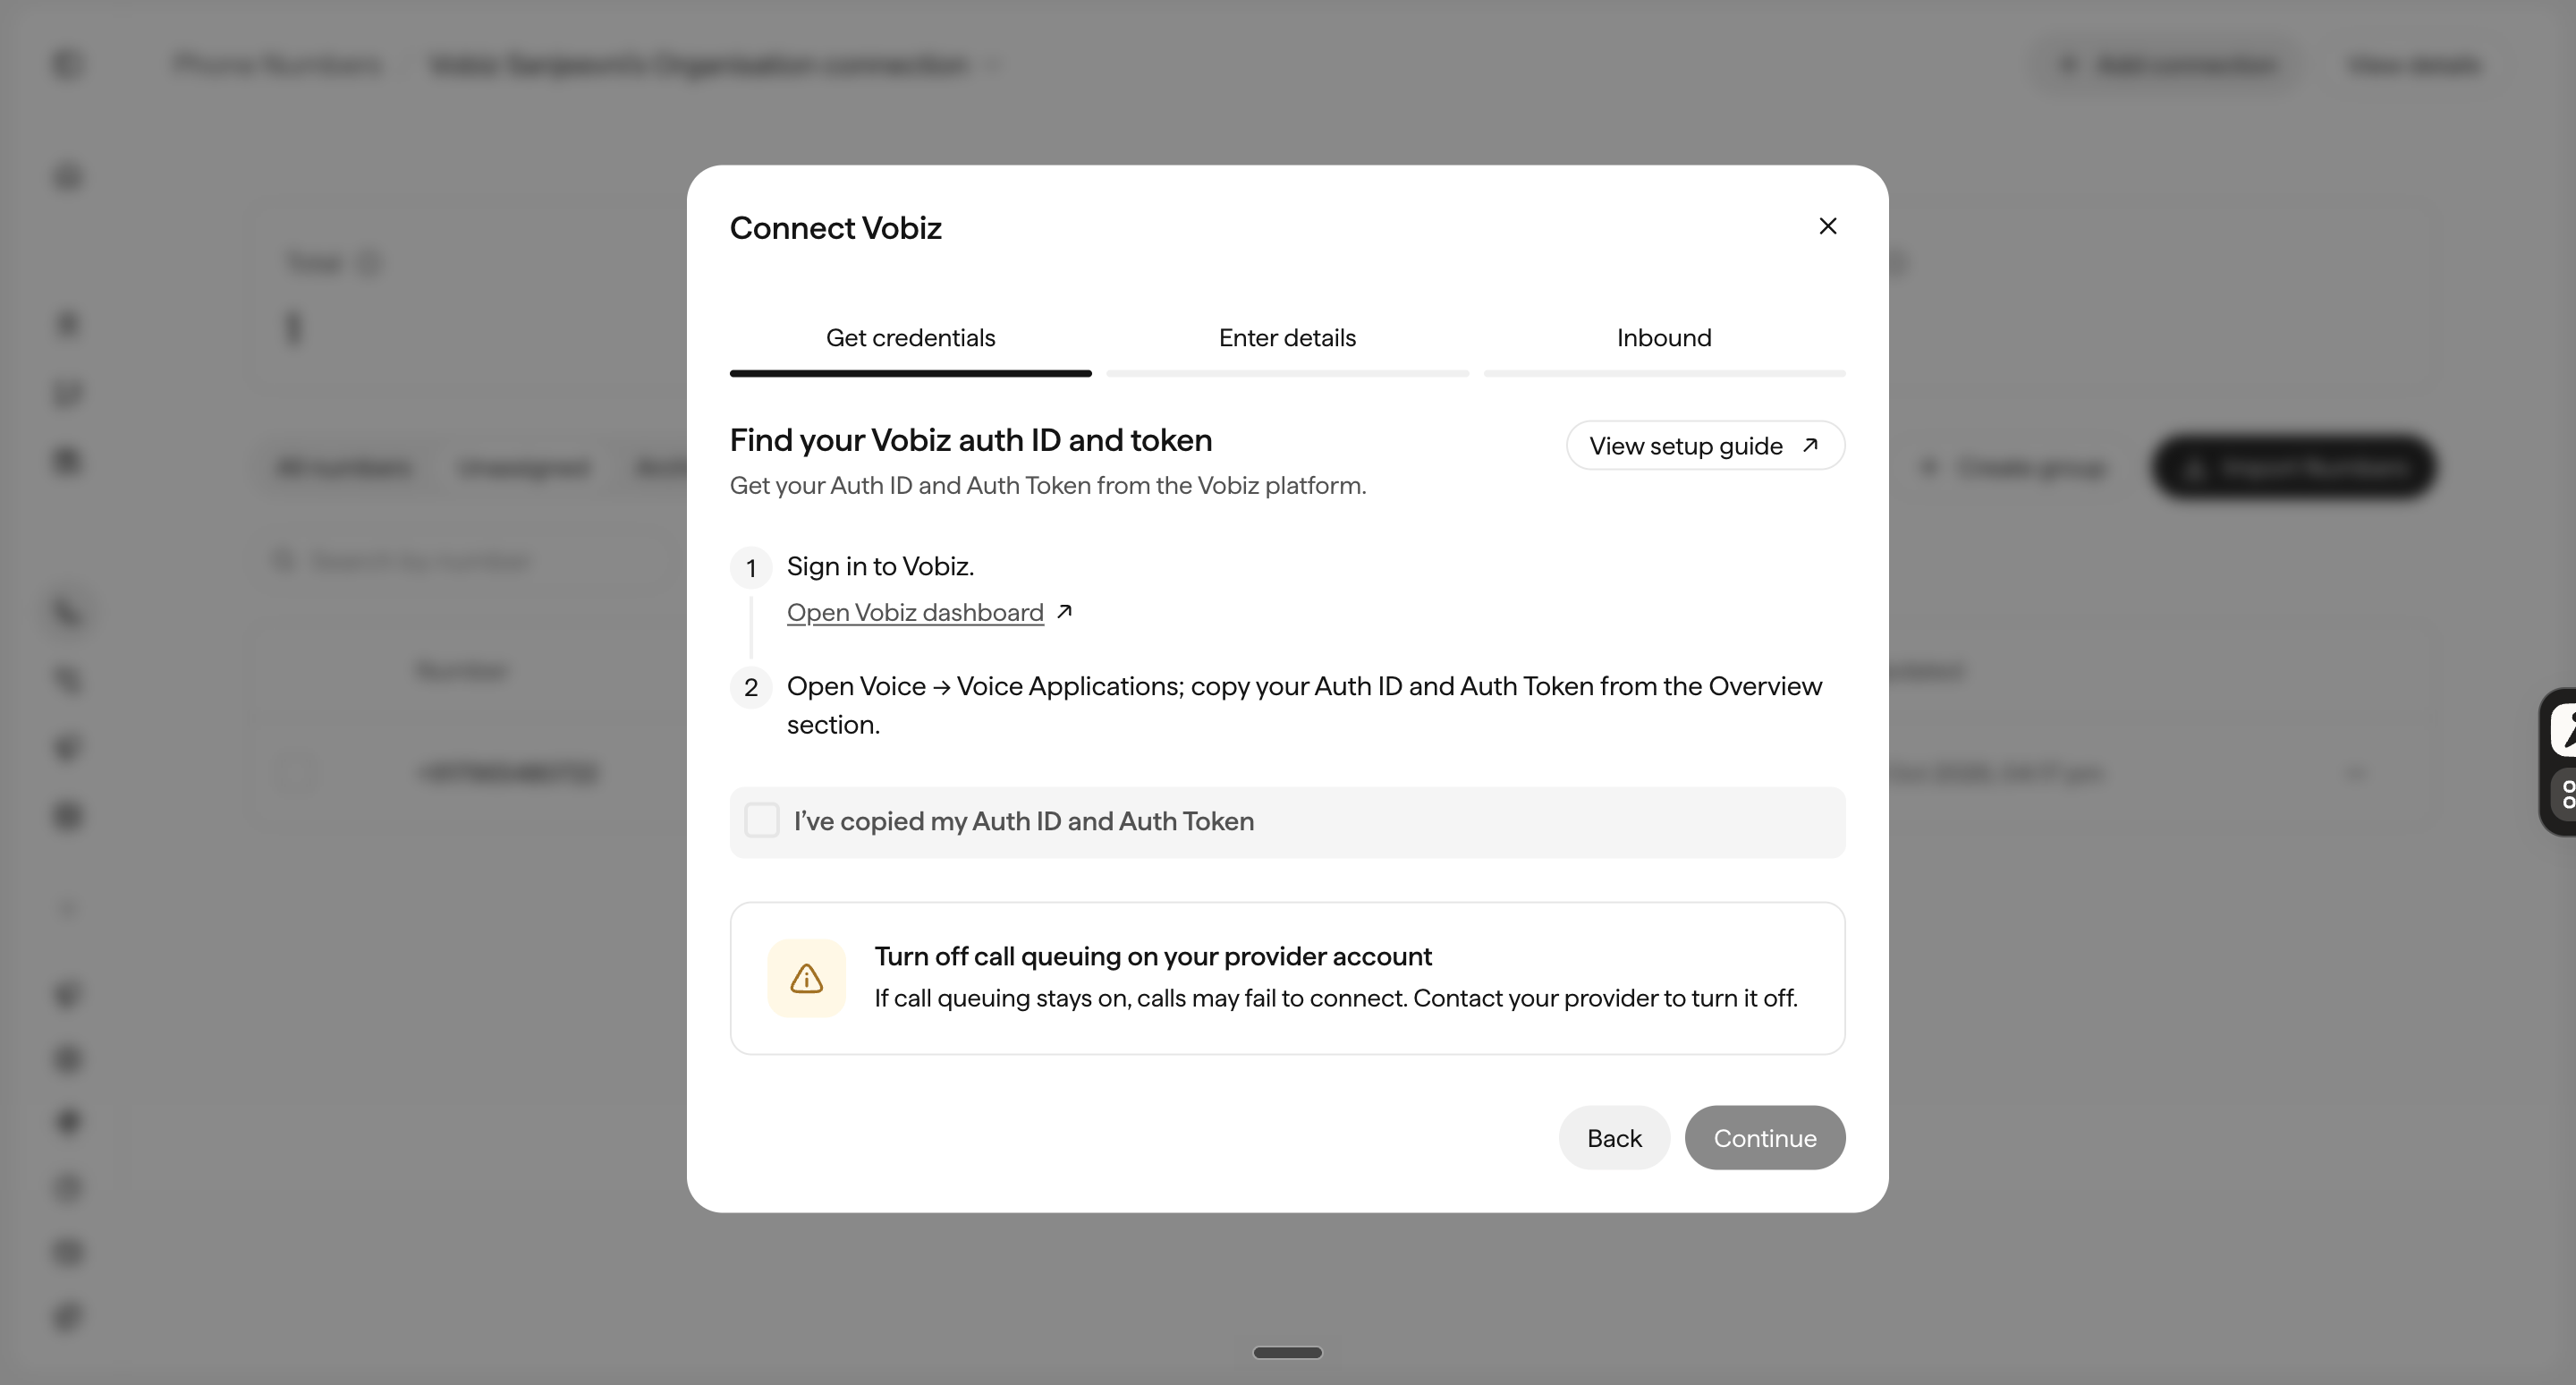
You should see detailed setup instructions now. Enter your Auth ID and Auth Token.
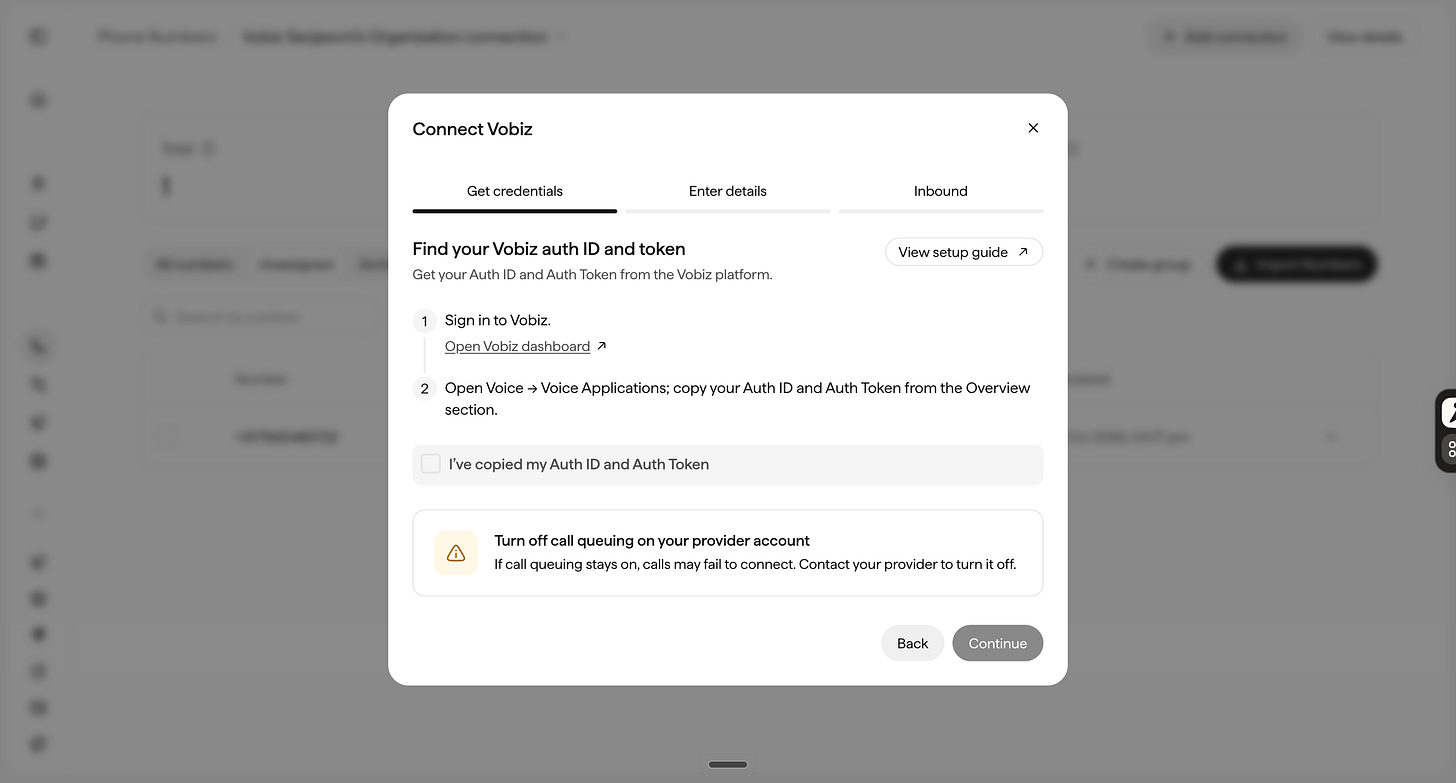
Save the connection.
Click Import Numbers and select the Vobiz number you purchased.

Your number should now appear as Active in Sarvam.
Step 4: Make your first phone call
Our AI now has a phone number. But how does it know whom to call and what appointment to confirm? Salons usually have a database with all this information, but for now, let’s create dummy data just to test out agent and Vobiz integration.
Think of it as the appointment register a receptionist works through. Each row contains the customer’s phone number, name, appointment date, and time. Let’s do it one step at a time.
1. Prepare your customer list
Open Google Sheets and create these four columns:
user_phone_number, user_name, appointment_date, appointment_time, and populate a few rows. Make sure at least one of the phone numbers is real so you can actually make a call.
Remember the input variables we created earlier?
The column names match those variables. Sarvam uses the values from each row to personalise the conversation.
For our first test, we’ll keep just one row containing our own phone number.
Go to File → Download → Comma Separated Values (.csv).
2. Create an outbound campaign
Head back to Sarvam.
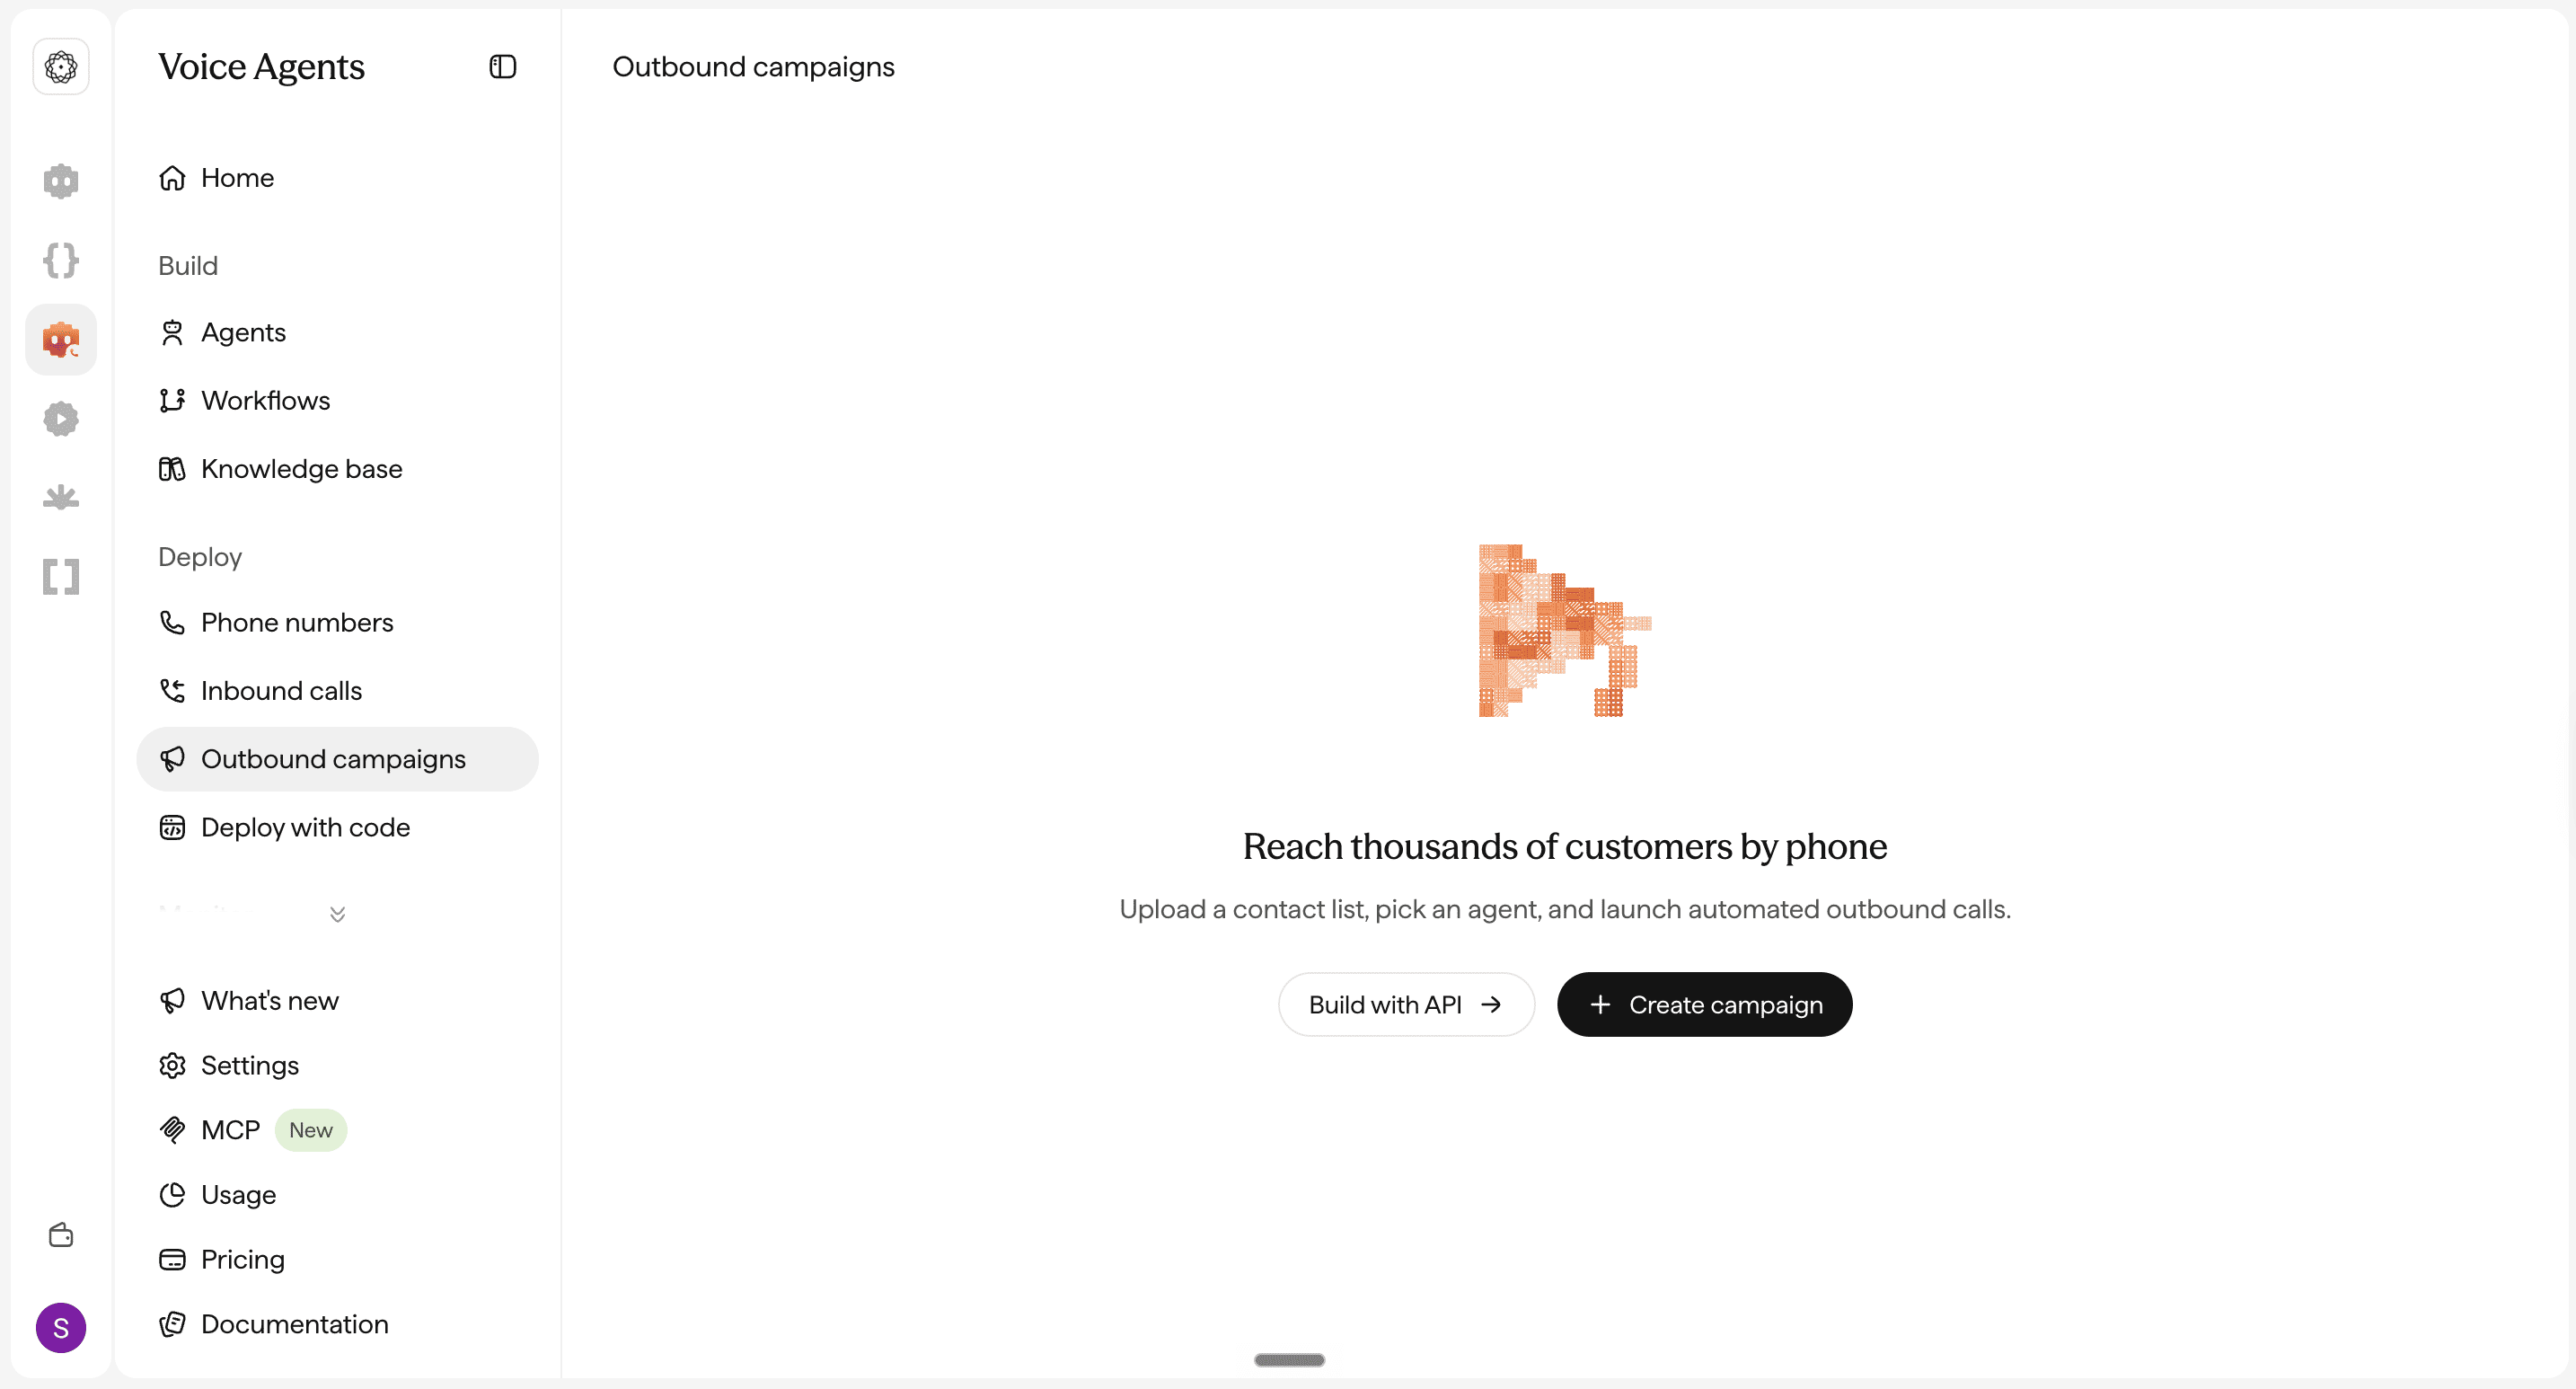
Navigate to Deploy → Outbound Campaigns.
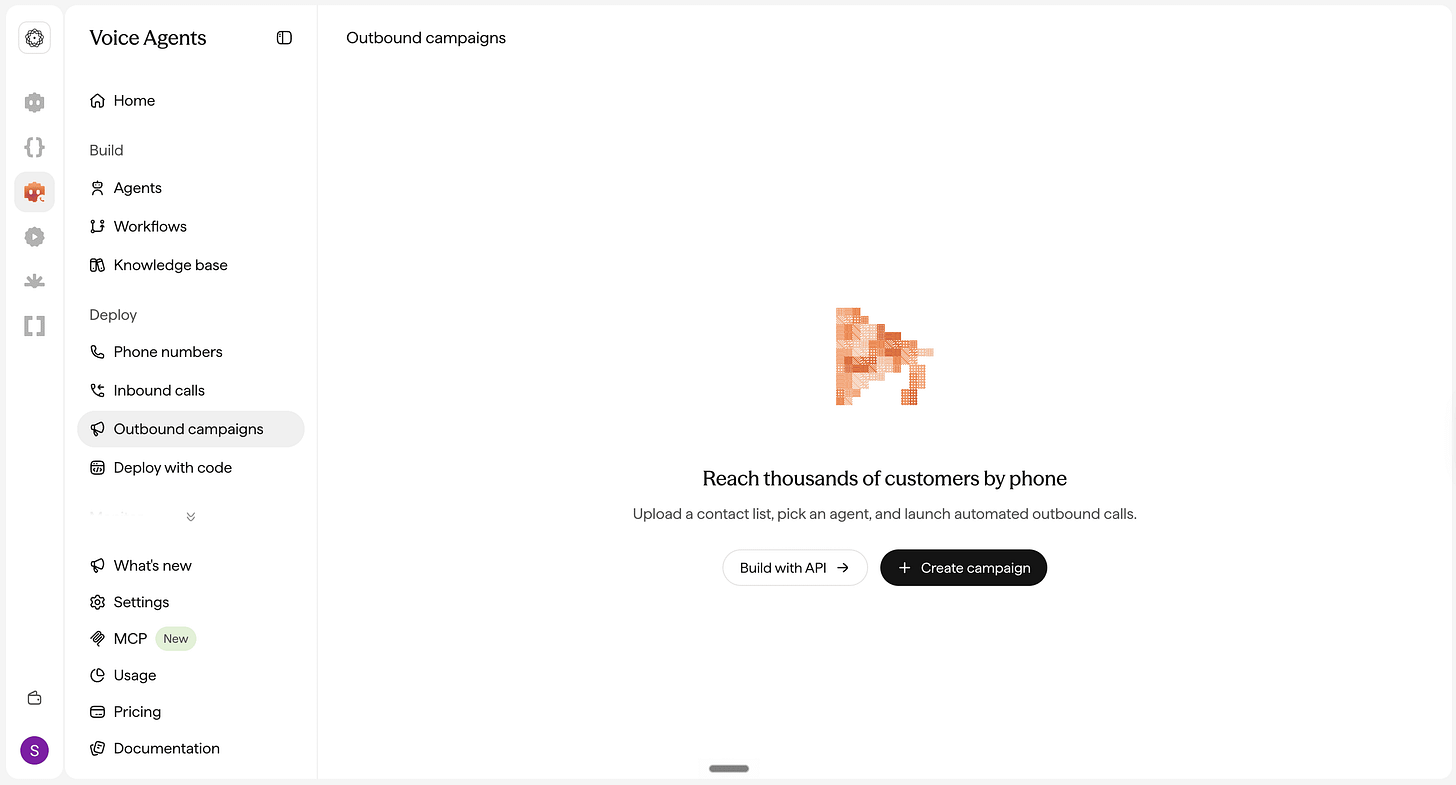
Click Create Campaign.
Name it Salon Receptionist.
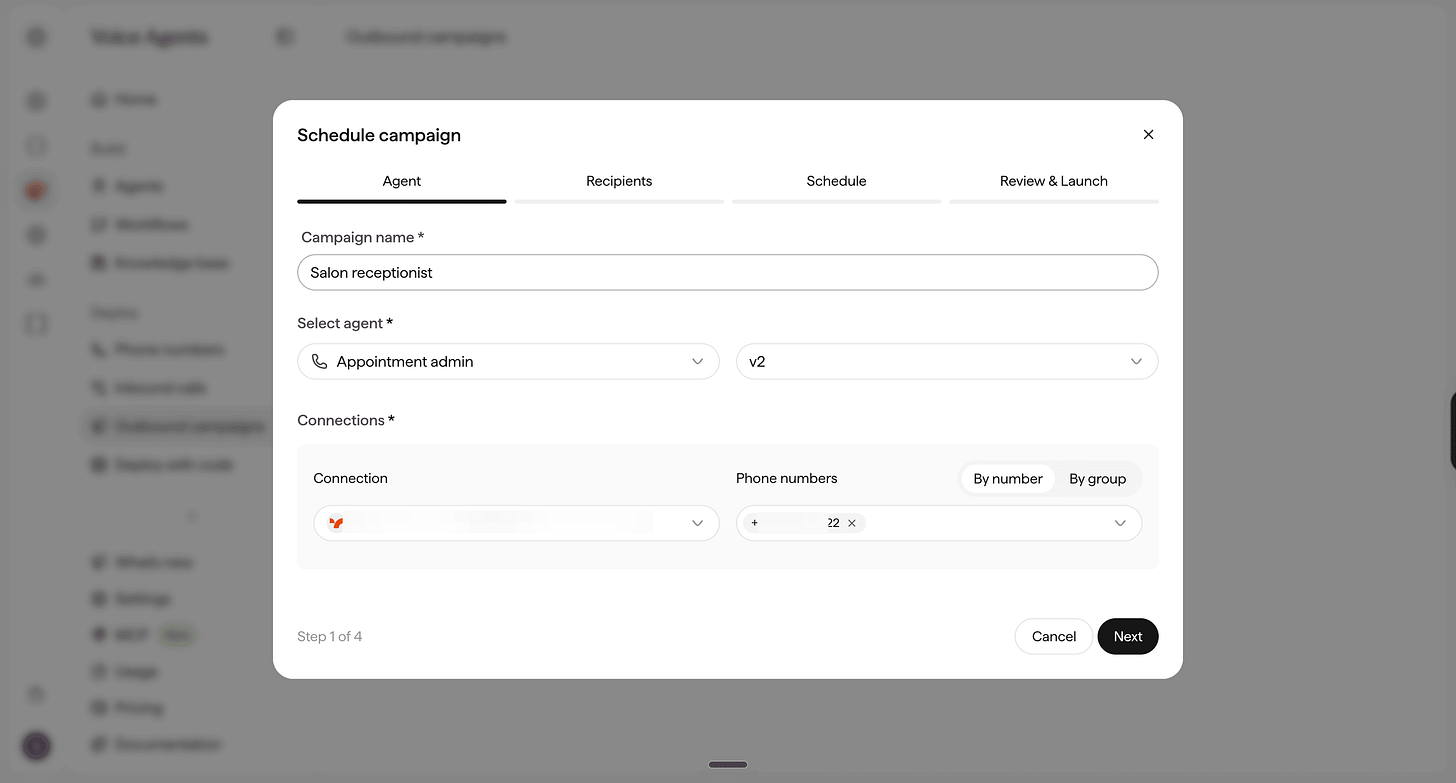
Select your Appointment Admin agent and its latest published version.
Choose your Vobiz connection and the phone number you imported.
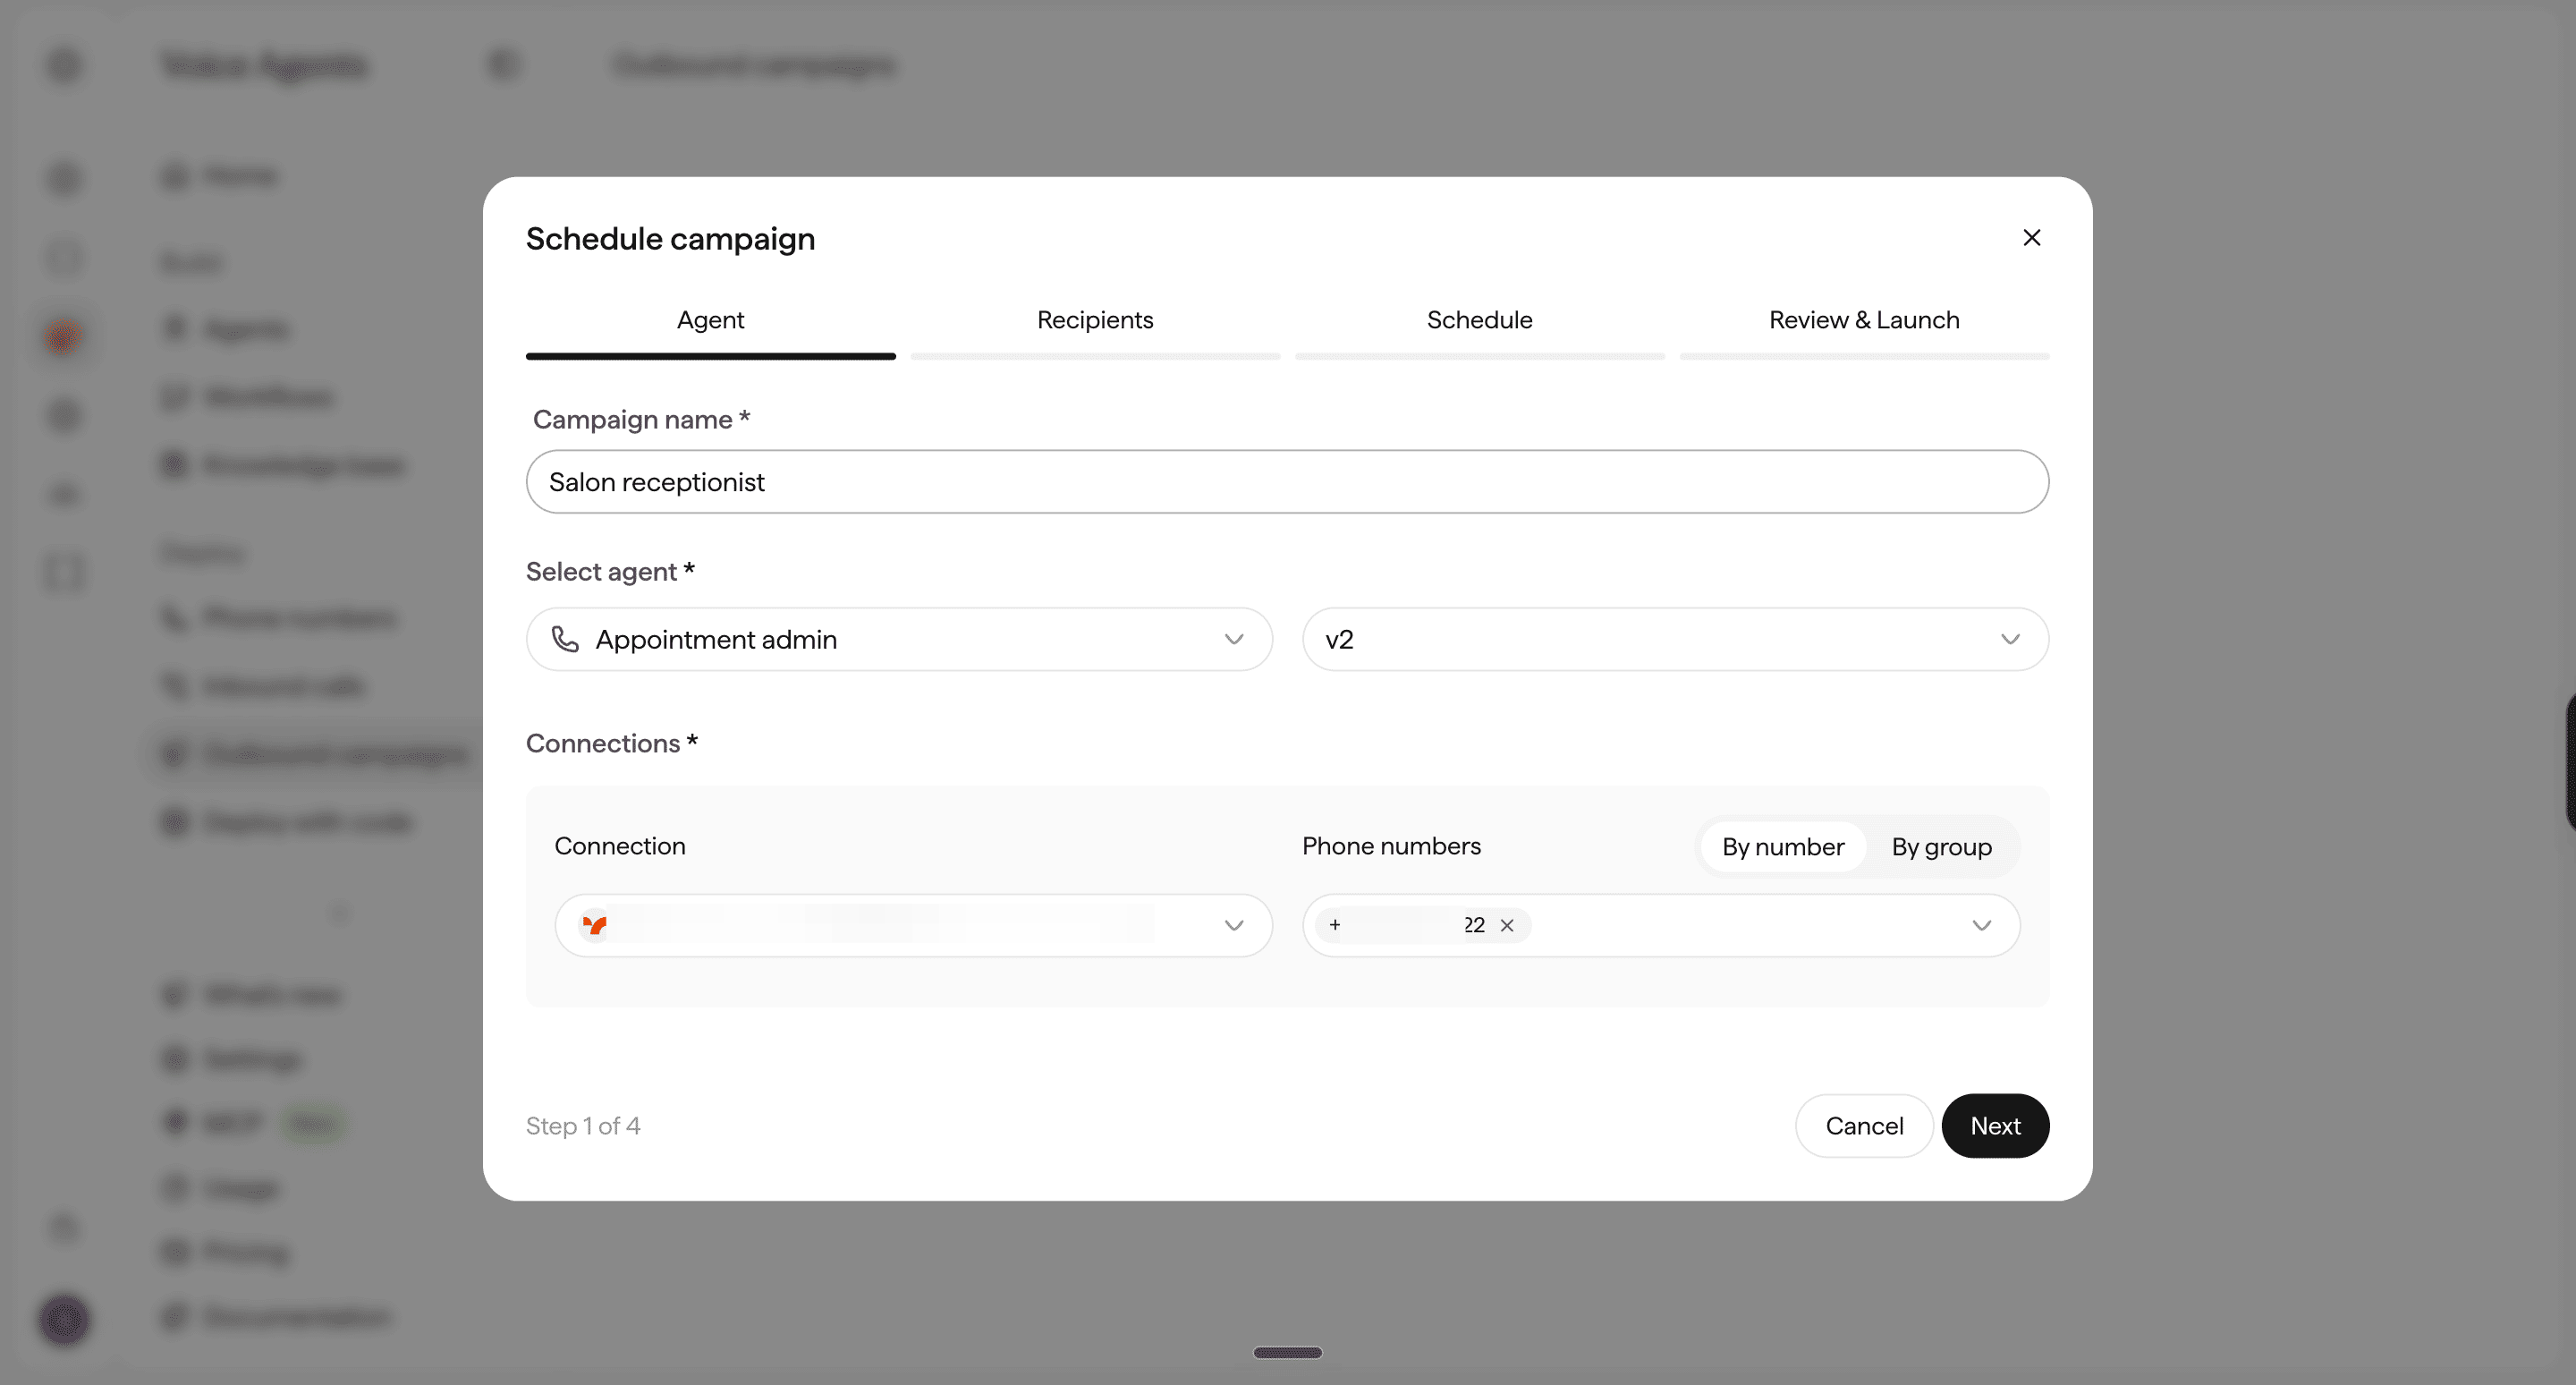
Click Next.
3. Upload your customer list
Upload the CSV we just created.
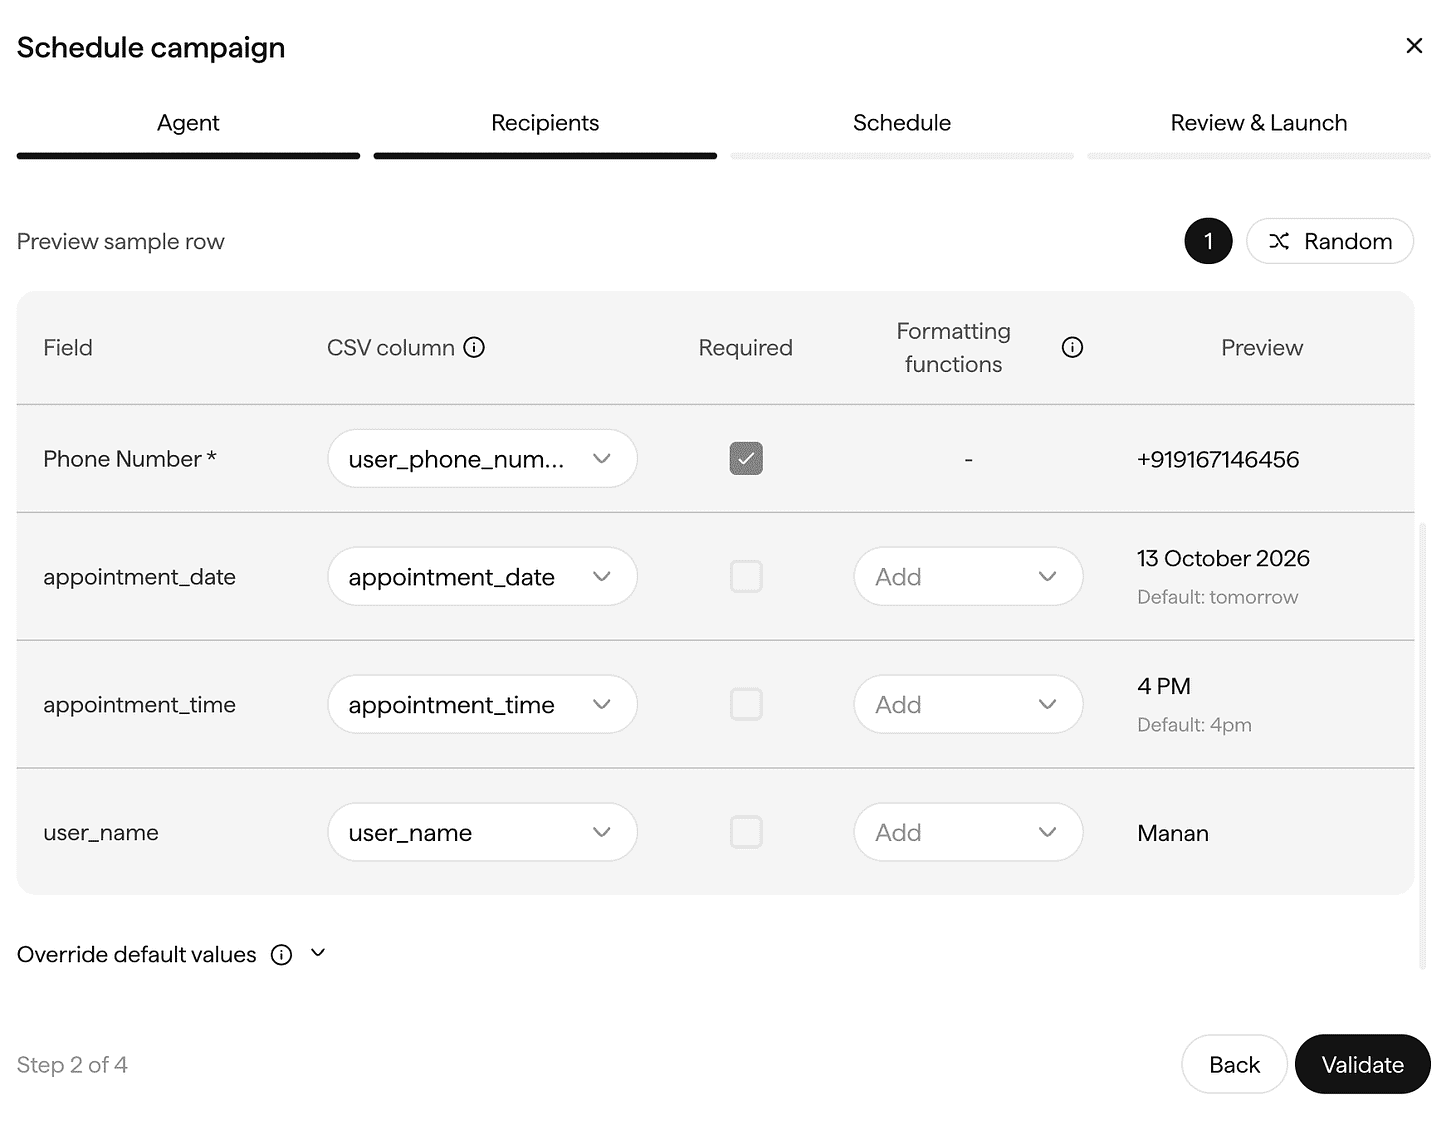
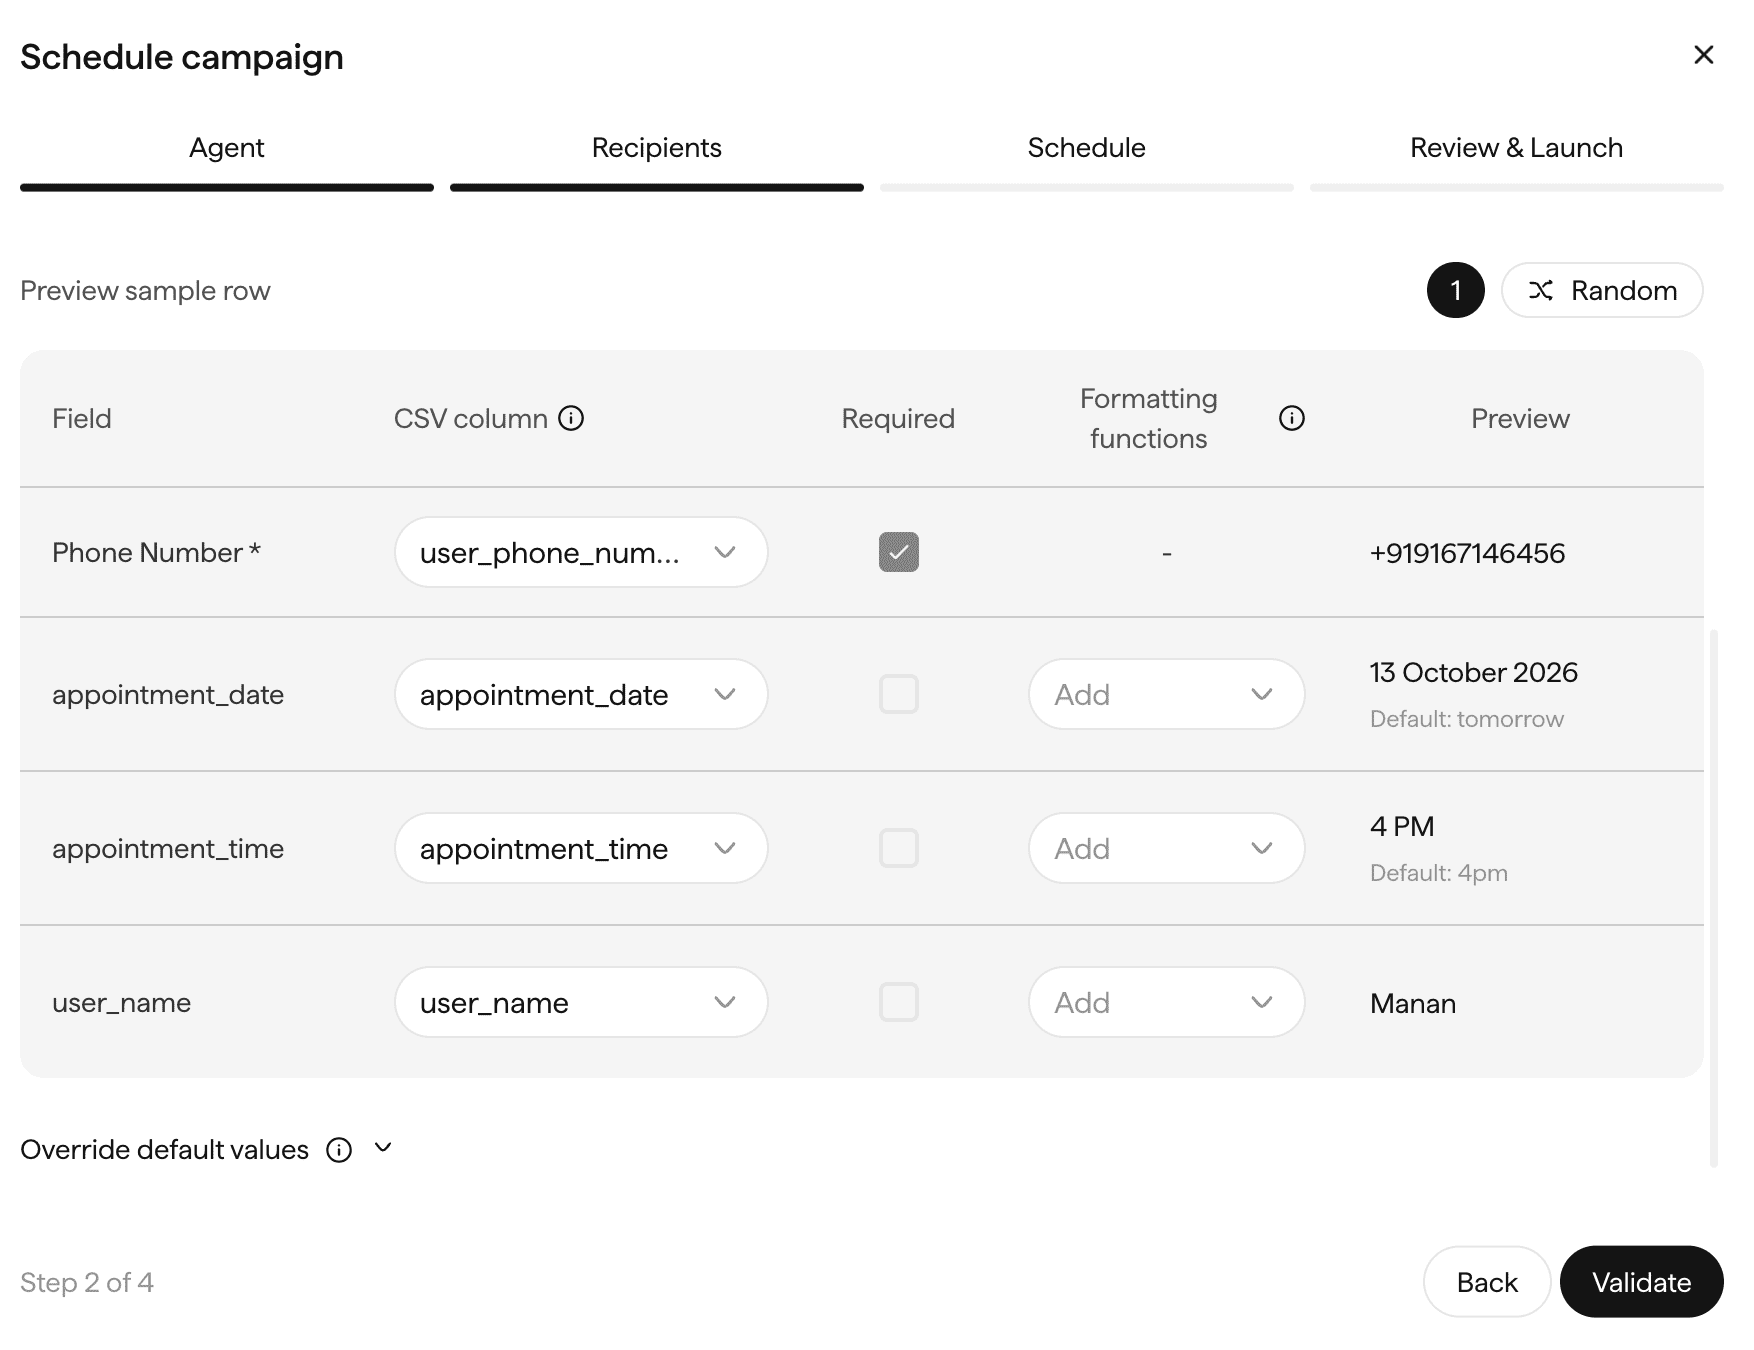
Sarvam will ask you to match your spreadsheet columns with the agent’s input variables.
For example, user_name in your spreadsheet should map to user_name in Sarvam.
Check the preview to ensure the details match, then click Validate.
Next, configure your campaign’s calling hours. For our test, we’ll keep retries off so the system doesn’t repeatedly attempt a failed call.
4. Set when your AI can call customers
Once you validate the recipients, the Schedule screens should pop up. It’ll look like this.
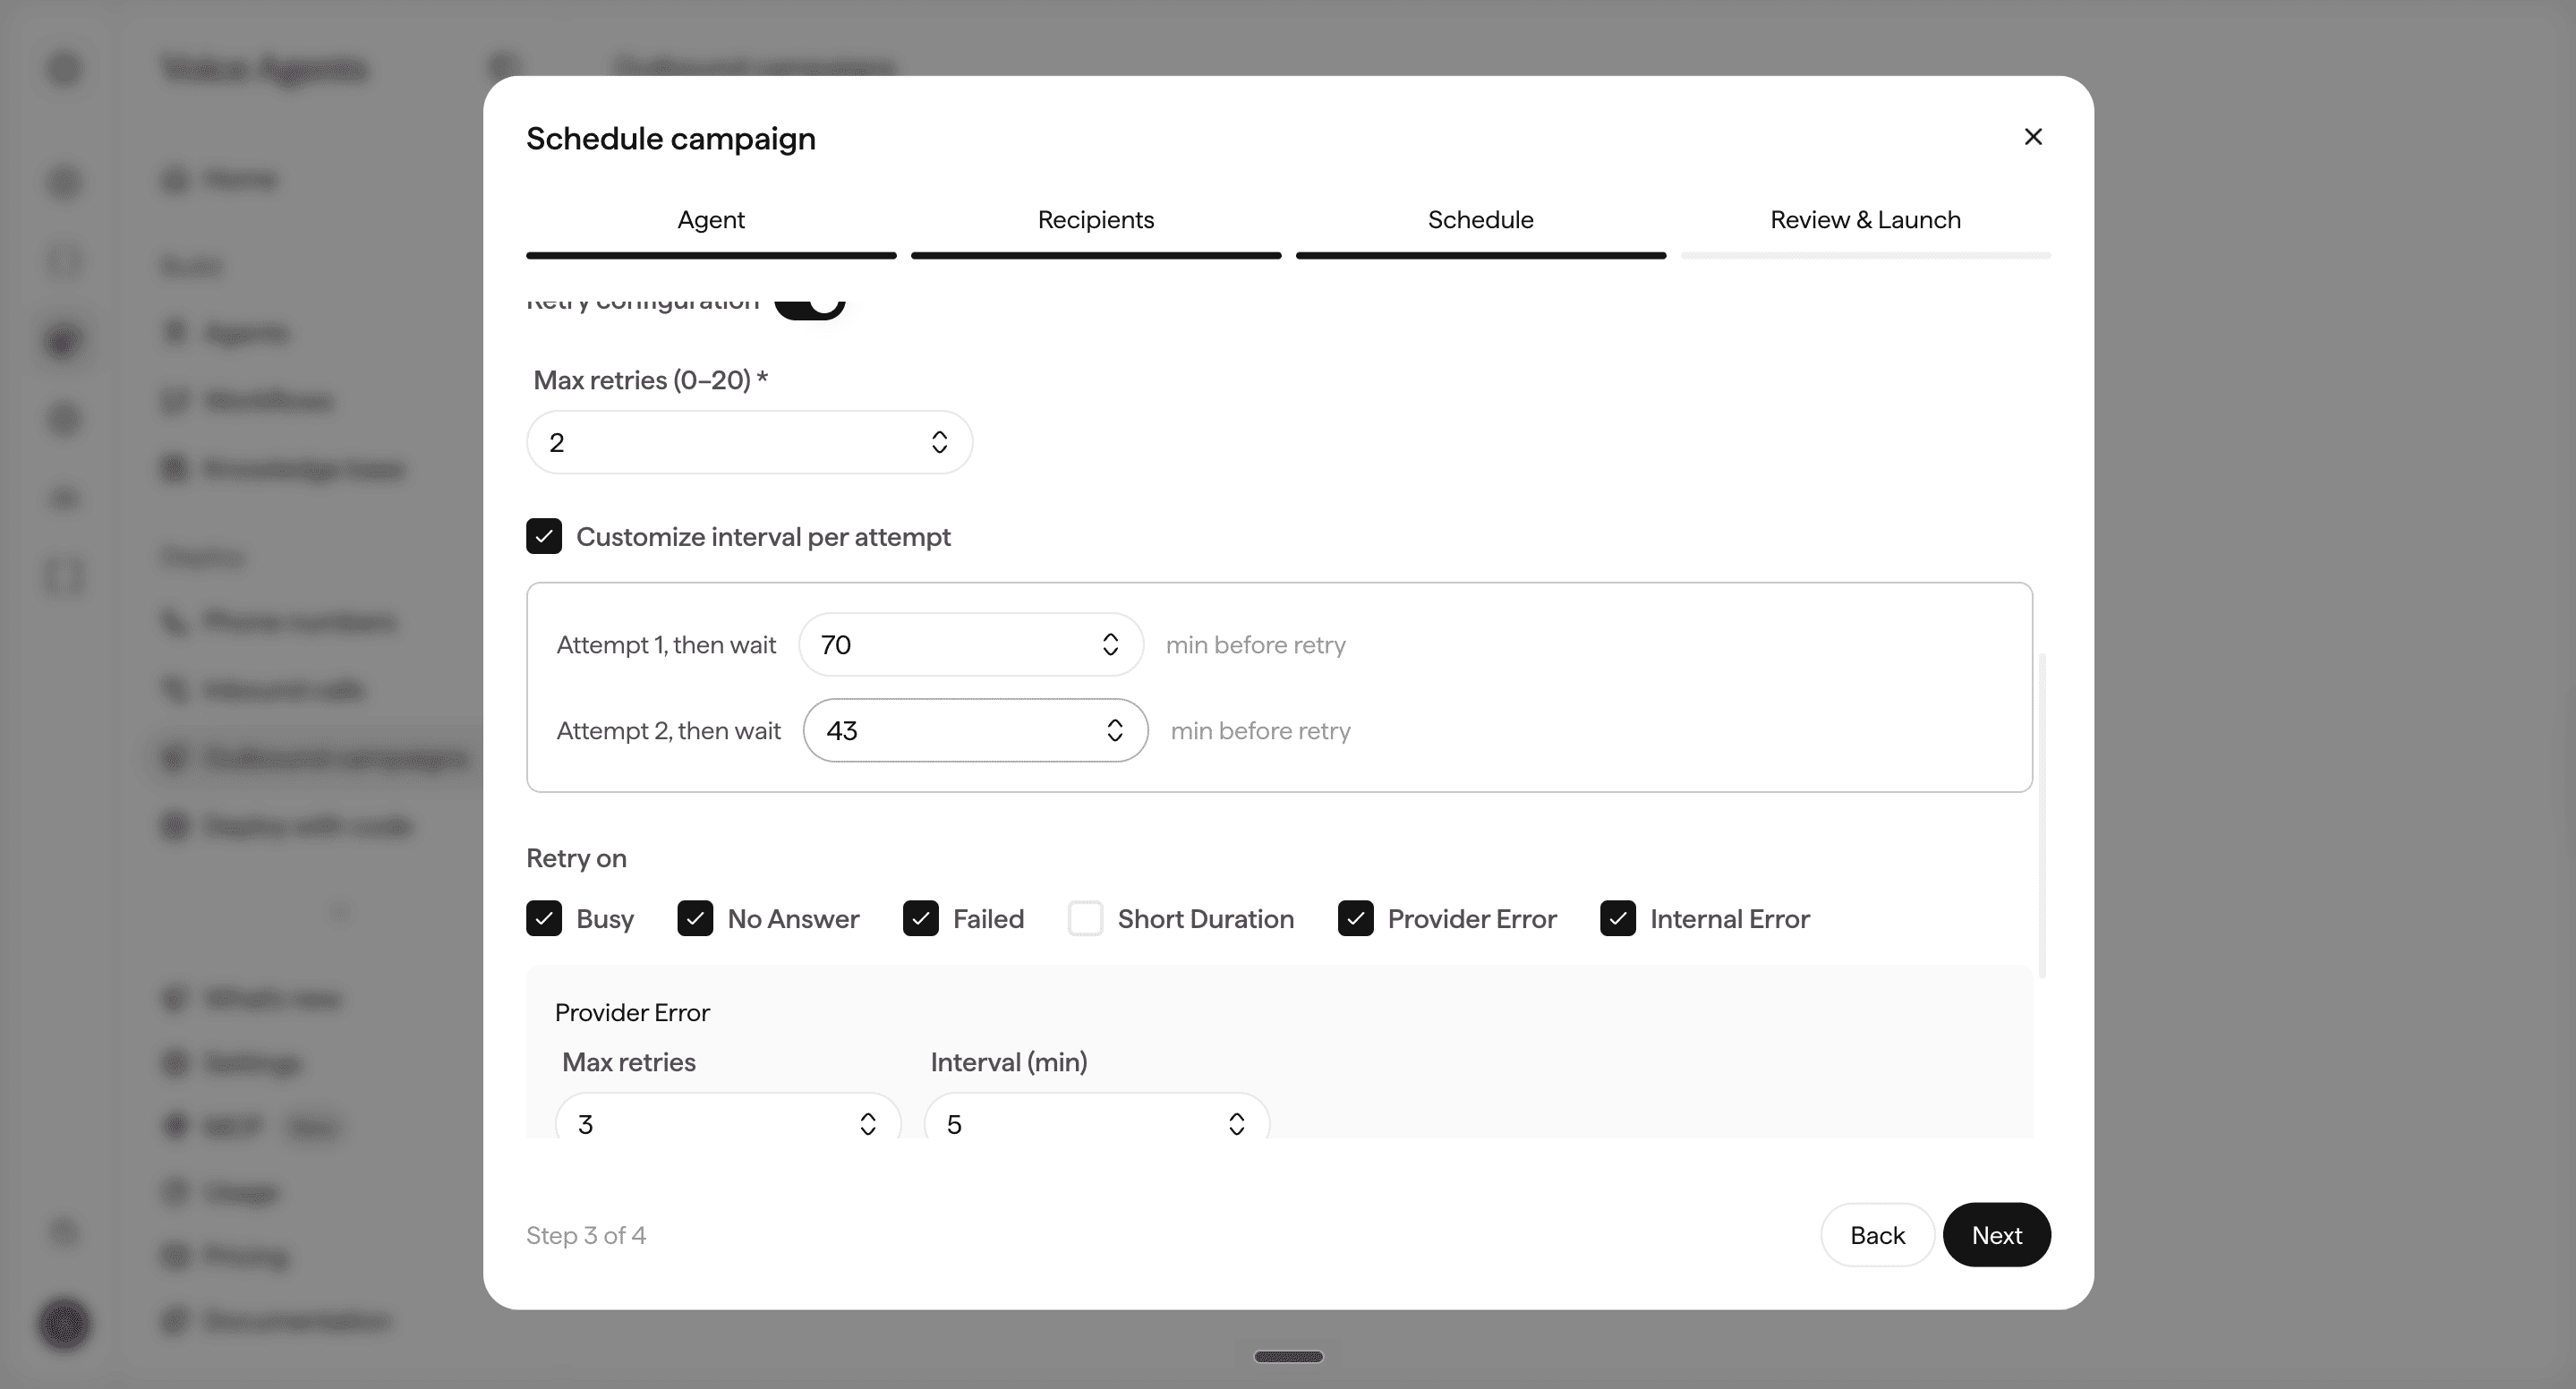
This is where Sarvam lets you control when calls happen, how quickly they’re placed, and whether failed calls should be retried.
For our first test, we’ll keep things simple.
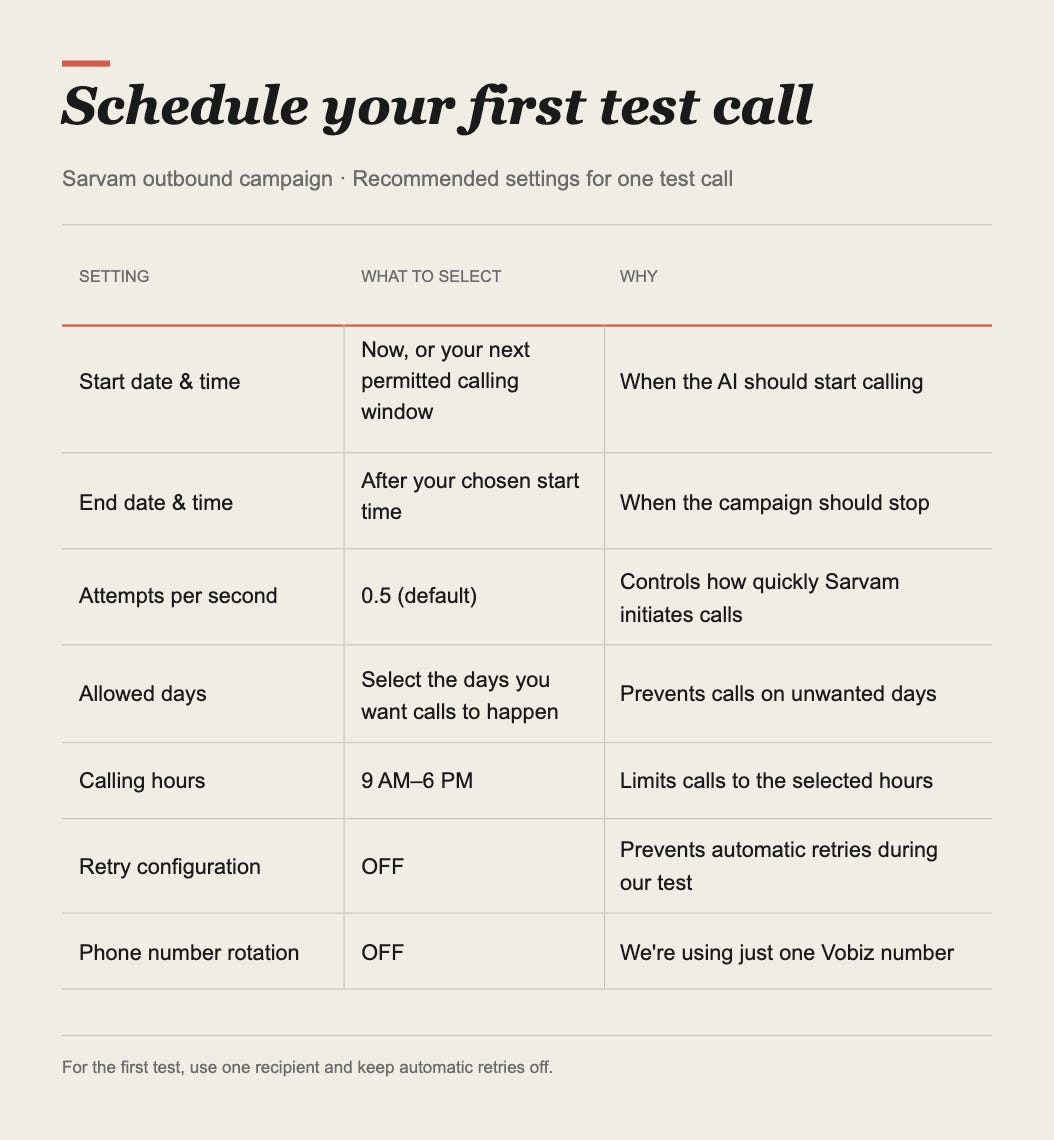
One important distinction: Attempts per second controls the rate at which calls are initiated. It doesn’t control the total number of customers called.
For now, we’re testing with one customer. Once the workflow works, you can configure the campaign for a larger list.
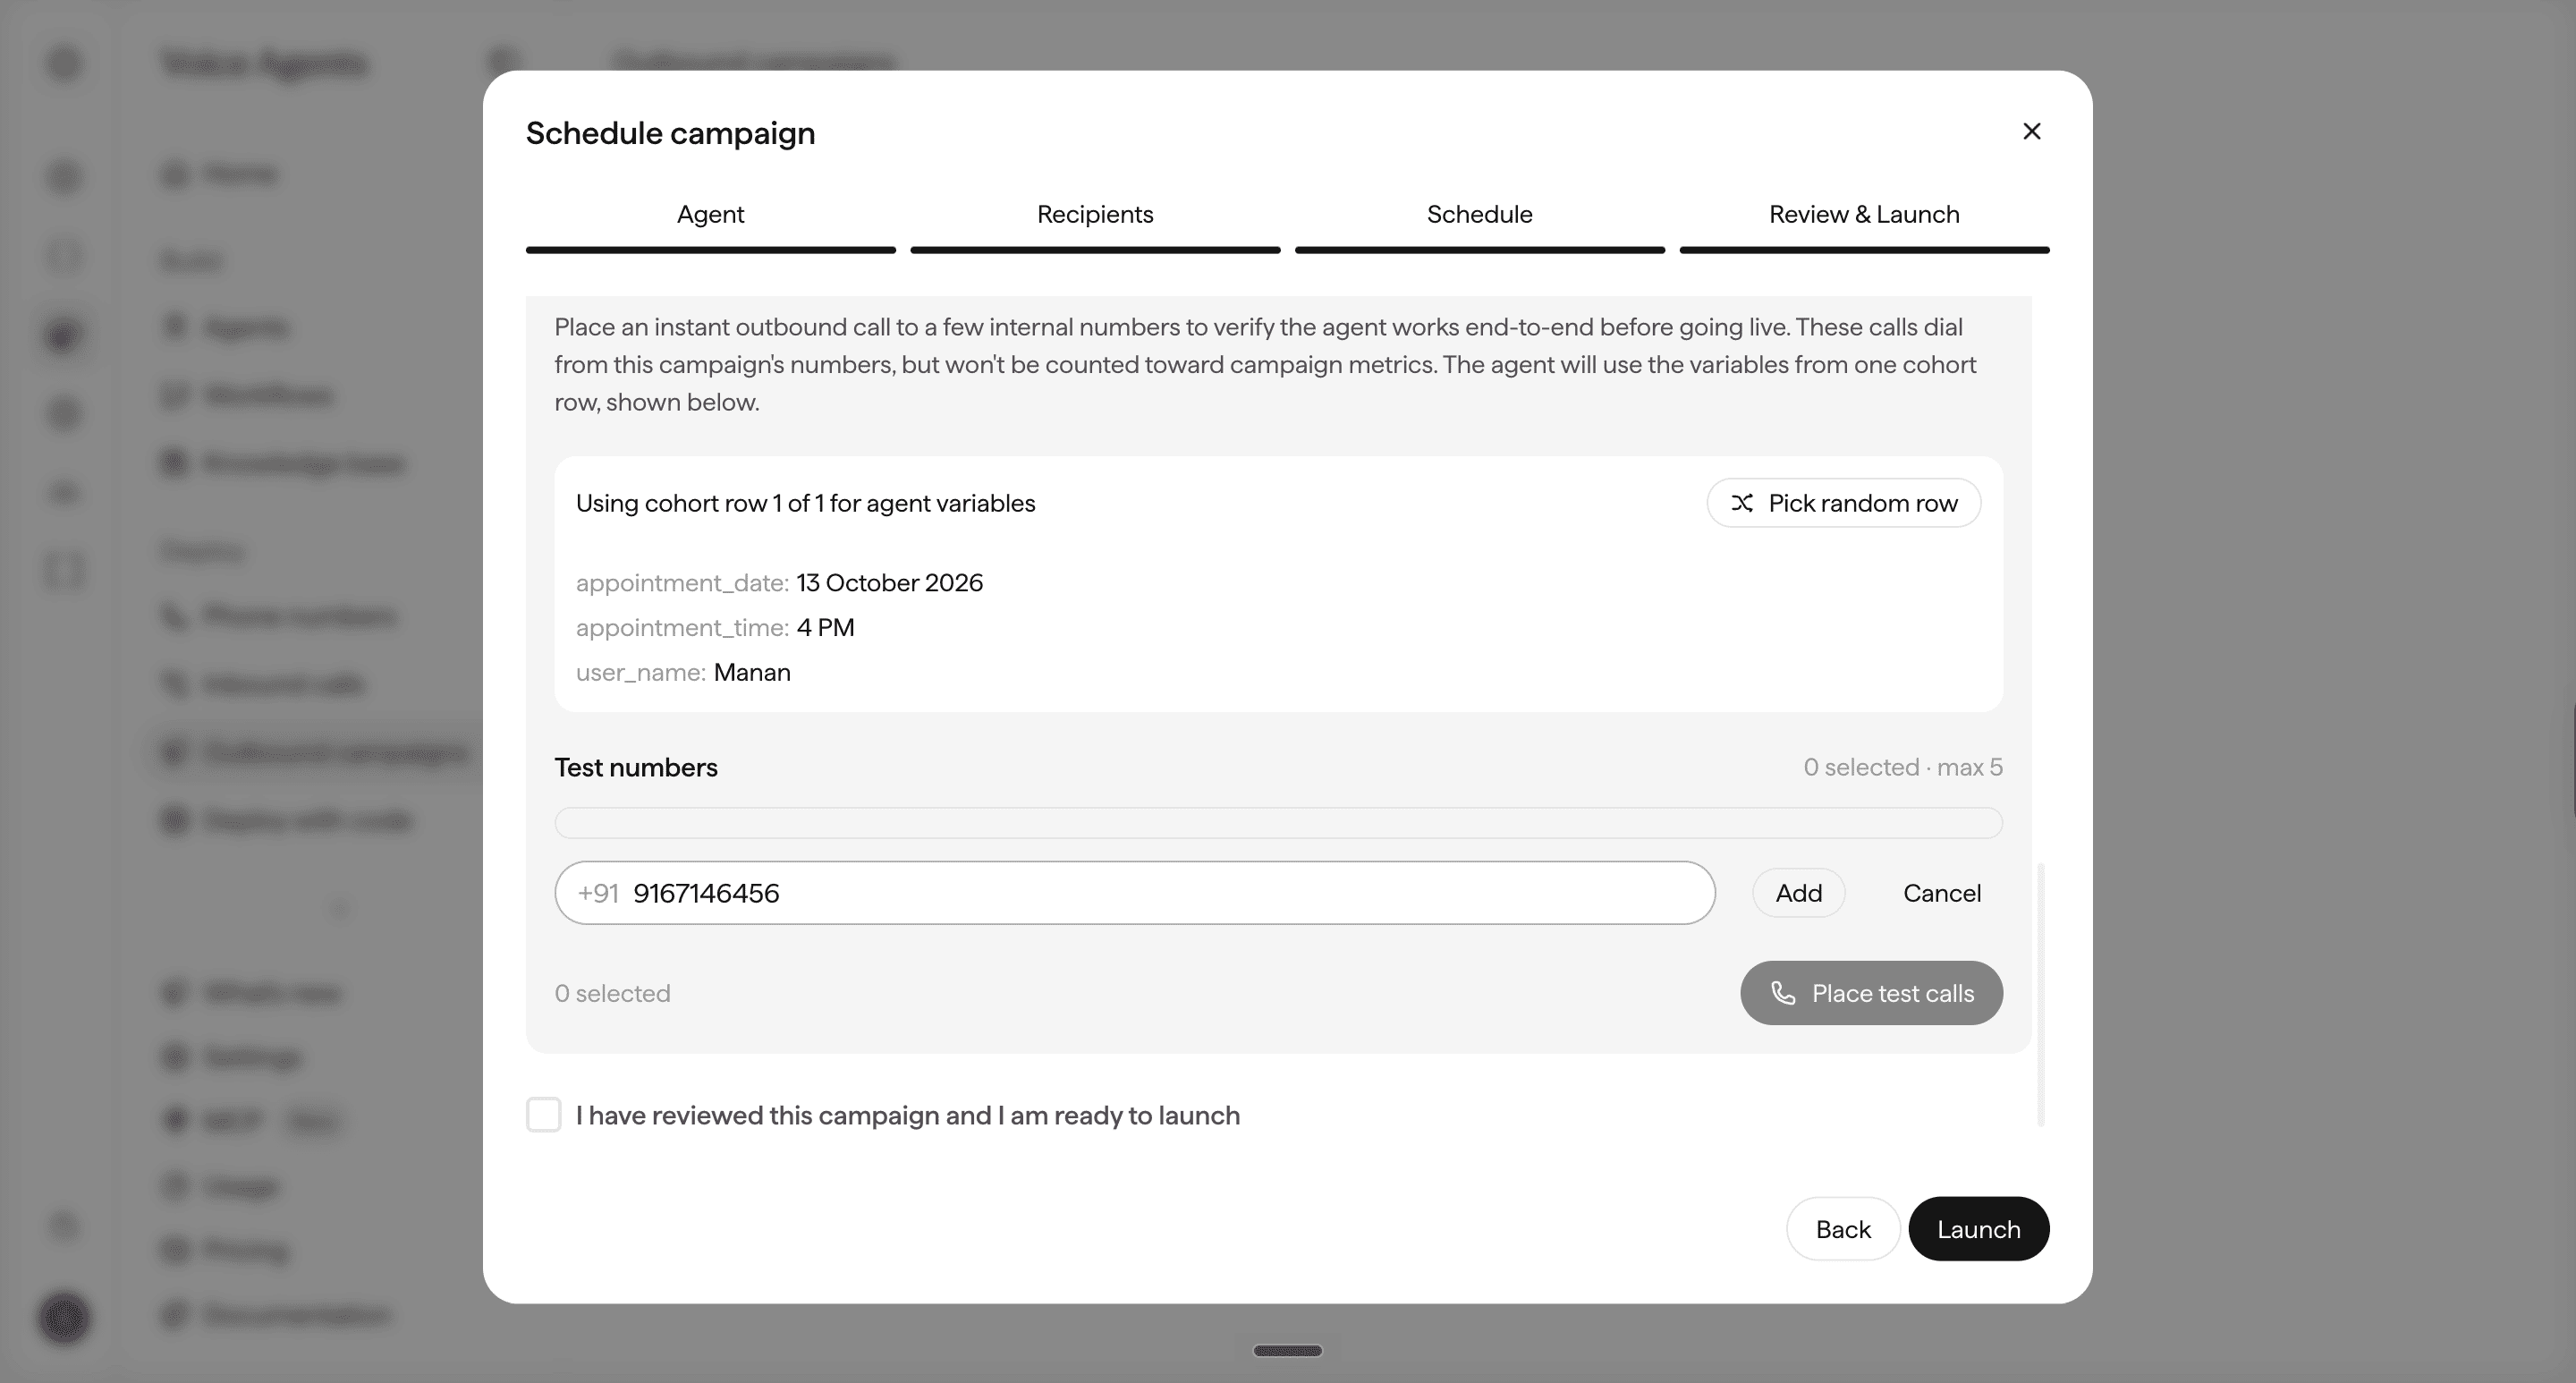
Enter your number in the test number block, review and launch. Sarvam will make a call to the number if it falls within the scheduled time.
Checkpoint: We tested this ourselves. The AI called our mobile, spoke in Hindi, understood our response, and completed the conversation.
You can inspect the conversation under Sarvam → Call Logs.
Step 5: Record every conversation in the database
We'll use Google Sheets for this. Every time a campaign call finishes, the AI's findings will automatically appear in a new row.
Note: Ideally, you want to connect Sarvam to the same database where you have upcoming appointments and have results of rescheduled calls.
To do this:
Open Google Sheets and create a new spreadsheet. Name it Glow Salon – AI Appointment Tracker.
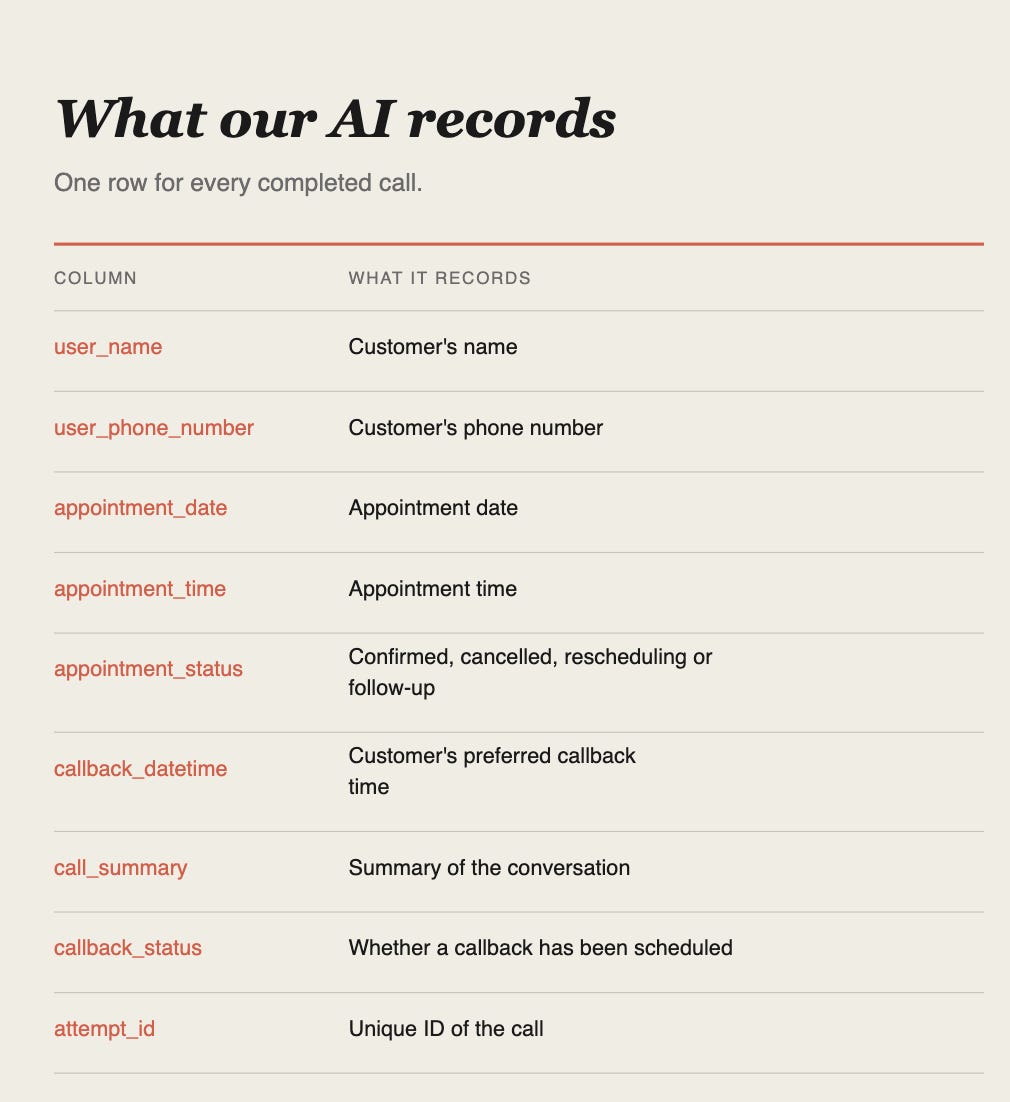
Connect Google Sheets to Sarvam
To get Sarvam to automatically fill this sheet, we’ll use Google Apps Script.
Apps Script lets us run small programs inside Google Sheets. We’ll write one that receives information from Sarvam and adds it to our spreadsheet.
How does Sarvam know where to send the information? Through a webhook.
Think of a webhook as an address where one application can send information to another.
When a call finishes, Sarvam sends the results to our webhook address. Apps Script receives them and updates Google Sheets.
Here’s what the entire flow of data looks like. Sarvam → Webhook → Apps Script → Google Sheets
Let’s set it up.
Open your Google Sheet.
Click Extensions → Apps Script.
You’ll see a file called Code.gs.
Replace its contents with the script below.
Copy this code into Apps Script
// Receives call results from Sarvam
function doPost(e) {
  const secret = PropertiesService.getScriptProperties()
    .getProperty("WEBHOOK_KEY");

  if (!secret || !e || !e.parameter ||
      e.parameter.key !== secret) {
    return ContentService.createTextOutput("Unauthorized");
  }

  try {
    const data = JSON.parse(e.postData.contents);
    saveCall(data);

    return ContentService.createTextOutput("Success");
  } catch (error) {
    console.error(error);
    return ContentService.createTextOutput("Error");
  }
}


// Saves the results in Google Sheets
function saveCall(data) {
  const sheet = SpreadsheetApp.getActiveSpreadsheet()
    .getSheets()[0];

  const inputs = data.initial_agent_variables || {};
  const outputs = data.output_agent_variables || {};
  const attemptId = String(data.attempt_id || "");

  if (!attemptId) {
    throw new Error("Missing call attempt ID");
  }

  sheet.getRange("J1").setValue("attempt_id");

  const lastRow = sheet.getLastRow();

  const existingIds = lastRow > 1
    ? sheet.getRange(2, 10, lastRow - 1, 1)
        .getValues().flat()
    : [];

  if (existingIds.includes(attemptId)) return;

  const status = outputs.appointment_status ||
    "NOT_AVAILABLE";

  const callbackTime = outputs.callback_datetime || "";

  const callbackStatus =
    status === "NEEDS_FOLLOW_UP" &&
    callbackTime &&
    callbackTime !== "NONE"
      ? "NOT_SCHEDULED"
      : "NOT_REQUIRED";

  sheet.appendRow([
    lastRow,
    inputs.user_name || "",
    "'" + String(data.user_phone_number || ""),
    inputs.appointment_date || "",
    inputs.appointment_time || "",
    status,
    callbackTime,
    outputs.call_summary || "",
    callbackStatus,
    attemptId
  ]);
}


// Creates a private webhook key
function setupSecret() {
  const properties = PropertiesService.getScriptProperties();

  if (!properties.getProperty("WEBHOOK_KEY")) {
    properties.setProperty(
      "WEBHOOK_KEY",
      Utilities.getUuid() + Utilities.getUuid()
    );
  }

  Logger.log("Webhook key created");
}


// Tests whether Google Sheets can save a result
function testSave() {
  saveCall({
    attempt_id: "DEMO-001",
    user_phone_number: "TEST_NUMBER",

    initial_agent_variables: {
      user_name: "Demo Customer",
      appointment_date: "13 October 2026",
      appointment_time: "4 PM"
    },

    output_agent_variables: {
      appointment_status: "NEEDS_FOLLOW_UP",
      callback_datetime: "2026-10-13T15:00:00+05:30",
      call_summary: "Customer requested a callback."
    }
  });
}
The script does three jobs: receives Sarvam’s call results, extracts the relevant information, and creates a row in Google Sheets.
It also checks the call’s unique ID to avoid recording the same call twice.
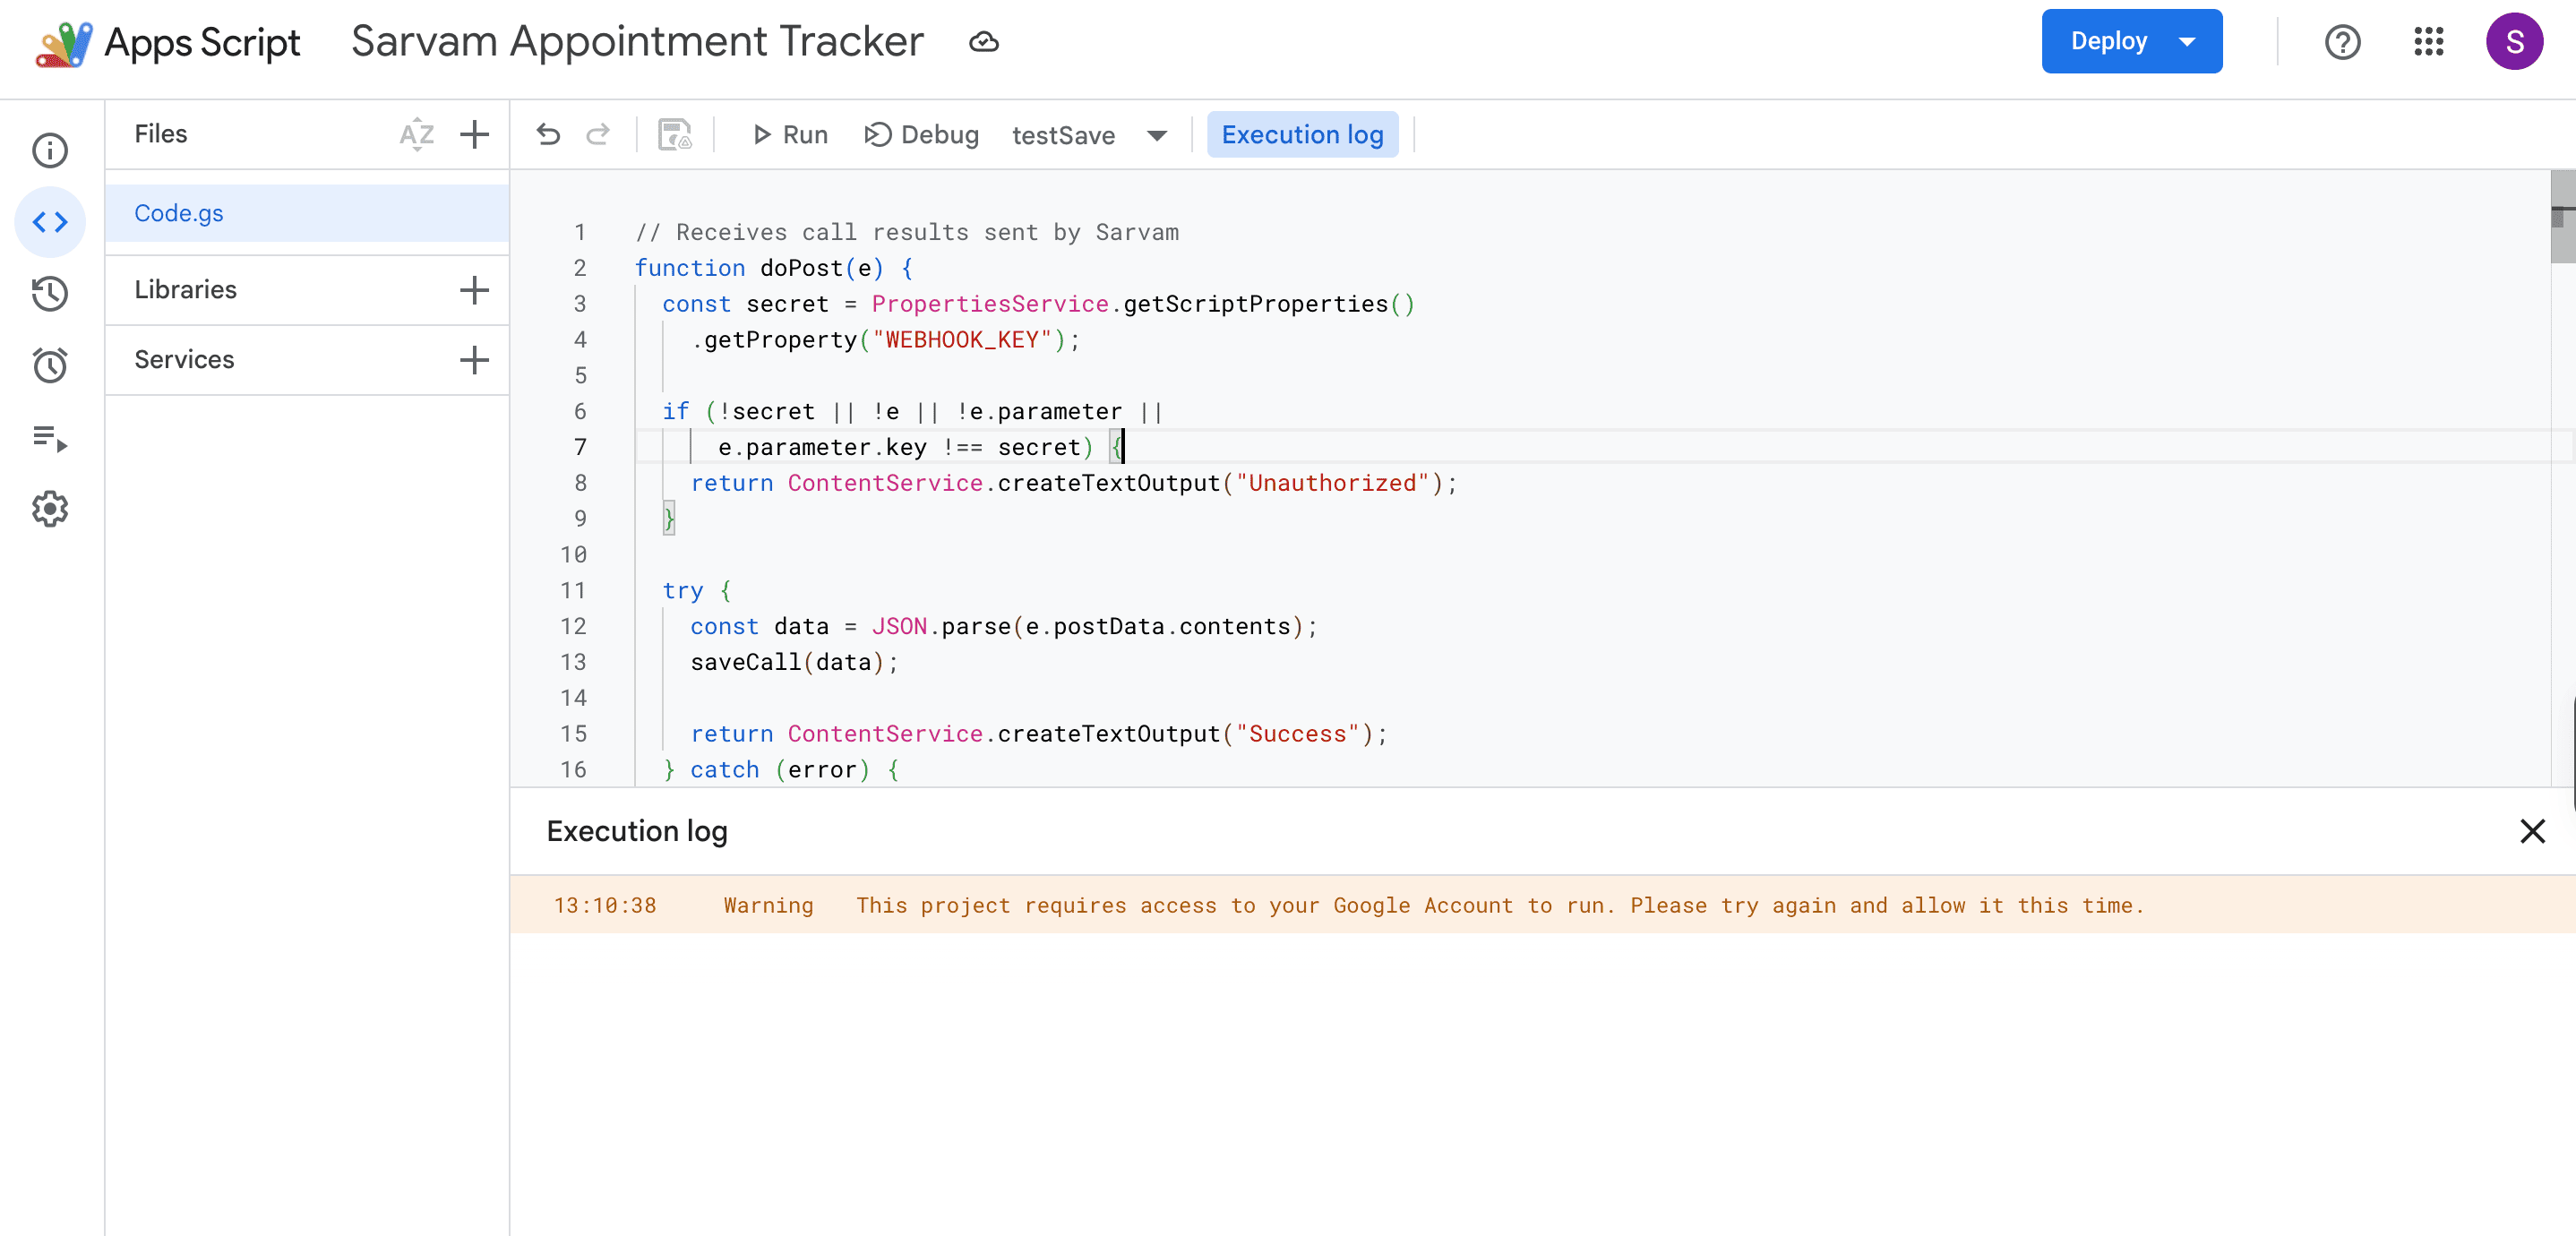
Test whether the script works
Before connecting Sarvam, let’s check whether our script can write information to Google Sheets.
Save your Apps Script project.
Select testSave from the function dropdown.
Click
Authorise the script if Google asks for permission.
Now open your spreadsheet.
Checkpoint: You should see a new row for Demo Customer, with the appointment status marked NEEDS_FOLLOW_UP.
We now know Apps Script can update our spreadsheet. We still need Sarvam to send it real call results.
Create your webhook URL
This is how we get Sarvam to send the results automatically after every call.
See, a webhook is a way for one application to send information to another when something happens. In our case, whenever Sarvam finishes a call, it sends the customer’s responses to Google Apps Script, which records them in our sheet.
To make this work, we need two things: a web address Sarvam can send data to and a private key to protect it. Why? Because we’re making our script public so that Sarvam can reach it. Meaning we’re putting people's valuable information at stake.
How to do it?
In Google Apps Script:
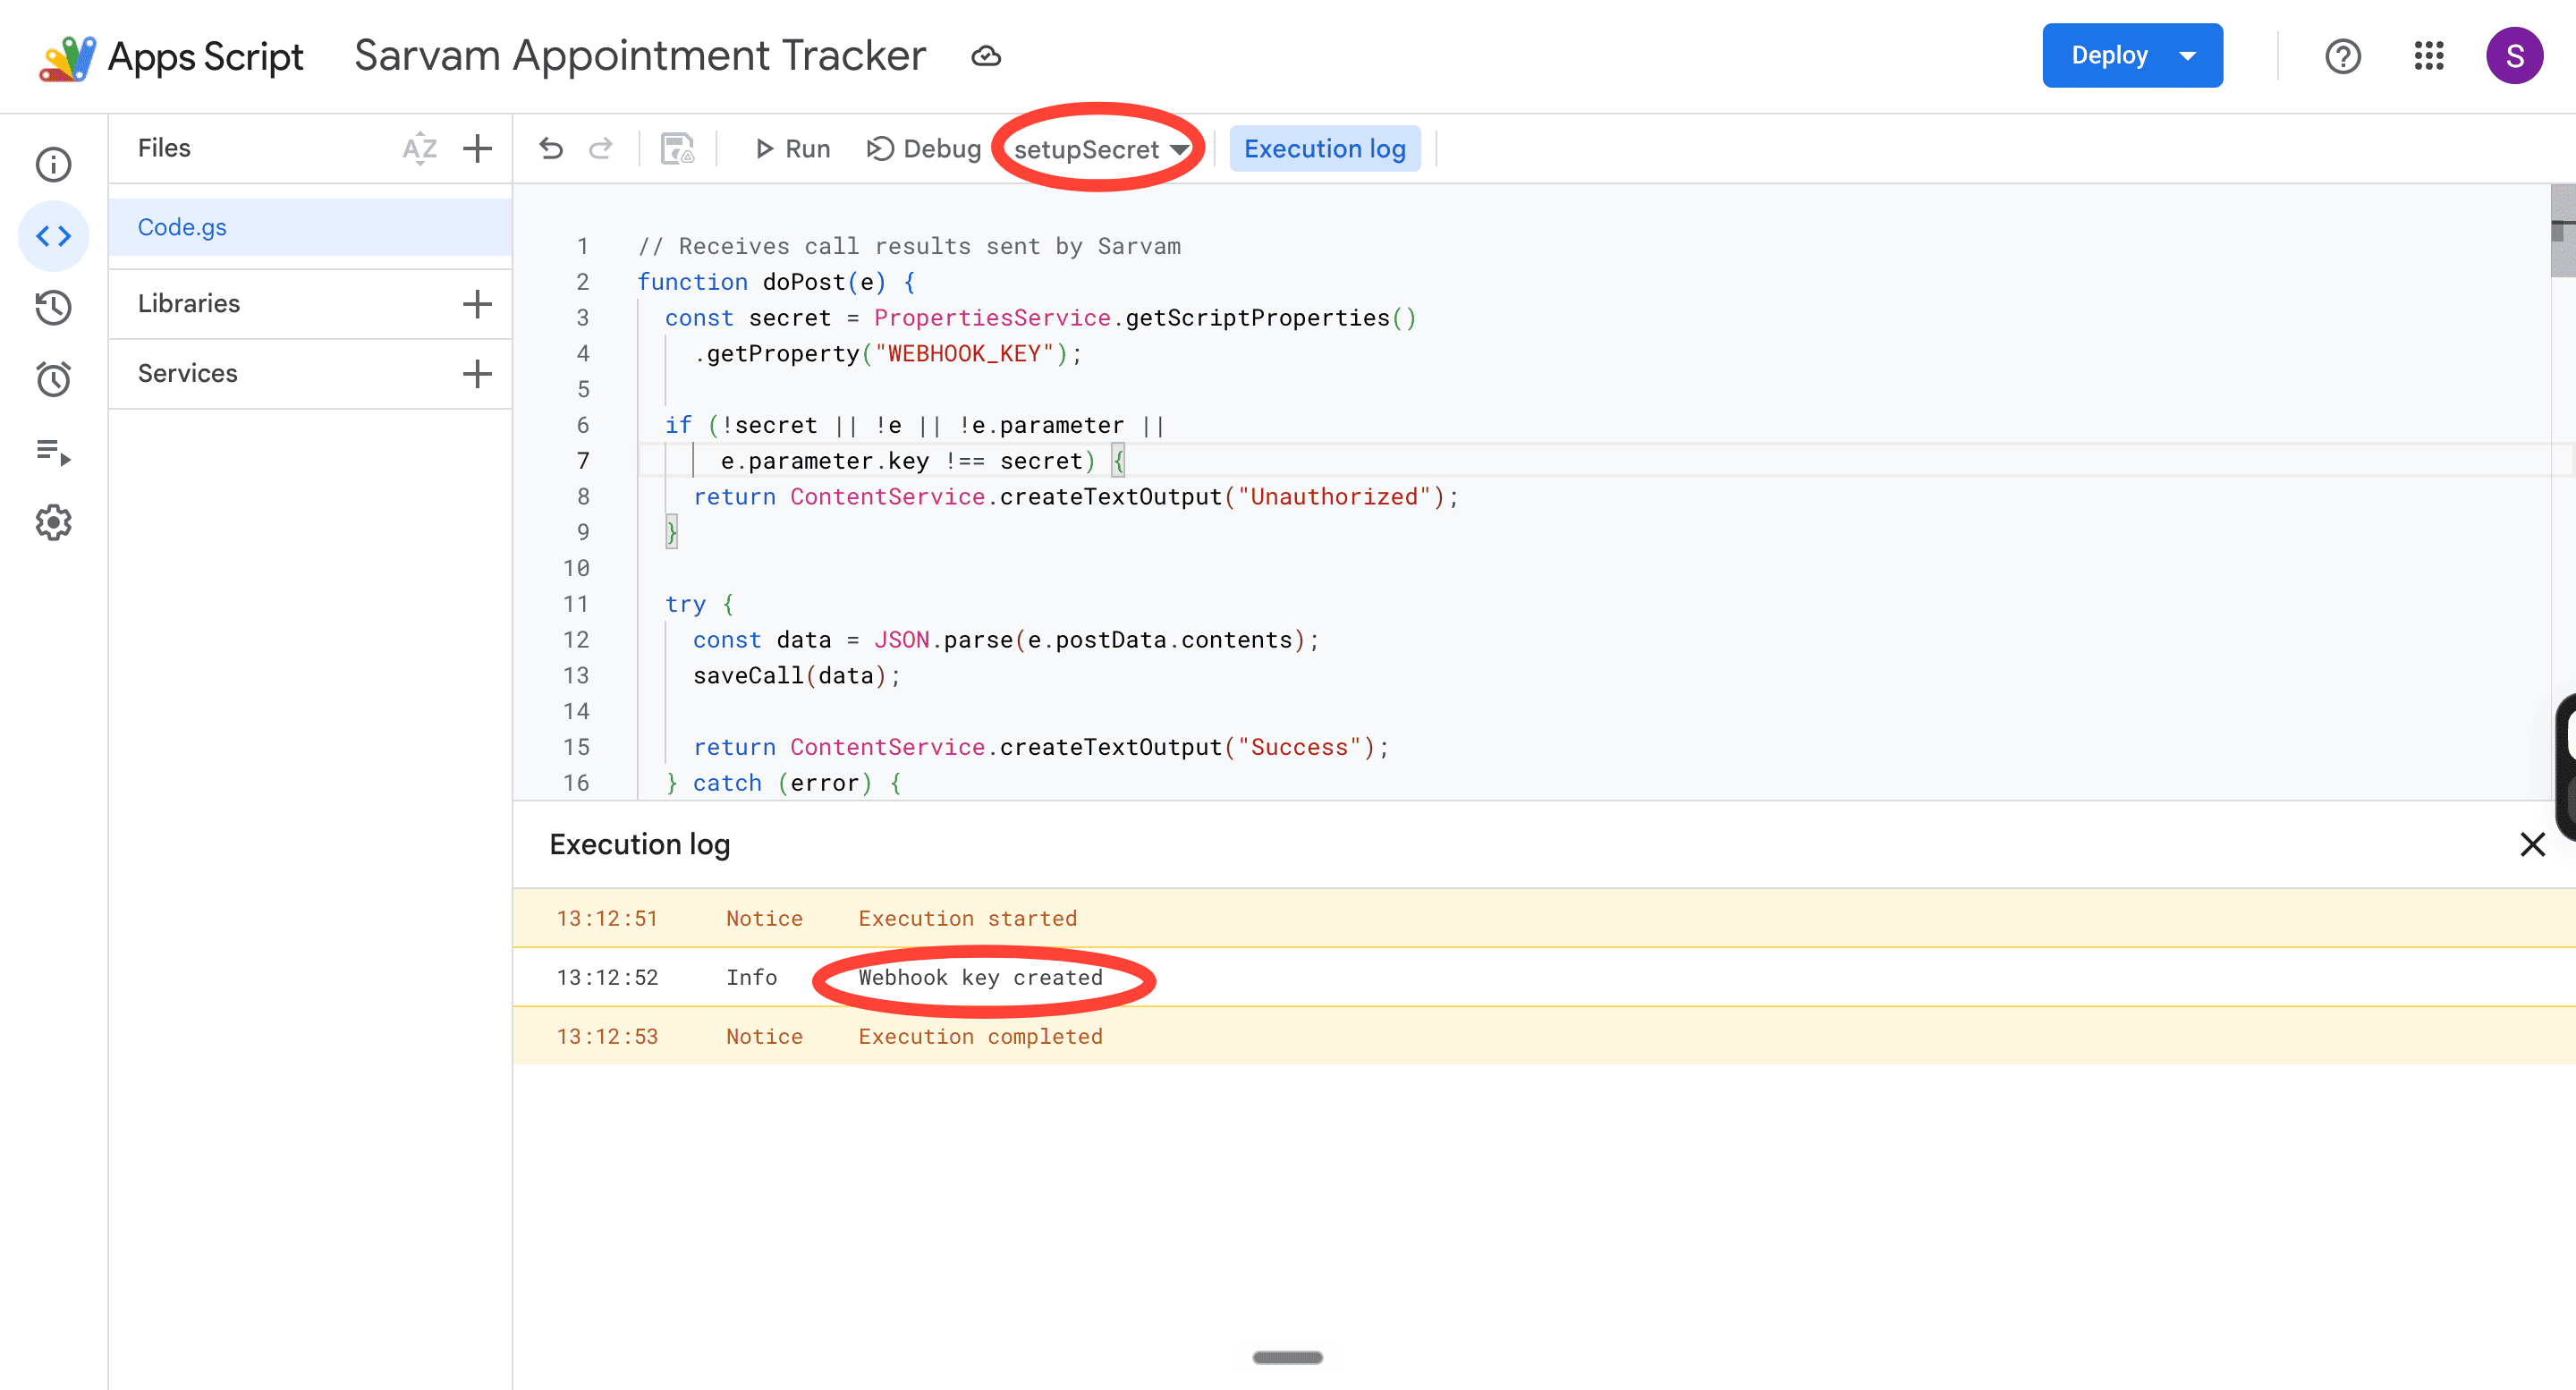
Select setupSecret from the function dropdown.
Click Run.
Wait for the execution log to show “Webhook key created.”
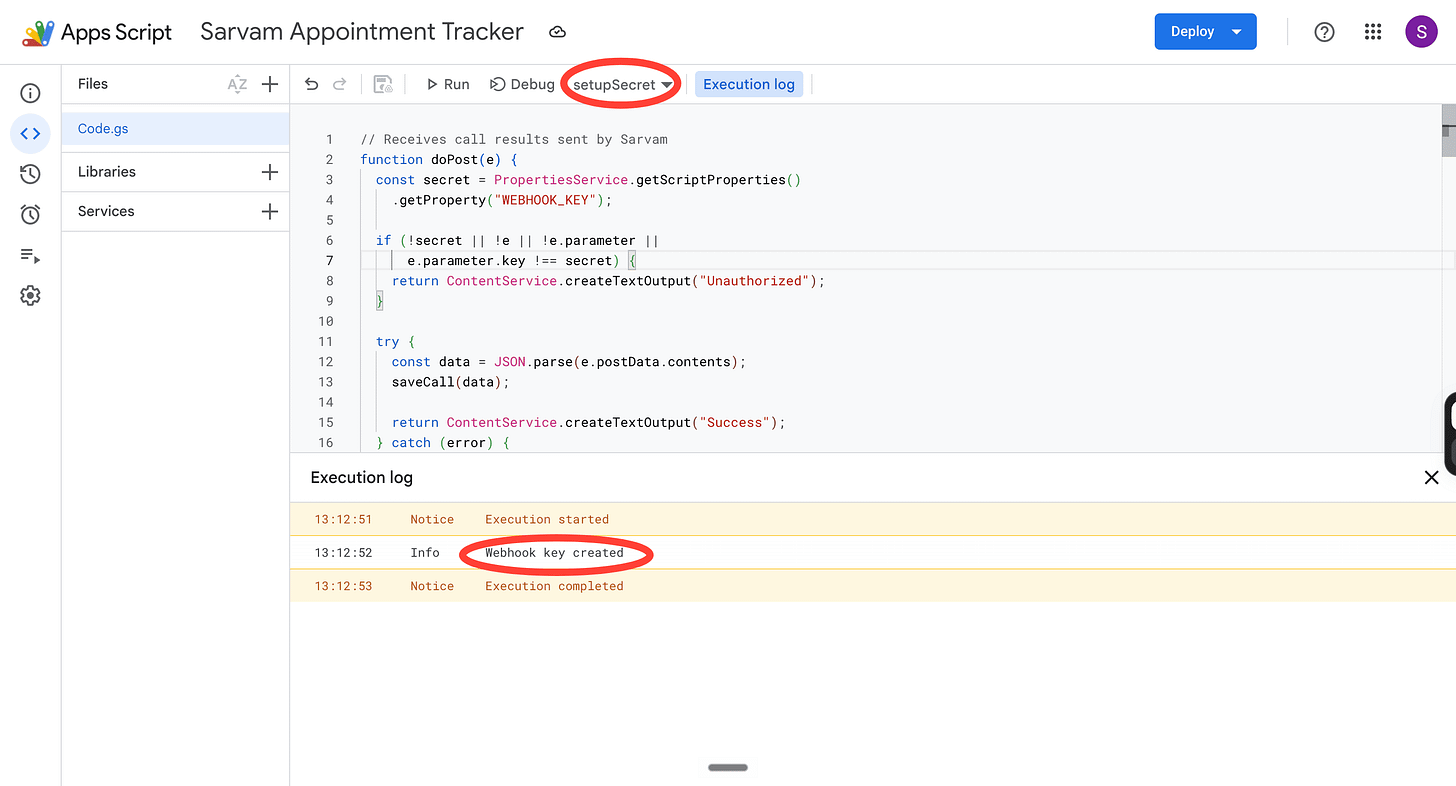
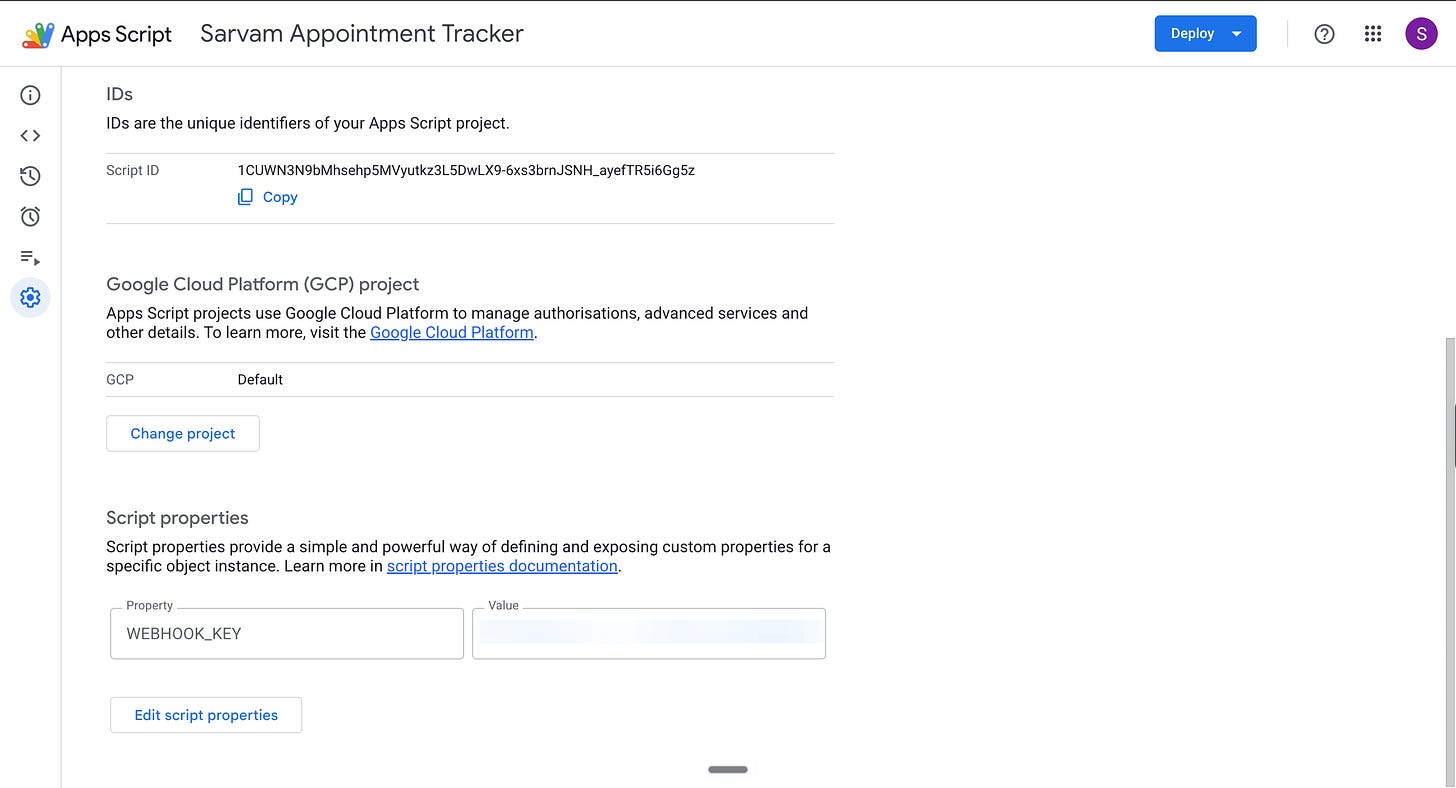
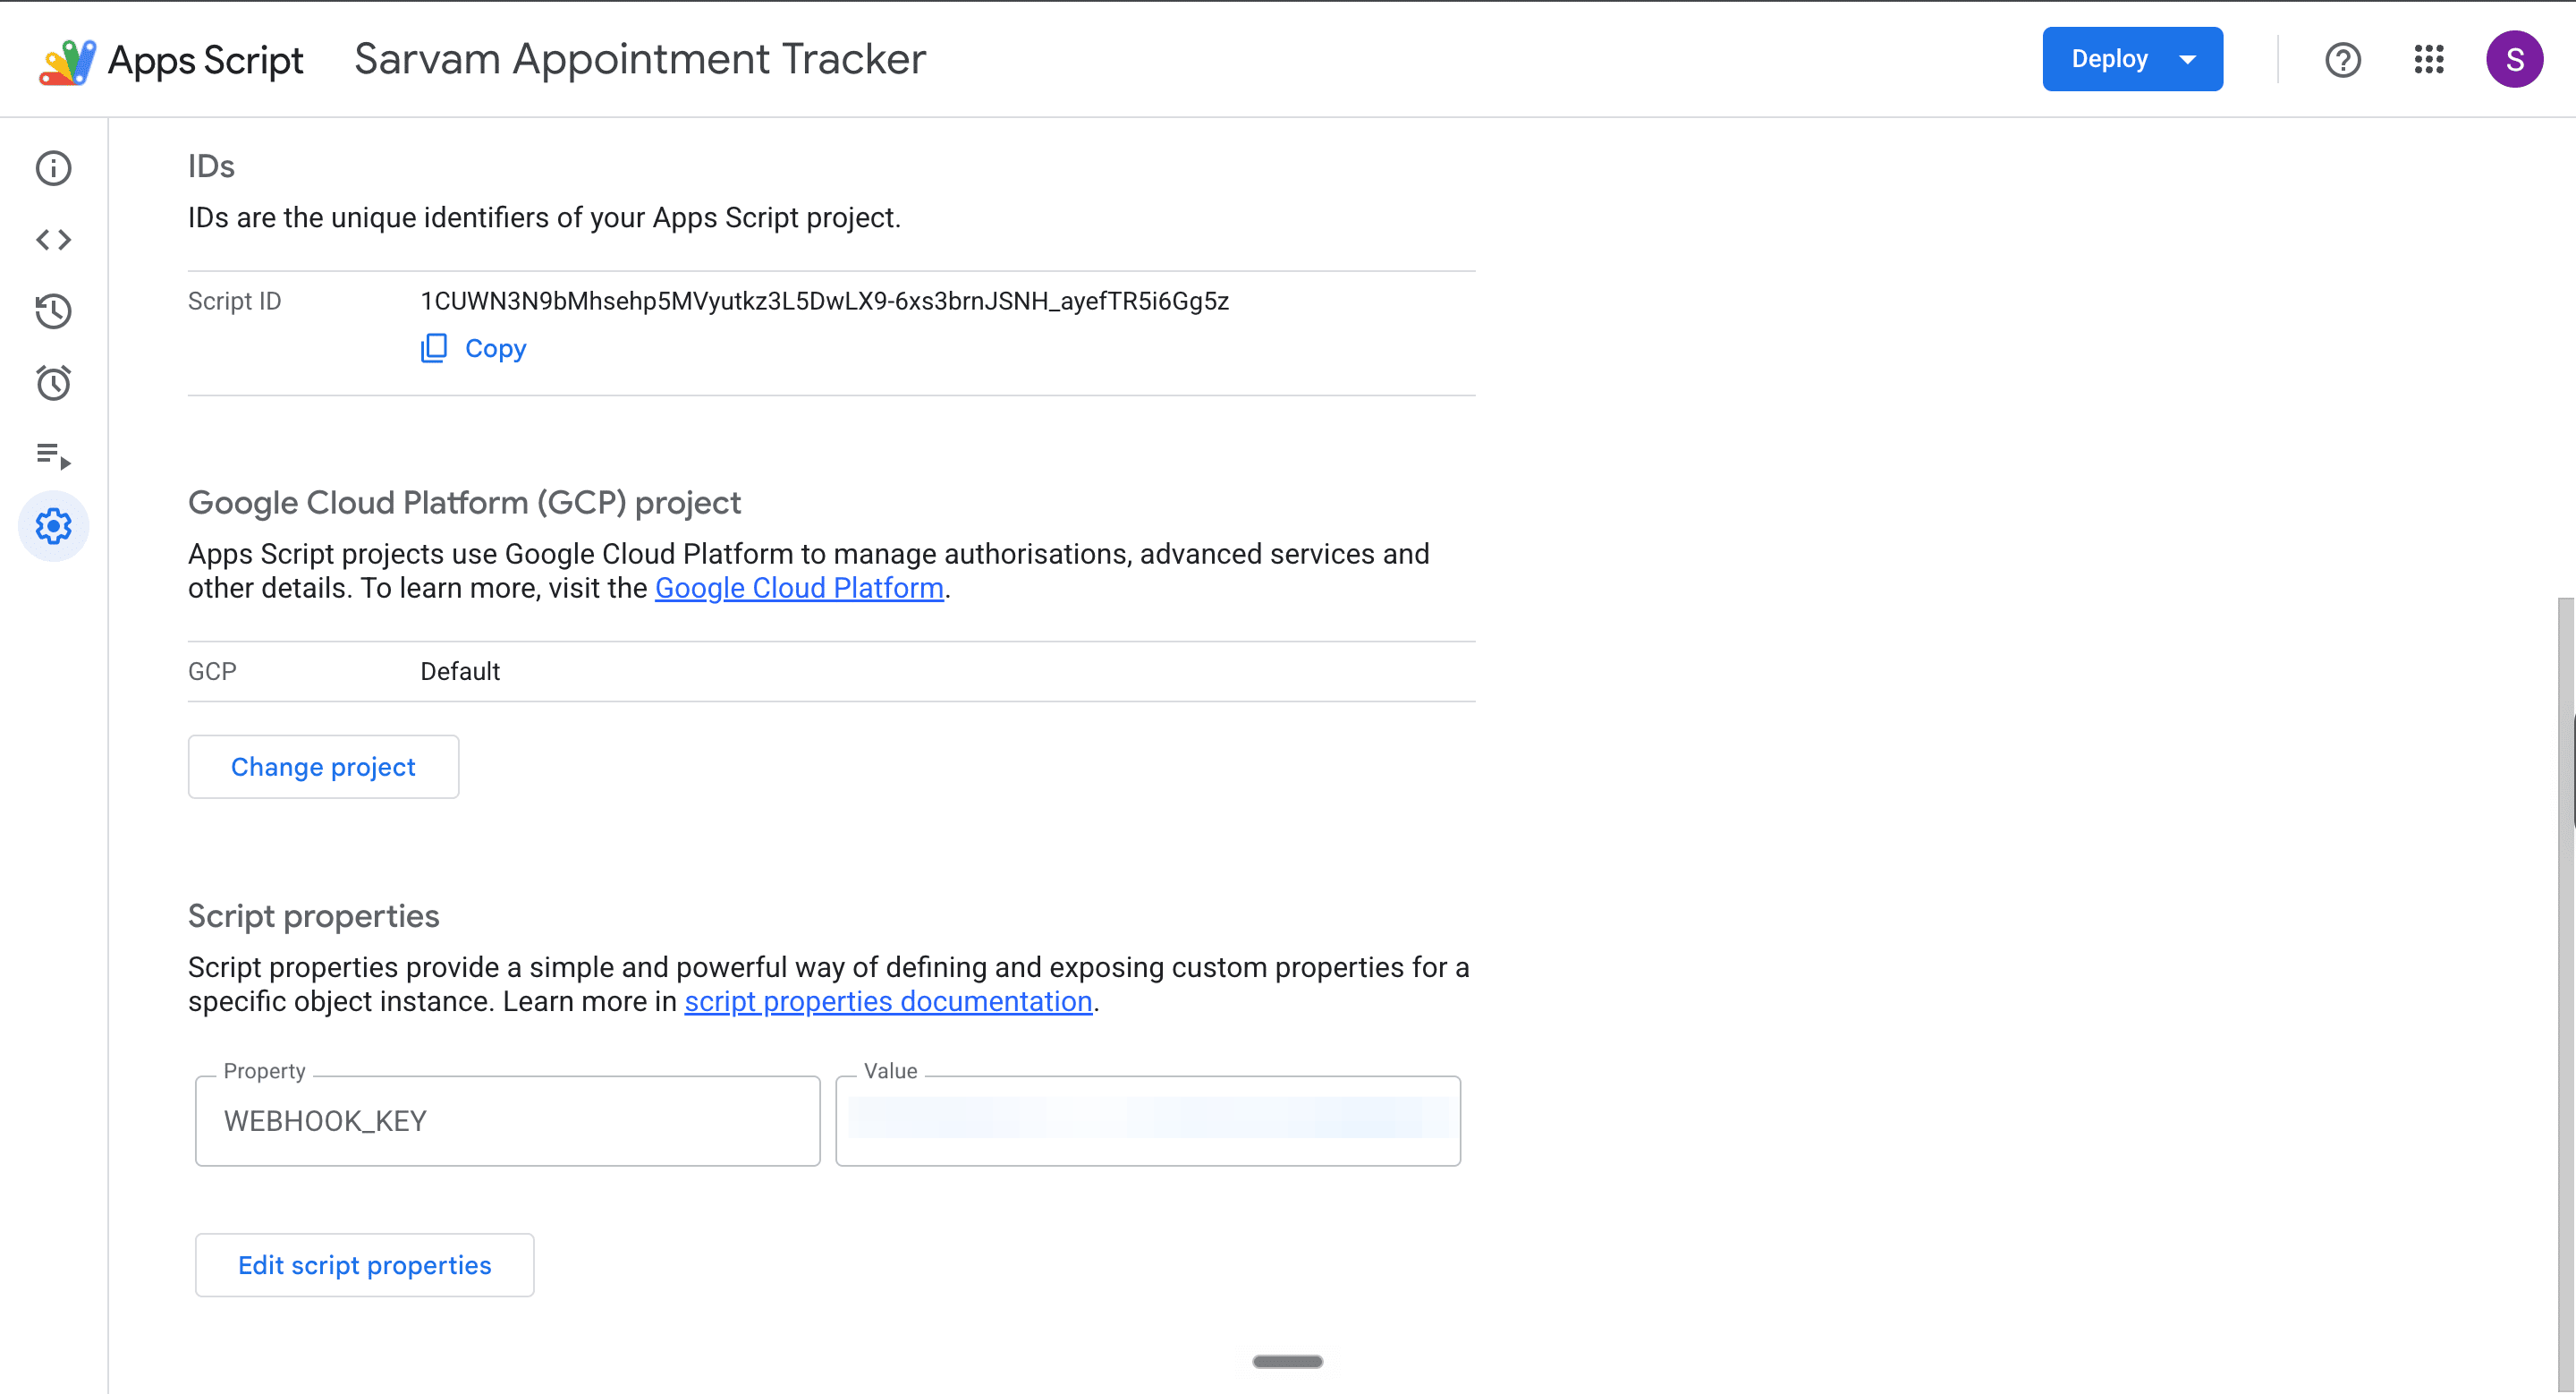
Go to Project Settings → Script Properties and copy the value of WEBHOOK_KEY.
Keep this key private.
Next, give your script a web address.
This is how it’ll get the information Sarvam brings and execute the action — in this case, making a new row in the spreadsheet.
For this:
Head back to Google Apps Script.
Click Deploy → New Deployment.
Under Select type, choose Web app.
Configure the following settings: execute as: me, who has access: Anyone.
Click Deploy and authorise the permissions Google requests.
Google will generate a Web App URL that looks like this: https://script.google.com/macros/s/ABC123/exec
Now, add the private key we created earlier.
Append ?key= followed by your WEBHOOK_KEY to the end of the URL.
For example: https://script.google.com/macros/s/ABC123/exec?key=YOUR_WEBHOOK_KEYThe private key lets our script check whether an incoming request has the correct credentials before recording data.
Copy this complete URL and keep it private.
Anyone who obtains the URL and key could submit data to your spreadsheet.
We now have a web address that can receive Sarvam’s call results. Next, we’ll tell Sarvam to send them there.
Tell Sarvam where to send the results
We now have a web address that can receive call results. Let’s give this address to Sarvam so it can send the information automatically after every call.
Head back to Sarvam → Outbound Campaigns.
Create a new campaign using the agent, Vobiz number, and customer CSV we configured earlier.
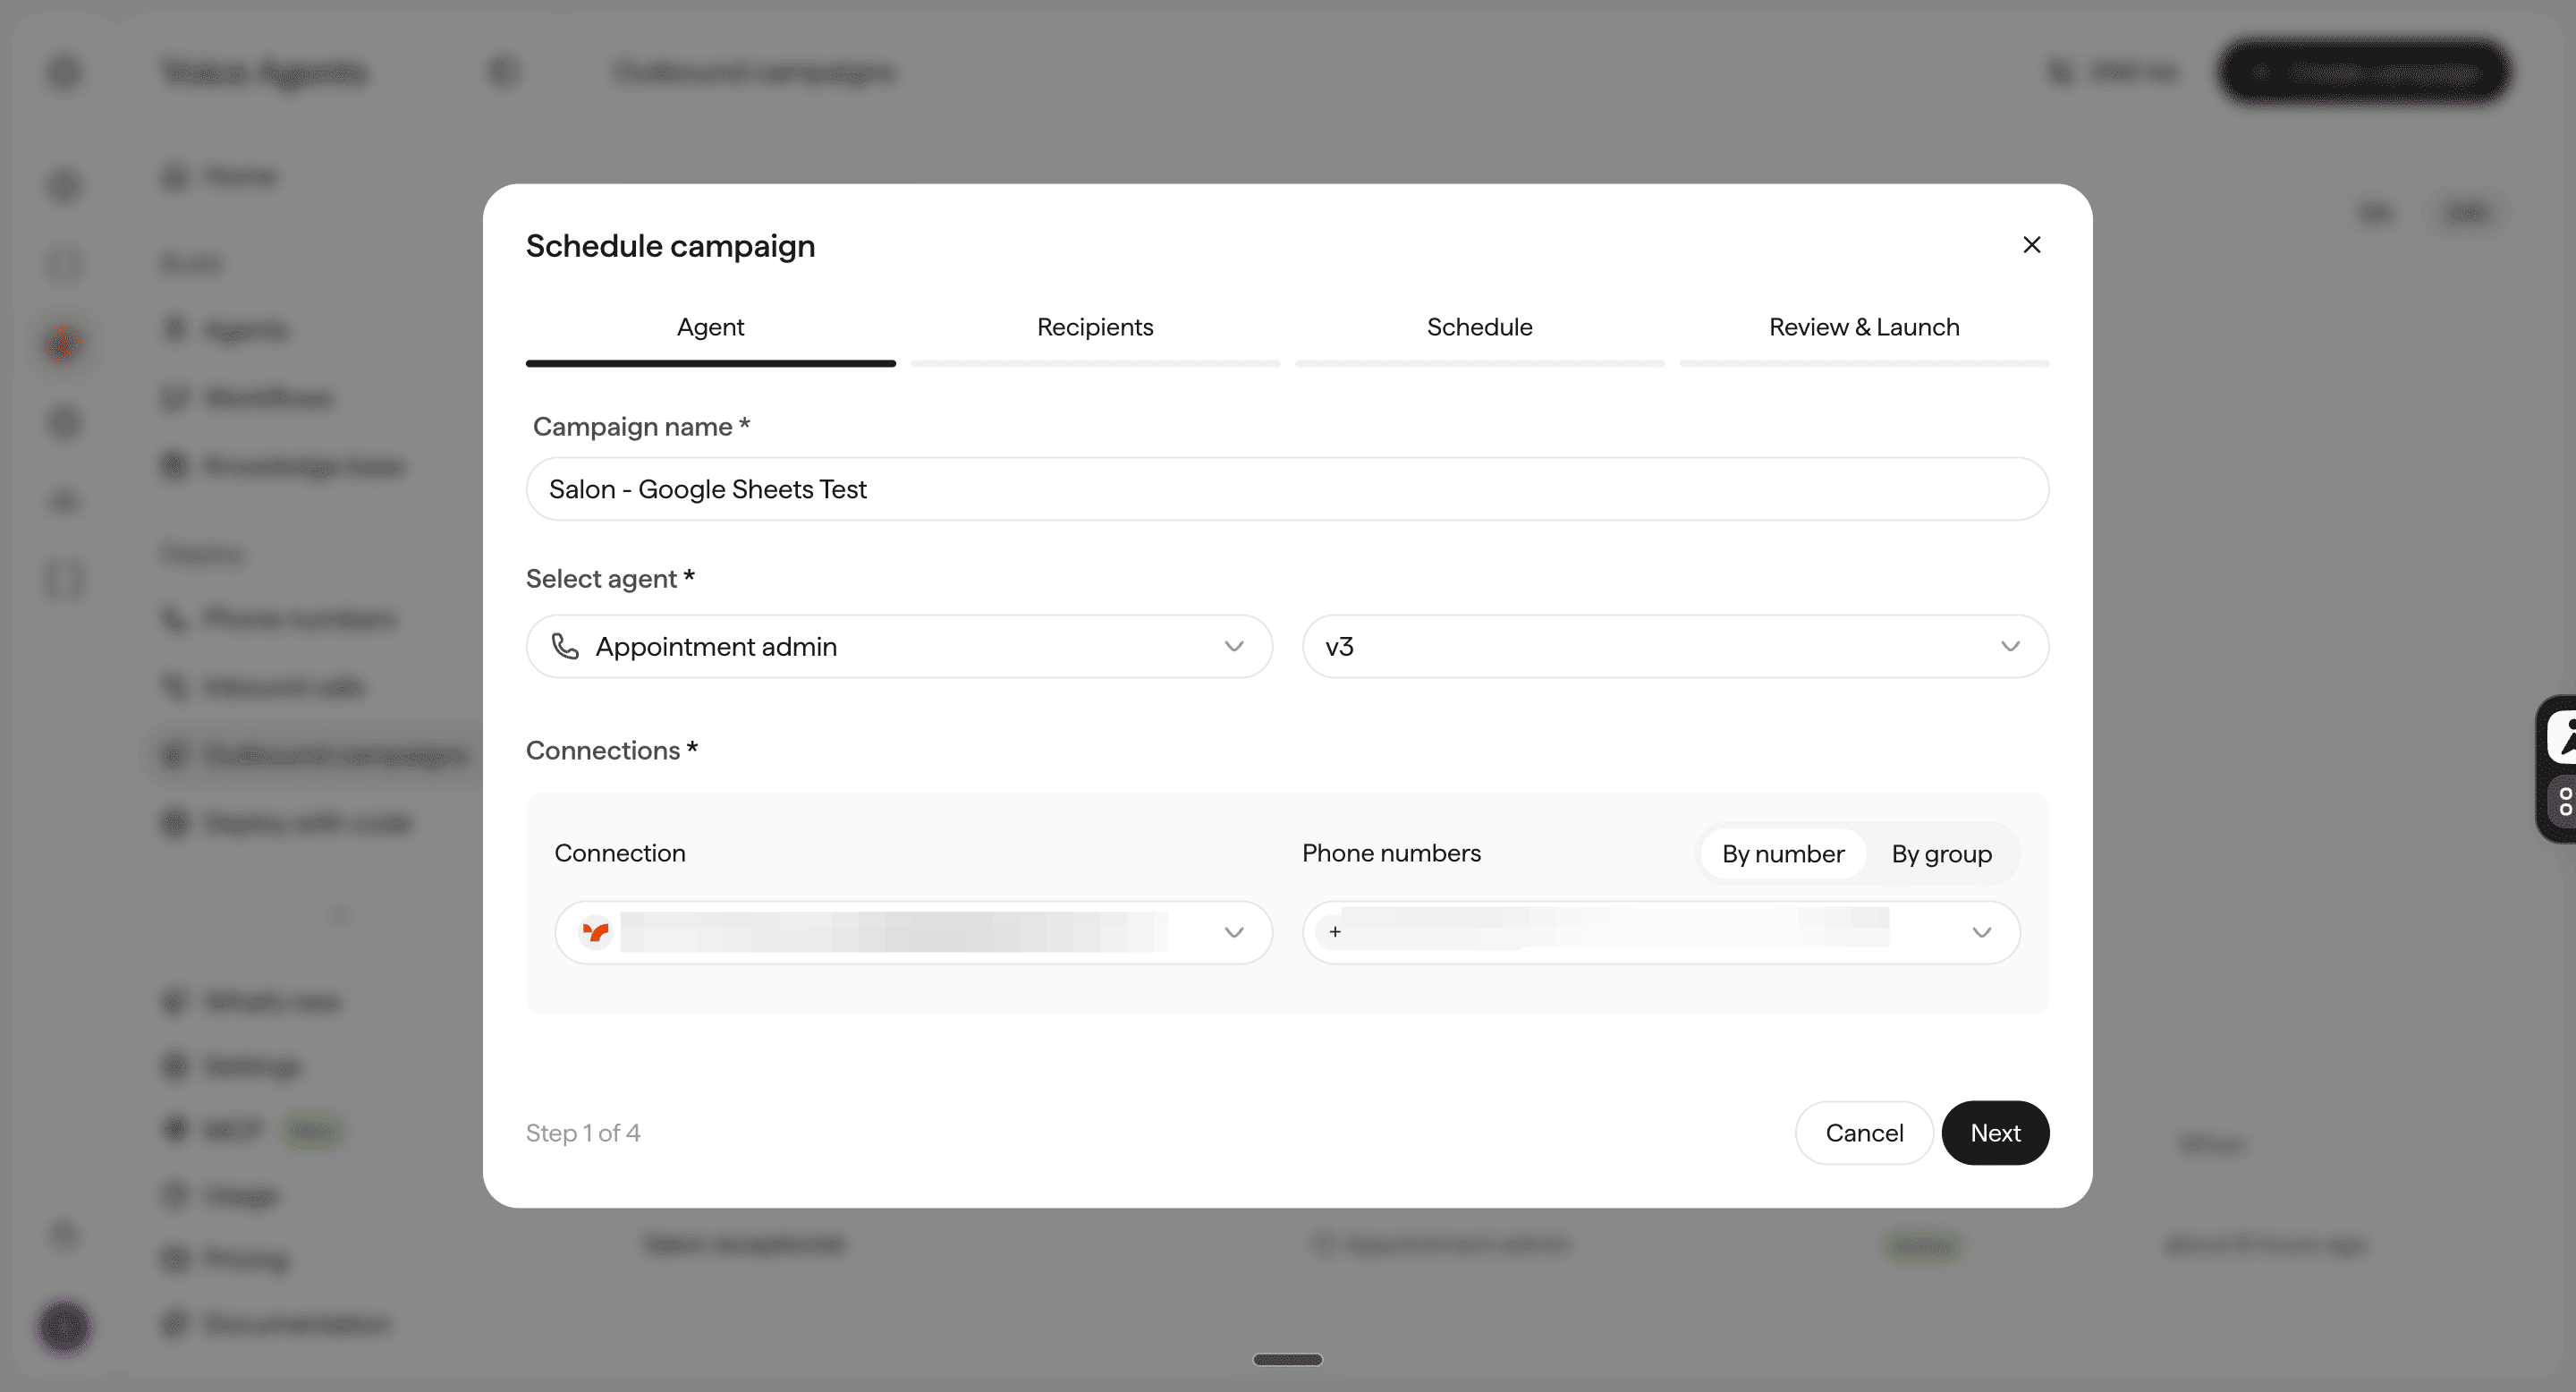
When you reach the Schedule screen:
Scroll down to Advanced Settings.
Find the Webhook URL field.
Paste the complete Google Apps Script URL, including the private key.
Click Next to reach Review & Launch.
Here’s what happens after a campaign call:
Sarvam sends the call results → Apps Script receives them → Google Sheets gets a new row.
The script records the customer’s appointment details, confirmation status, callback preferences, and call summary.
We now have all three systems connected. But we haven’t verified that information from a real call reaches our spreadsheet correctly.
Let’s test the complete workflow.
This time, we’ll use a live campaign instead of Sarvam’s Test Dial feature. We want to check whether the results reach our webhook.
Here’s what to do:
In Sarvam → Outbound Campaigns, create a new campaign using your AI agent and Vobiz number.
Upload a CSV containing only your own phone number and a future appointment.
Under Schedule, choose a permitted calling window, turn off retries, and paste the webhook URL we created.
Review the campaign, confirm there’s only one recipient, and click Launch.
When your phone rings, answer and try saying:
“I’m not sure if I can make it tomorrow. Could you call me back tomorrow morning?”
Let the AI suggest a time, agree on one, and complete the conversation.
Now open your Google Sheet.
After the call finishes and Sarvam processes the results, a new row should appear.
What happened when we tested different conversations?
Confirming an appointment is easy when the customer says yes. But customers don’t always give straightforward answers.
We tested four scenarios to see how our AI would handle them.
We tested these conversations inside Sarvam’s agent preview. We also tested the confirmation and callback scenarios over real phone calls.
The callback test
We wanted to see whether the AI could handle a customer who hadn’t decided yet.
Our agent was instructed to offer a callback, suggest a specific time when the customer gave a broad preference, and let them change that time.
The live test worked. The agent handled the callback request, and Google Sheets recorded the outcome:
Appointment status: NEEDS_FOLLOW_UP
Preferred callback: 13 October, 10 AM
Callback status: NOT_SCHEDULED
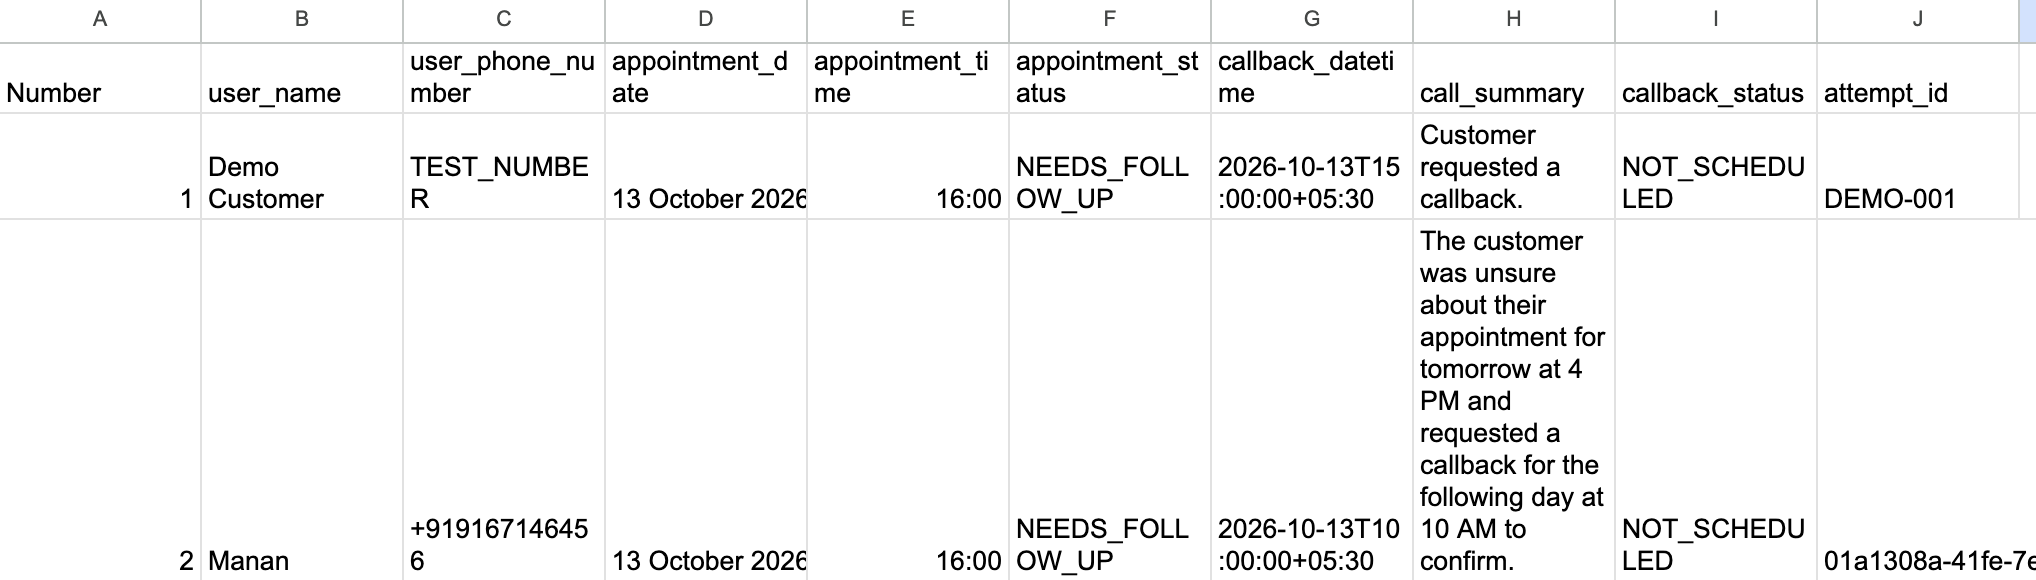
The AI could collect a callback preference during the conversation and pass that information to our spreadsheet.
But recording a callback request doesn’t mean the AI can automatically make that second call. We haven’t built that part yet.
So, can AI do a receptionist's job?
A receptionist might make 20 calls asking customers the same question. But the answers won’t always follow a script.
Our AI can confirm appointments, handle uncertain responses, and record everything in Google Sheets. We haven’t yet connected it to the salon’s booking system or built the automation that calls customers back at their preferred times.
Those are the next workflows we could build on top of what we’ve already created.
Before you leave.
If you’ve followed our newsletters and built a few tools, you already know how satisfying it is to make something work. But what would it take to turn your own idea into a product people would pay for?
500+ folks are doing exactly that inside Build Sprint.
You bring your own idea. Get hands-on guidance when you’re stuck, feedback from experienced builders, and help turning your first version into a production-ready product you can take to real customers.
Here’s what members from our previous cohorts have built.